Tuesday, September 30, 2014

Grilled Chipotle Chicken w/ Parmesan Roasted Cauliflower

This evening dinner was nice and simple. It was warm here today, in the upper 70s. I had a package of boneless skinless chicken thighs in the fridge and a head of cauliflower that I needed to use. I thought about making my Parmesan Cauliflower Mash but decided instead to make a different twist on it. I cut the cauliflower up into florets and placed them in a large pot on the stove in about a half inch of water so it didn't become water logged as it cooked. I steamed it for about 10 minutes or so until it was tender when pierced with a fork, but still intact (don't cook it until it falls apart). I tossed it in a bit of butter and then spread it in a single layer on a baking sheet and seasoned it with salt and pepper and about 1/3 cup of finely grated Parmesan cheese. I popped it into a 400 degree oven for about 15 minutes and then drizzled with a little melted butter and topped it with shredded Parmigiano Reggiano and baked it an additional 10 to 15 minutes until light golden and the cheese slightly browned. 

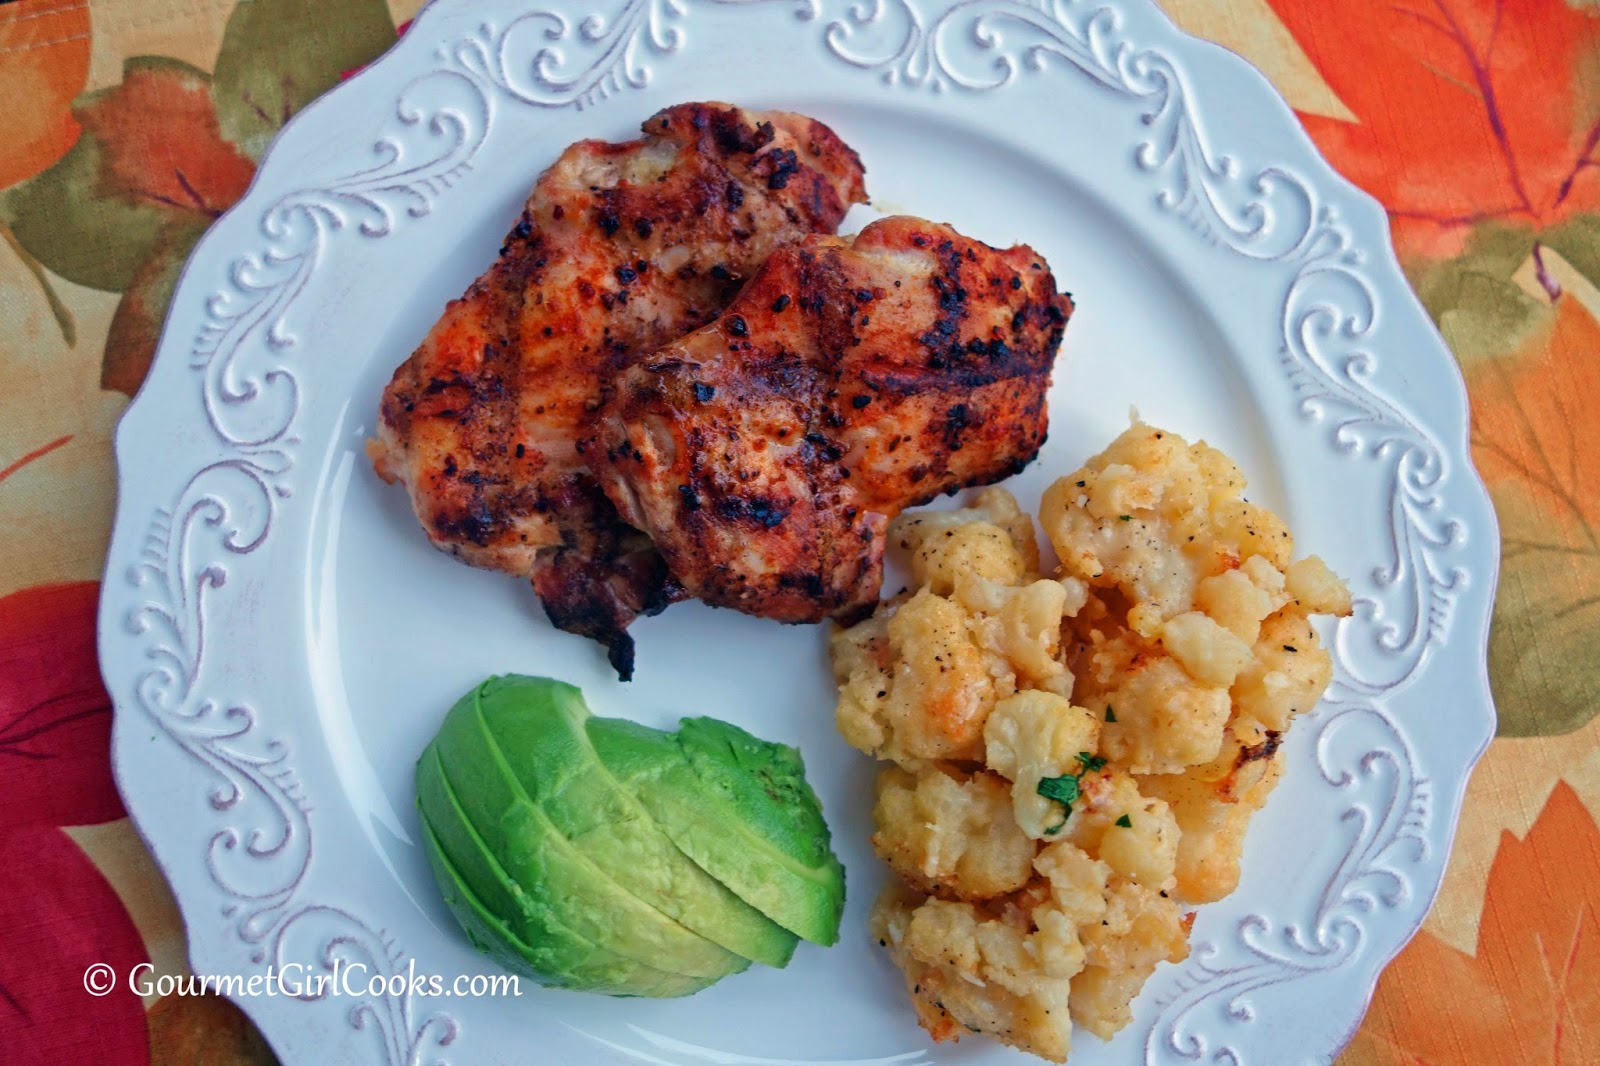
I seasoned the chicken thighs by spraying them with olive oil and then sprinkling with McCormick's Chipotle and Roasted Garlic seasoning. We grilled them for about 6 to 7 minutes per side. I served our meal with sliced avocado sprinkled with a bit of sea salt. It was so easy to make. I snapped a couple photos for you to see below. Enjoy!


Parmesan Roasted Cauliflower

Ingredients:

1 medium head of cauliflower (separated into florets), steamed
Salt and pepper, to taste
4 tablespoons melted butter, divided
1/3 cup finely grated Parmesan cheese
1/4 cup shredded Parmesan 

Directions:

Preheat oven to 400 degrees F. Line a large cookie sheet with foil or parchment paper.

In a pan or bowl, toss lightly steamed and drained cauliflower florets with 2 tablespoons butter until coated. Spread in a single layer on lined baking pan. Season with salt and pepper and top with finely grated Parmesan. Bake for 15 minutes. Remove from oven and drizzle with remaining 2 tablespoons melted butter; top with shredded Parmesan and bake an additional 10 to 15 minutes or until light golden brown. 


Monday, September 29, 2014

Pizza-tata - Half Pizza & Half Frittata - Low Carb Awesomeness

This evening I was in the mood for pizza but didn't feel like making it. I thought about making eggs for dinner since I had a plate of Southern Style Buttermilk Biscuits left from the weekend. Then, it struck me like a lightning bolt (well, maybe not exactly like a lightning bolt or I'd be dead). I decided to make a frittata with all the flavors and toppings of a pizza! You know...a Pizza-tata; half pizza, half frittata. It turned out amazing. 

I already had a leftover small piece of onion and part of a red bell pepper in the fridge...so I quickly diced them up and sauteed them. Rather than add oil to my skillet, I added about 10 slices of pepperoni and let the fat and flavor render a bit and tossed my peppers and onions into the pan to cook along with the pepperoni. I always have a jar of organic oven roasted tomatoes packed in oil that I get at Costco so I decided to use them, too. They have a nice deep rich roasted tomato flavor and they don't make a lot of juice when you cook with them. You could substitute diced fresh Roma (plum style) tomatoes if you like or even a couple tablespoons of sun dried tomatoes packed in oil instead. Now, I would have loved to add some mushrooms, but then I would have been eating this all by myself since hubby detests mushrooms. He actually isn't crazy about onions either...so sneaky little me diced them super duper fine and cooked them into complete and utter translucency. LOL Unfortunately I can't make mushrooms turn clear and disappear like onions so I added a heap of fresh baby spinach leaves and wilted them along with the veggies. 

This dish was a blaze of beautiful rich colors and it was full of pizza flavor. With the mozzarella and Parmesan cheeses this frittata tasted just like a pizza baked until golden puffiness. If you love pizza and you love frittatas...you will absolutely love this Pizza-tata. I snapped a few photos below as well as the easy peasy recipe. It's perfect for breakfast, lunch or dinner. Enjoy!


Sunday, September 28, 2014

Chicken and Broccoli Stir-Fry - Low Carb "Take-in"

Today was an overcast and cool day here. We slept in again which was nice. It drizzled on and off as we ran our errands. Youngest son came for dinner this evening so I made dinner that contained two of his favorites...chicken and broccoli. I put together the quickest and easiest meal...Chicken and Broccoli Stir-Fry. I began preparing our meal at 5:45 and it was ready to eat at 6:15. If we had placed an order for "take-out", it would have taken at least that long to get it and it would have included yucky corn starch, no doubt. Most stir-fry sauces and foods contain corn starch as a thickener. I have made plenty of stir-fries in my day and they all included corn starch to either marinate the meat and or make the sauce. 

Not too long after going wheat and grain free a couple of years ago, I experimented a bit because stir-fry was one of my favorite kind of meals. I used nut butter as my thickener (peanut, almond and cashew). I was both amazed and thrilled at how nicely they thickened chicken or beef stock to duplicate the consistency of sauce traditionally thickened with cornstarch. If you like Kung Pao Chicken, peanut butter is awesome for thickening the sauce. If you don't want to taste the nut butter, cashew butter is the best to use because it's so mild and the other seasonings (garlic, red pepper, Tamari, etc) are the only flavors you'll taste. If you miss Chinese take-out, you will love this way of making your own Chinese "take-in" instead. You can do the same thing with shrimp or beef stir-fry too. Make it soon....thank me later! LOL I literally had dinner on the table in 30 minutes and that included making jasmine rice for the guys to eat with their meal. That is from start to finish, including chopping time, cooking time...everything! To save even more time, you could also buy pre-cut and washed bagged broccoli instead. Enjoy!


Saturday, September 27, 2014

Southwestern Scrambled Eggs, Buttermilk Biscuits & Carrot Cake Donuts - First Fall Brunch

Today we slept in late..it was so nice to do for a change. It was chilly this morning and it's only up to 72 degrees here in this afternoon. We took our time this morning and didn't rush around like we typically do and we're getting ready to head out to run errands late this afternoon instead of our usual mornings. Since this is our first "fall brunch"...I wanted to make it a little special. We didn't eat until after noontime today, so we won't eat again until dinnertime. 

I made Southwestern Style Scrambled Eggs by mixing in a dollop of fire roasted salsa that I picked up at Sprouts (it's their brand) and diced Cabot pepper jack cheese (my favorite cheese) as the eggs cooked. I also baked a batch of my grain free Southern Style Buttermilk Biscuits. I still have a some of my Carrot Cake Donuts w/ Cream Cheese Frosting so we had those with our breakfast too along with a big cup of coffee. It was so good. I snapped a few photos for you to see below and included the recipe for my buttermilk biscuits. The biscuits turned out really good. I probably still prefer my Cheddar Black Pepper Biscuits...but these are really good if you are looking for a basic southern style buttermilk biscuit. You really can't tell the difference between these and those made with regular flour. My hubby and sons really love these. Enjoy!


Friday, September 26, 2014

Mexican Style Meatloaf & Roasted Butternut Squash - Easy Low Carb Meal

This evening we had leftover Mexican Style Meatloaf and Roasted Butternut Squash for dinner. Whenever I think about fall, I think about butternut squash. Besides the fact that I love it, it's also one of my favorite fall shades of orange that I love so much. Roasted butternut squash is simply chunks or cubes of butternut squash tossed with oil and seasoned with salt and pepper and roasted on a sheet pan in the oven at 400 degrees for 20 to 30 minutes (depending on the size of your cubes). I've cut my own squash up before and I've purchased it already cubed (from Costco). In case you've never cut up a butternut squash before, it has to be peeled and seeded (there aren't many seeds)...but the tricky part is cutting it up. It's a really hard squash and you need a really good sharp knife (I use a chef's knife). It's much easier if you can find it fresh and already cut up. I sliced and heated up the meatloaf and within 20 to 30 minutes, dinner was ready. 

If you haven't tried my meatloaf yet, you will never look at adding breadcrumbs to meatloaf the same way again. Trust me, whether or not you are grain and gluten free, forget about breadcrumbs...why waste good retail space with filler when you could add CHEESE instead? This meatloaf has diced Cabot pepper jack cheese instead of bread crumbs or faux crumbs, etc. The cheese adds FLAVOR, creaminess and depending on what kind of cheese you add...it adds some zip too. I've used shredded cheddar and monterey jack cheese before, also. Rather than dicing up onions or adding catsup or tomato sauce...add fresh salsa instead, particularly if you are looking for a little Mexican or southwestern style flavor. Why add dry stuff (crumbs) to your meatloaf only to have to turn around and counter the dryness with egg, catsup, etc. Keep it moist and flavorful...period! That's my meatloaf rant for the year. LOL 

Lastly, I was SO excited when I pulled into the driveway this afternoon...I have actual visual proof that it really is fall! Our leaves are not only beginning to turn color but I found a few on the ground, too! Yippeeeee...bring it on! Check out the photo of my super easy and quick meal tonight. It's nothing fancy...just good food! Enjoy!


It really is fall...seeing this today was the highlight of my day!
Proof that fall has arrived in Atlanta...we have colorful leaves on the ground! 


Thursday, September 25, 2014

Carrot Cake Donuts w/ Cream Cheese Frosting - NEW RECIPE ALERT

Happy Thursday! Today I'm excited to be doing another guest post for Honeyville. I'm sharing one of my newest recipes for Carrot Cake Donuts with Cream Cheese Frosting! If you are a carrot cake lover like I am (or were before you went low carb/grain free/no sugar, etc.), you are going to love these donuts. I tinkered with the recipe again the other night because good just isn't good enough for me...I wanted "Supercalifragilisticexpialidocious." Dorky...yes; true story...YES! Well, lets just say, my tinkering paid off!

These donuts are so moist and delicious, and who doesn't love a good excuse to have cake for breakfast! Who doesn't want to be able to have their cake and eat it too? Why do we feel guilty having a slice of cake for breakfast, but when that cake gets served in a donut shape slathered with frosting with a hole in the middle...suddenly it's an acceptable way to have cake and frosting for breakfast? Traditional donuts are basically just empty calories with little, if any, nutritive value. These donuts are good and good for you (that's my story and I'm sticking to it). They are chocked full of good stuff and sweetened with Swerve and liquid stevia. Each donut contains approximately 4.2 net carbs, 2.2 grams sugar and 4.3 grams of protein. Not too shabby for a donut! I hope you enjoy them as much as I do.

With my first batch of donuts I used my Wilton 6-cavity donut pan. Until a few days ago, it was the only one I had and it works very nicely. I was planning to get another 6-cavity donut pan so I can bake a full dozen at the same time instead of in shifts. Last week I ordered the USA Pan 6-well donut pan. I am obsessed with USA pans. They are some of the nicest baking pans I've ever used. My new pan came Monday and I used the new pan to make my second version and batch of donuts. All I can say is "wowza"...I love it. It is a little pricey though compared to the Wilton pan...so if you don't think you will be making donuts very often, the Wilton pan works just fine. But, if you are a donut or bagel freak...it would be worth checking out USA Pan's donut pan.

Now...for the new recipe, which is why you are here. You can find my new recipe for these donuts here: Carrot Cake Donuts w/ Cream Cheese Frosting. You are going to have to pinch yourself while eating them to keep reminding yourself that they really are grain-free, gluten-free and have no added sugar!  ;-)  Enjoy!


Wednesday, September 24, 2014

Simple Chicken Soup w/ Baby Kale - Only 4 Ingredients to Fab

Today was another beautiful day here. Since I was finishing up my new recipe project (that will be posted tomorrow..."hint hint"), I kept dinner quick and simple. Since I am full swing into the "fall mode" I decided to make soup. I didn't have time to make anything complicated and I was in the mood for chicken soup. I had hubby pick up a rotisserie chicken on his way home. While he was foraging for the chicken (caveman that he isn't)...I got started on my easy peasy soup.

I heated a bit of olive oil in a medium stock pot and filled the pot to the top with about half a pound of fresh baby kale (it cooks down drastically the same way spinach does). During the 5 minutes it took the kale to cook down, I diced one medium carrot and tossed that into the pan and then added 4 cups of chicken stock. By the time hubby got home with the chicken, I was ready to add chicken to the soup. I removed and diced about 2 cups of chicken and added it to the pot along with the leg and thigh bones that I removed the meat from (to add a bit more flavor). I covered my pot and let it simmer on the stove for about 30 minutes while I got some other things done. It was quick, colorful and delicious. How is that for a soup that contained only 4 ingredients! 

I snapped a couple photos for you to see below. Be sure to check back tomorrow to see my NEW recipe. This one is a good one...you are going to want to make it...trust me!  :-)  Enjoy!


Tuesday, September 23, 2014

Easy Mexican Style Meatloaf & Sauteed Baby Kale w/ Pancetta

Today was the most gorgeous first full day of Autumn! It was 55 this morning and cool, brisk and breezy. The sky even looked like fall. It was an amazingly beautiful day. I'm currently working on a new recipe project so I wanted to make something super easy but good for dinner. I had a couple packages of organic ground beef in the fridge as well as a big bag of fresh baby kale. I stopped by the store on my way home and picked us some pancetta (also referred to as Italian bacon). I decided to prepare a Mexican style meatloaf and Sauteed Baby Kale w/ Pancetta. Both require minimum prep time and they basically cook themselves. 

I mixed 2.5 pounds of ground beef with 1 cup of fresh salsa and about 1 cup of diced Cabot pepper jack cheese. I added about 1/2 teaspoon sea salt, freshly ground black pepper, about 3/4 teaspoon each of roasted ground cumin and smoked paprika and a scant 1/2 teaspoon ground chipotle pepper. I mixed it together and put it in my oval Le Creuset casserole dish and popped it into a 375 degree F oven to bake for about 1 hour and 10 minutes. While the meatloaf cooked, I sauteed a few ounces of diced pancetta in a nonstick skillet without any oil because the fat rendered as it sauteed. Once the pancetta was browned, I put several large handfuls of baby kale into the skillet and piled it high (about 3/4 pound which was half of my 1.5 pound bag). I covered the skillet cooked it for about 5 minutes (without adding any liquid) and seasoned it with freshly ground black pepper. We sprinkled a little apple cider vinegar on our kale at the table while eating it. It was delicious. 

Rather than use breading as a filler or binder for the meatloaf, I have found that adding shredded or diced cheese not only serves as a binder as it melts while baking, but keeps the meatloaf super moist. The salsa adds flavor and additional moistness. Because I use fresh salsa with onions, peppers and tomatoes in it, I didn't need to add additional diced onion and peppers to my meatloaf since the salsa contained both. You can make this meatloaf on a smaller scale if you want or substitute ground chicken or turkey if you prefer (Chris) and there is no magical amount of salsa or cheese or seasoning...just add what you like. If you haven't ever tried using cheese in place of breading as your meatloaf binder...try it, you'll like it! I snapped a couple photos below. Enjoy!


Ready to bake
Pancetta added to skillet to brown and render its fat
Browned and ready for the baby kale
Baby kale has been piled high in the skillet and will cook covered for 5 minutes


Monday, September 22, 2014

Grilled Chicken Kabobs & Happy Autumn!

First of all...Happy Autumn! I am so excited that at 10:29 p.m. tonight, fall officially begins. I'm looking forward to cool crisp days and chilly nights. This weekend was busy. We celebrated my oldest son's birthday yesterday and it was a wonderful day. He is one of the kindest, most generous hearted people I know and I am very proud to call him my son! I am so fortunate to be the mother of 3 of the most amazing kids who have grown to be exceptional young people. It's affirmation that I have done at least one thing right in my life in raising them.

It was a beautiful day yesterday and I made one of our favorite grilled meals; Grilled Chicken Kabobs. I made a huge batch...I marinated 7 pounds of boneless chicken breast, 6 large colorful bell peppers, and 1 large sweet onion for about 8 hours. My marinade is simple and fresh using olive oil, fresh lemon juice, fresh minced garlic, fresh rosemary, Italian seasoning, sea salt and black pepper. By marinating most of the day, it produced the most tender, moist and flavorful chicken. The rest of the family enjoyed their kabobs over jasmine rice and I enjoyed mine "as is."

This evening we enjoyed the leftover Spicy Beef & Cabbage Soup. It was a perfect kick-off meal for the first day of fall. I decided to add a dollop of sour cream to my soup this evening...and it was amazing. The sour cream went extremely well with the tomato, beef and cabbage flavors and it was a nice cool contrast to the hot and spicy soup. I snapped a few photos below of yesterday's birthday meal as well as tonight's soup. Enjoy!


Tonight's Leftover Spicy Beef & Cabbage Soup


Saturday, September 20, 2014

Spicy Beef & Cabbage Soup - Slow Cooker Style

This evening we had one of my favorite easy soups for dinner, Spicy Beef & Cabbage Soup. Why is it easy? For one, it's prepared in the crock pot / slow cooker...and on a Friday night, after a long week...I can't tell you how nice it was to come home to a hot meal waiting for me! Secondly, it has very few ingredients and despite that, is unbelievably good. I actually put my soup on to begin cooking late last night before going to bed and cooked it all night long and all day today until I got home from work. The cabbage and beef were so tender and the flavors melded together so nicely in the slightly spicy, flavorful beefy tomato broth. I snapped a few photos for you to see below. The recipe can be found here: Spicy Beef & Cabbage Soup. Enjoy!


Thursday, September 18, 2014

Southwestern Style Grilled Chicken Sandwiches & Oven Baked Zucchini Fries

This evening I made Southwestern Style Grilled Chicken Sandwiches for dinner and served them with a side of my Oven Baked Zucchini Fries. It was a simple and deliciously easy meal. I cut up a large zucchini into thick rectangular sticks and dipped them in egg wash and rolled them in my breading mixture and baked them in a 425 degree oven for 25-30 minutes until browned and crisped. While my zucchini fries were baking, I prepared the grilled chicken sandwiches.

I lightly sprayed chicken cutlets with olive oil and seasoned them with McCormick's Grill Mates Chipotle & Roasted Garlic Seasoning and then grilled them for a couple of minutes on each side. I turned the heat off on the grill and topped them with Cabot's Pepper Jack Cheese and let it melt a bit. I served the grilled chicken topped with melted cheese on my grain free Sesame Seed Buns with lettuce and tomatoes. It was a delicious meal. I snapped a few quick photos below. Enjoy!


Tuesday, September 16, 2014

Chocolate Glazed Spiced Pumpkin Donuts - Low Carb & Luscious

I am excited to share my new donut recipe with you this evening, as promised. I really love pumpkin...almost as much as I love cranberries...and that's a LOT! I decided that a pumpkin donut recipe was in order to ring in the "can't get here soon enough" upcoming fall season. These donuts just scream FALL! They are moist, pumpkiny, cake-style donuts that are spiced like a pumpkin pie. I decided there was only one logical way to adorn these beauties and that was with a "not too sweet" dark chocolate, luscious glaze. Besides the fact that it's a CHOCOLATE glaze...the dark black chocolate color gives these orange colored donuts a Halloween-like color scheme. Oh, did I also mention that I absolutely love these?

Glazes are usually pretty easy to whip up...but I assure you that nothing could be easier than this one! I kept it very simple by using a different type of baking chocolate that I picked up recently at Sprouts. Guittard chocolate has been around for years (about 145 years to be exact)...but my regular grocery stores don't carry Guittard baking chocolate, only their chocolate chips. Sprouts had several different varieties of Guittard baking bars to choose from. I picked up their 70% bittersweet bars (they come with three 2-ounce bars to a box). I'm so happy I gave these a try because when they are melted, they have a much thicker and richer consistency than melting other types of dark chocolate bars I've used before, which tend to get a bit thin when melted. 

I simply broke up 2-ounce bar into a small glass custard cup and heated it in the microwave for a minute or two (you can also melt it on the stove top instead if preferred), and then spooned and drizzled the thick melted chocolate over top of my cooled donuts. I sprinkled some of the donuts with chopped pecans after glazing. The combination of the pure dark chocolate on top of the moist spiced pumpkin donuts was amazing! It was even better than I could have imagined. I may never make another traditional glaze again...certainly not another traditional chocolate glaze! Even though dark chocolate does add a tiny bit of sugar (depending on what type you use and how much)...you could also melt sugar free chocolate (like Lily's chocolate that's sweetened with stevia) if you wanted, or simply use a higher percentage cacao chocolate (like 85-90%) for very low sugar. I am not going to lie...I had 2 donuts as my lunch today! LOL Yup...they are THAT good! 

This recipe makes about one dozen donuts. To experiment a bit, I made 6 donuts and 6 muffin tops to test how they worked that way, too. My donuts took 17 minutes to bake and the muffin tops took 15 minutes to bake. If chocolate isn't your thing, you could easily whip up a delicious little sweetened cream cheese frosting (beat softened cream cheese with sweetener, to taste, along with a few splashes of heavy cream and a touch of cinnamon). That would be delicious on these, too. I hope you enjoy these as much as I do. I will definitely be making these again...and soon (maybe tomorrow)...LOL. I snapped a few photos for you to see below as well as the recipe as promised. Enjoy!  


Chocolate Glazed Spiced Pumpkin Donuts

Ingredients:

1-1/2 cups blanched almond flour
1/4 cup coconut flour
1/4 cup ground chia seeds
3/4 cup confectioners style Swerve (or other powdered sweetener of choice)
2 teaspoons baking powder
1/2 teaspoon baking soda
1/2 teaspoon sea salt
1 teaspoon ground cinnamon
1/4 teaspoon ground ginger
1/8 teaspoon ground cloves
1 cup 100% pure pumpkin puree (not pumpkin pie filling)
1/4 cup buttermilk
3 large eggs
1 teaspoon apple cider vinegar
2 tablespoons coconut oil (or melted butter)
1 teaspoon pure maple flavor, optional
1/2 teaspoon liquid stevia (or to taste), optional
2 to 3 ounces dark chocolate bar (preferably 70% to 90% cacao)

Directions:

Preheat oven to 350 degrees F. Lightly spray or grease a 6-cavity donut mold pan with either coconut or olive oil spray and set aside.

In a large bowl, whisk together the almond flour, coconut flour, ground chia, powdered sweetener, baking powder, baking soda, salt, cinnamon, ginger and cloves. 

In a separate bowl, whisk together pumpkin, buttermilk, eggs, vinegar, coconut oil and maple extract. Add wet mixture to dry mixture and combine until a thick batter is formed. If a little additional sweetness is desired, add stevia, to taste.

Spoon batter into prepared donut pan and fill almost to the top. Use fingertips lightly moistened with water to smooth and even out batter. Bake for approximately 16 to 18 minutes or until done. Let cool in pan for 5 minutes. Flip onto wire rack and allow to cool completely. 

To glaze donuts, break chocolate into chunks and place in a small microwave safe bowl and heat in microwave on high for 20-30 second intervals, stirring after each until melted, about 1 to 2 minutes; stir until smooth (or melt chocolate on stove top in a double boiler). Drizzle or spoon melted chocolate over donuts and let set (allow chocolate to cool slightly to thicken up a bit to keep from running off when spooned or drizzled). If desired, sprinkle glazed donuts with chopped nuts before chocolate sets completely. Makes approximately 10 to 12 donuts.