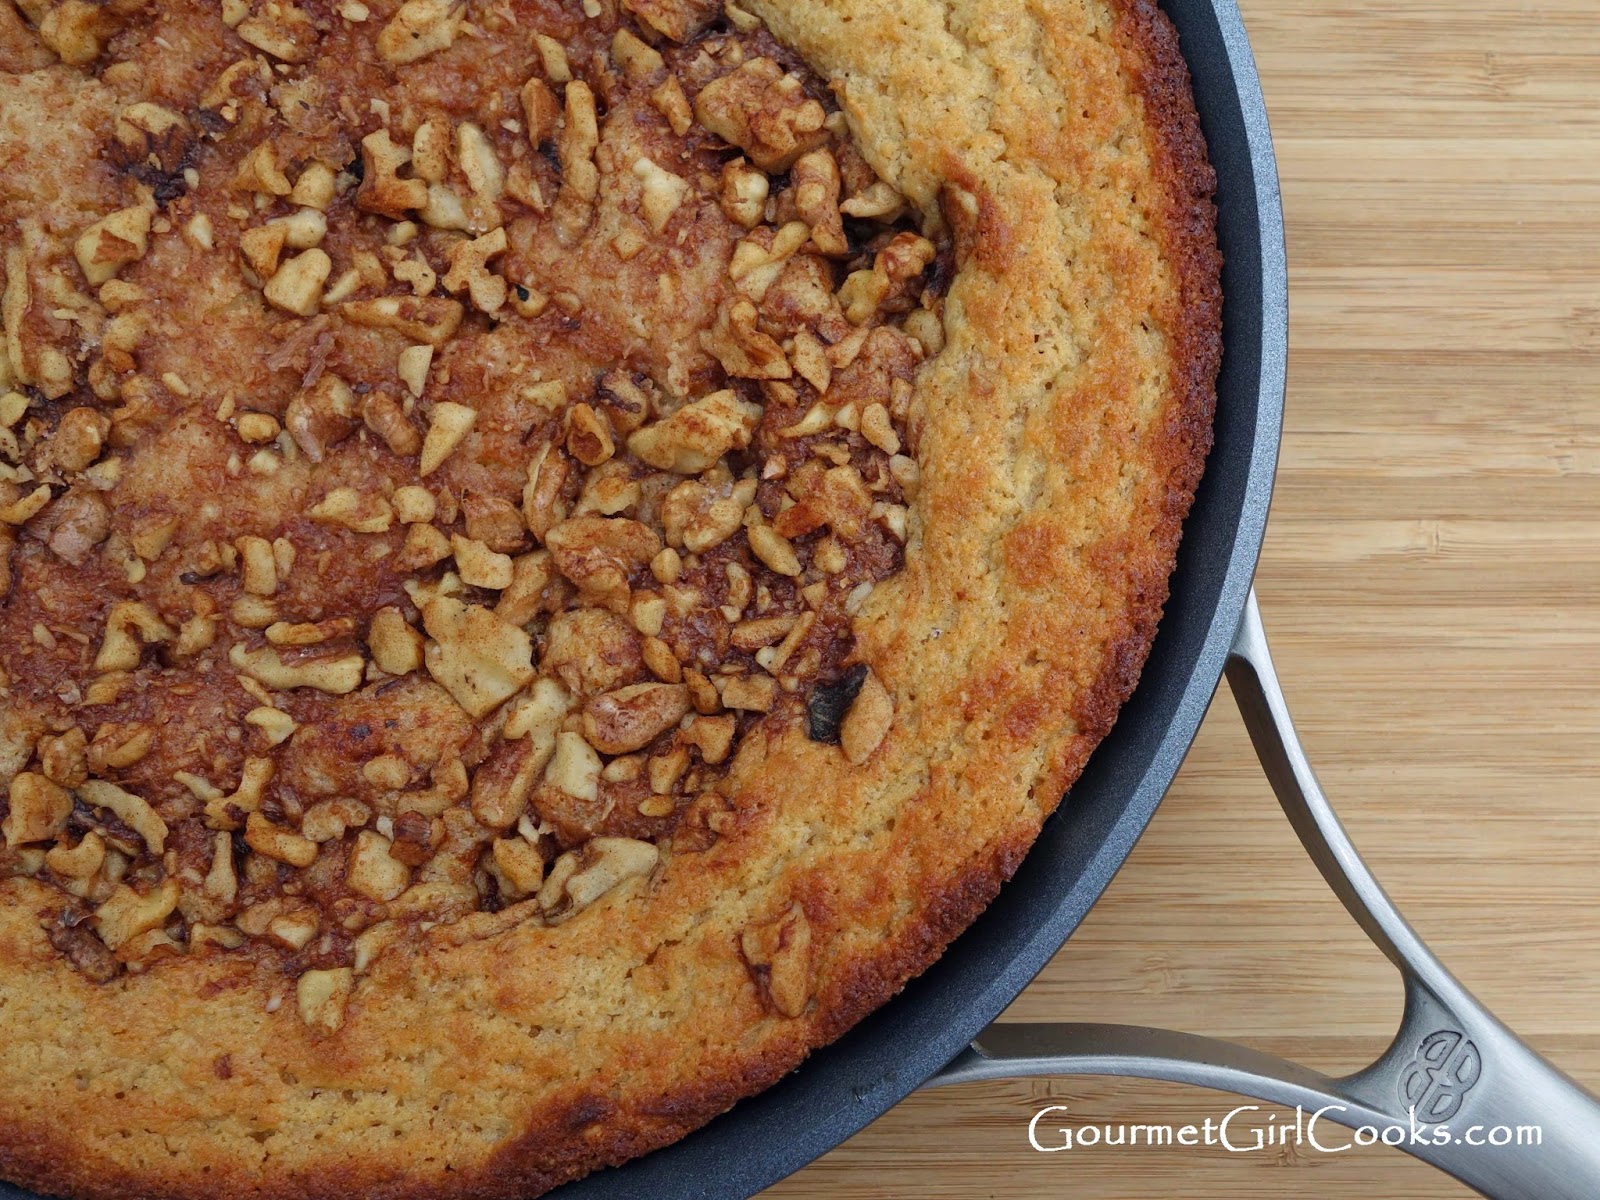
One of my most favorite old recipes was for a sour cream coffee cake with cinnamon, sugar, and walnut streusel. I didn't think I'd be able to enjoy anything like that again after going grain-free, but low and behold, I even surprised myself (with the help of Honeyville, of course)! I've created a grain-free version of that coffee cake that is also sugar-free thanks to my favorite sweetener, Swerve. The super fine grind of Honeyville's blanched almond flour helps to recreate a texture that is almost identical to that of my old recipe. This cake turned out moist, dense, rich and delicious, just like the original version. This coffee cake goes absolutely perfect with a cup of coffee and it makes a great breakfast, snack or dessert, too. The recipe is super simple and it is baked in an ovenproof skillet! This coffee cake would make a perfect addition to your Easter breakfast table and is something that everyone (grain-free or not) will enjoy. It will most definitely be found on my Easter breakfast table this year! I have enjoyed using Honeyville's blanched almond flour for close to 2 years now and haven't found anything else that comes close to its quality. To check out my Skillet Sour Cream Coffee Cake and get to the recipe, please click on this link: Skillet Sour Cream Coffee Cake. I'll be making another one later this week! Take a sneak peek below. Enjoy!
These are the ramblings of a self-described wheat, grain and gluten-free “gourmet girl” that loves to cook and eat good food. I love creating and sharing recipes and photographing “beautiful food”. In July 2012, I eliminated wheat, grains and added sugar from my diet and rediscovered real, whole fresh foods again and effortlessly lost 65+ pounds. Join me in my wheat, grain and gluten-free journey. See how easy it is to enjoy grain free gourmet, one meal at a time! Welcome to my blog. Enjoy!
Tuesday, April 15, 2014
Skillet Sour Cream Coffee Cake -- Wheat, Grain & Sugar Free
Happy Tuesday! I am so excited today because Honeyville has graciously invited me to do another guest post on their blog and I get to share another delicious recipe with you. Because it's my absolute favorite almond flour to bake with, of course I said YES! Their almond flour has truly helped make my wheat and grain-free transition so much more enjoyable and easier to maintain long term (for almost 2 years now) and because of that, I never feel deprived. It's consistent high quality and freshness produces some of the best baked goods I have ever eaten. I'm constantly experimenting and creating new recipes and the recipe that I created for my 2nd Honeyville guest post is near and dear to my heart.
One of my most favorite old recipes was for a sour cream coffee cake with cinnamon, sugar, and walnut streusel. I didn't think I'd be able to enjoy anything like that again after going grain-free, but low and behold, I even surprised myself (with the help of Honeyville, of course)! I've created a grain-free version of that coffee cake that is also sugar-free thanks to my favorite sweetener, Swerve. The super fine grind of Honeyville's blanched almond flour helps to recreate a texture that is almost identical to that of my old recipe. This cake turned out moist, dense, rich and delicious, just like the original version. This coffee cake goes absolutely perfect with a cup of coffee and it makes a great breakfast, snack or dessert, too. The recipe is super simple and it is baked in an ovenproof skillet! This coffee cake would make a perfect addition to your Easter breakfast table and is something that everyone (grain-free or not) will enjoy. It will most definitely be found on my Easter breakfast table this year! I have enjoyed using Honeyville's blanched almond flour for close to 2 years now and haven't found anything else that comes close to its quality. To check out my Skillet Sour Cream Coffee Cake and get to the recipe, please click on this link: Skillet Sour Cream Coffee Cake. I'll be making another one later this week! Take a sneak peek below. Enjoy!
Monday, April 14, 2014
Stuffed Beef Cannelloni -- Low Carb & Grain Free
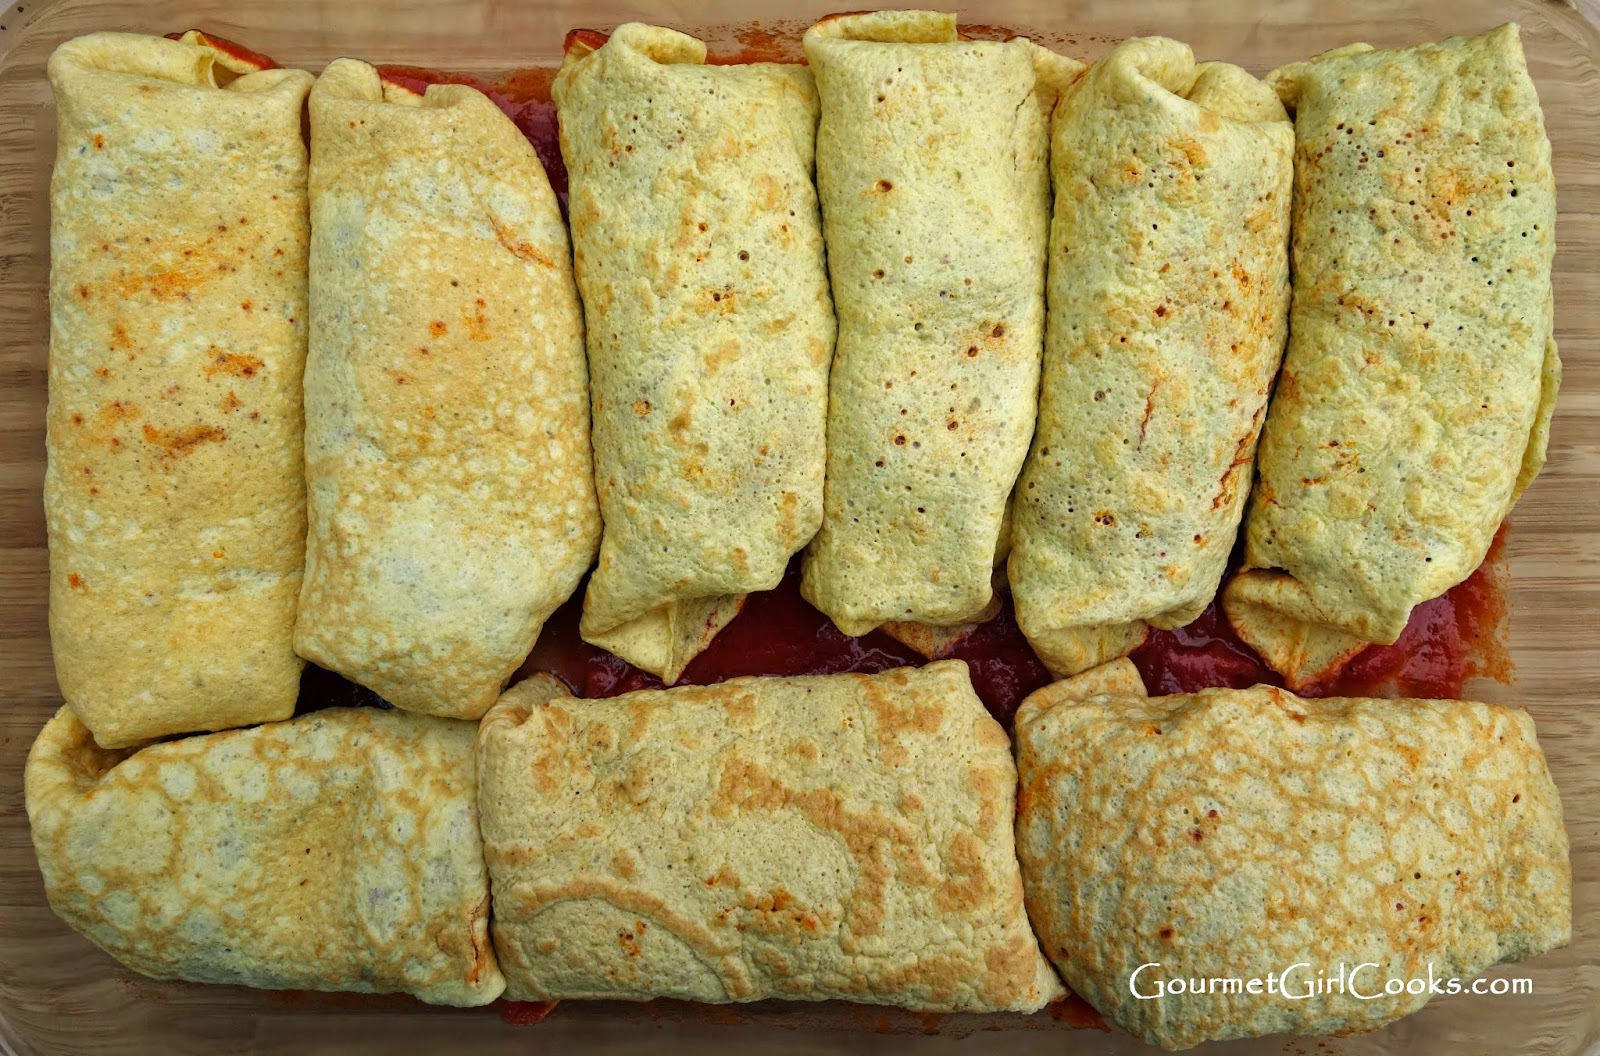
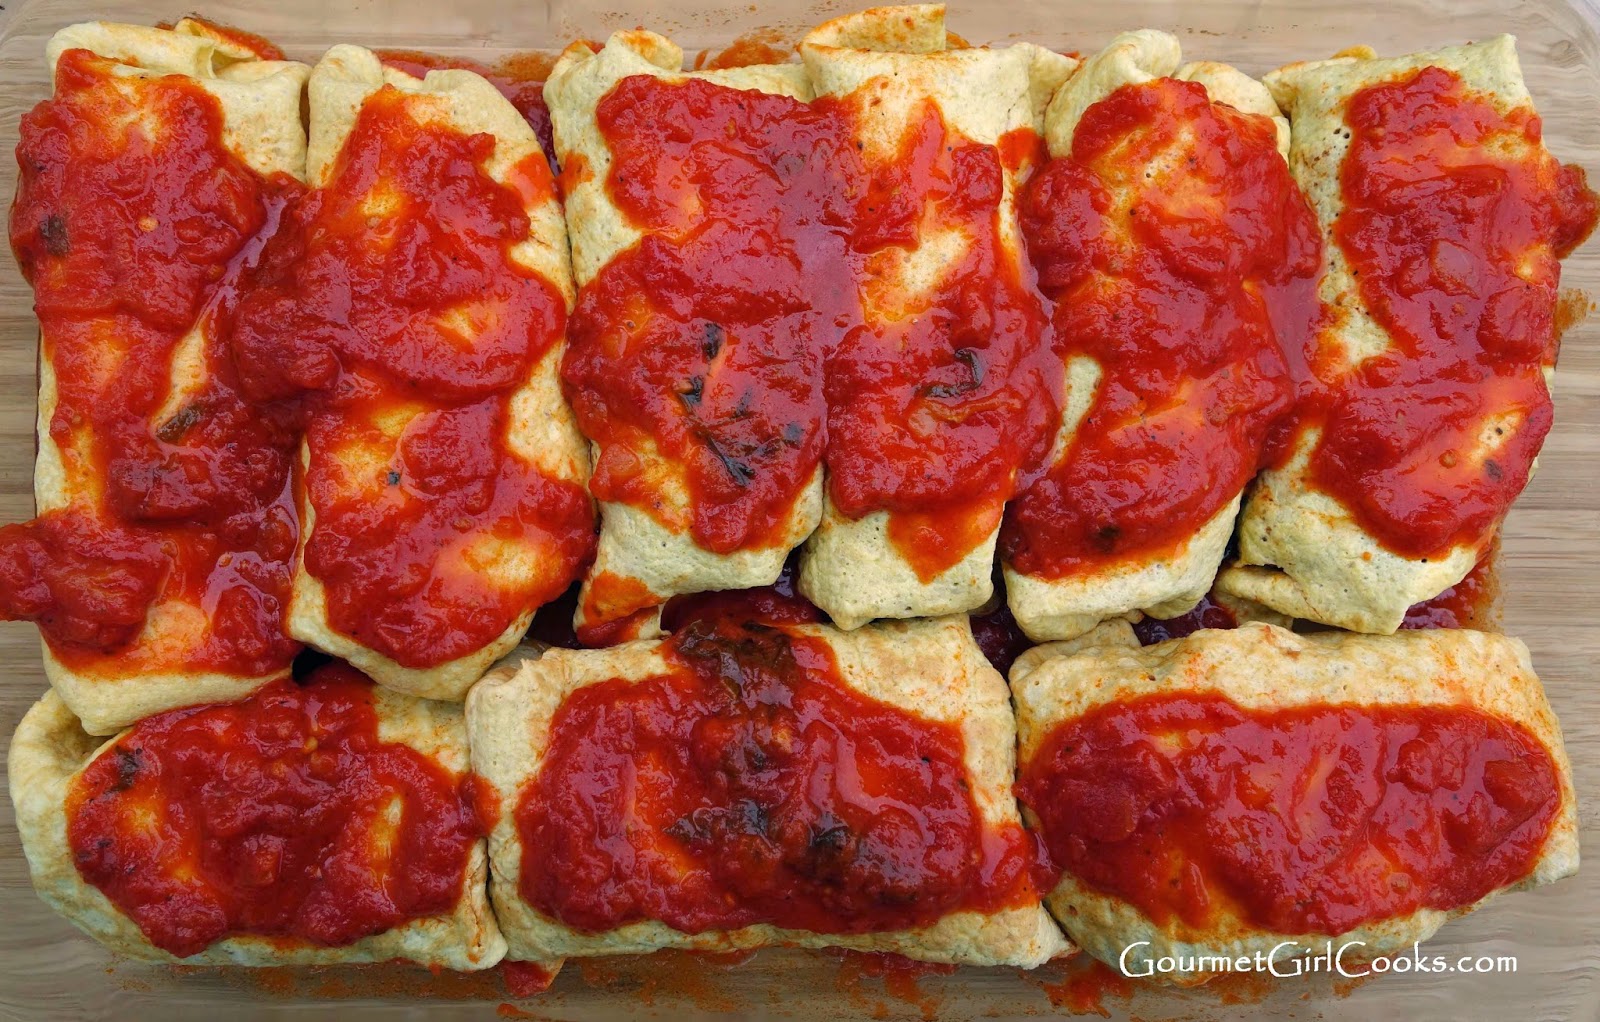
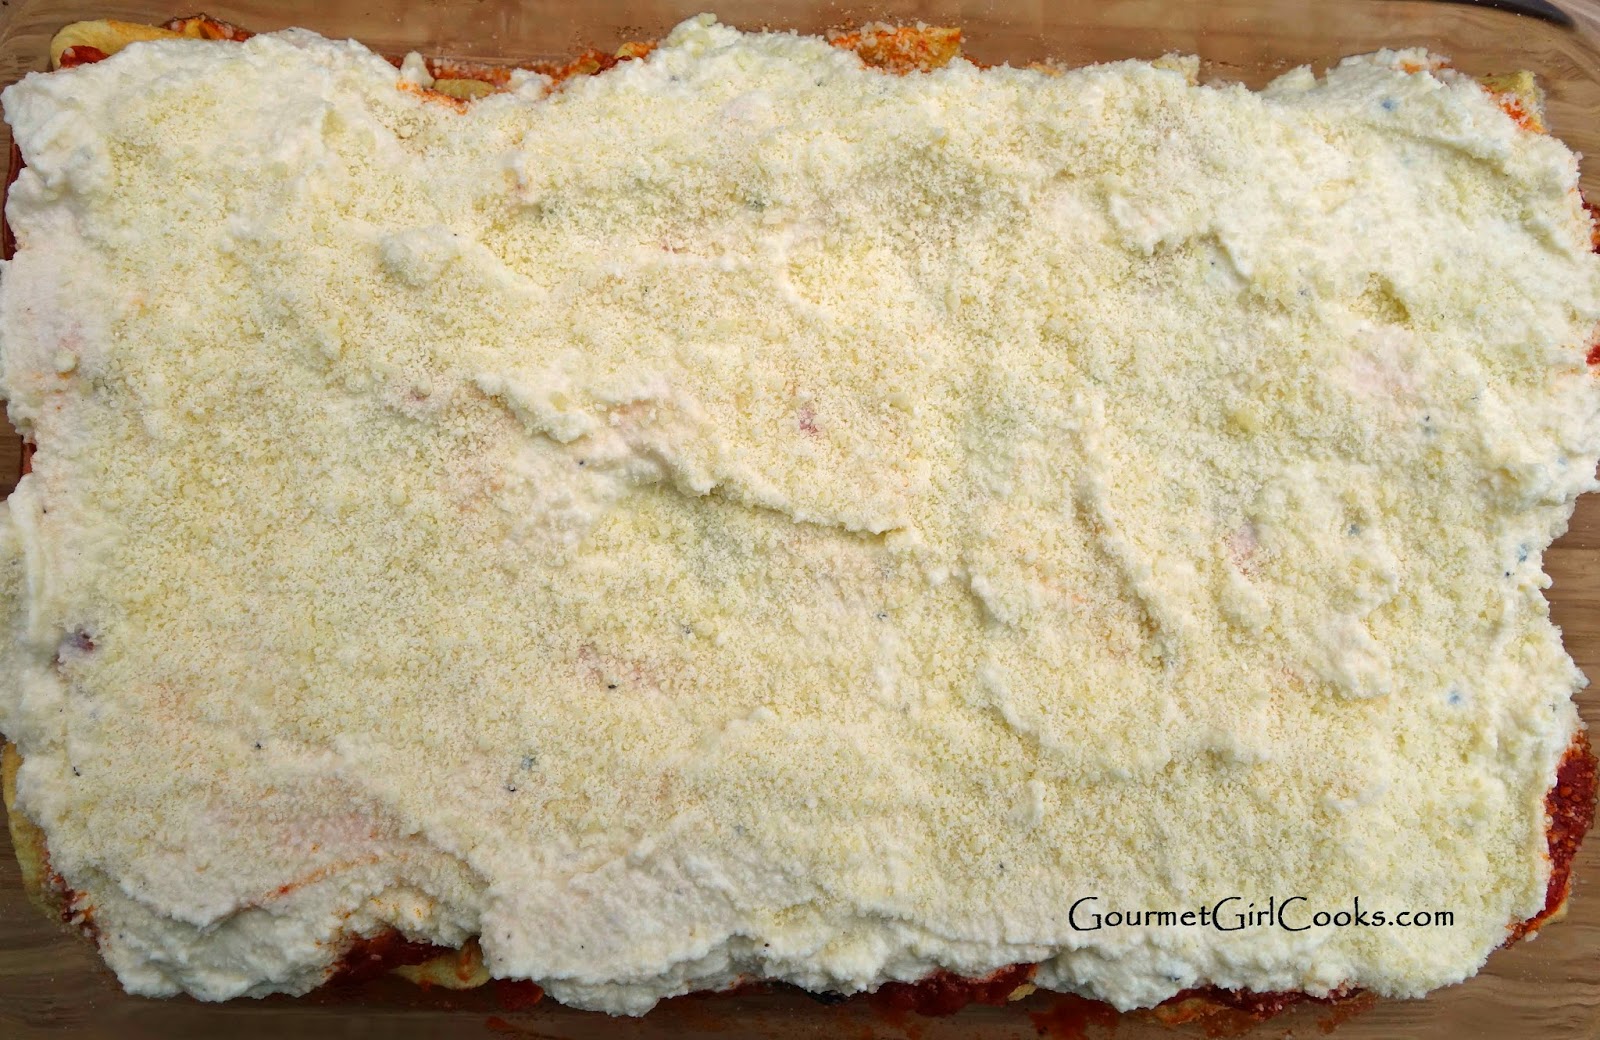
This evening I made Stuffed Beef Cannelloni for dinner. To get a head start on it, I browned the ground beef last night and simmered and reduced the sauce to make a thick meaty ragout filling (reducing until almost all of the liquid was gone so the filling isn't wet). I used my tortilla/noodle recipe to make crepe style cannelloni. These can easily be made in advance and don't take very long to make. If making this for a weeknight meal, it would be a great time saver to make the crepes in advance and refrigerate until ready to use. I had originally planned to make my own sauce for the ragout but to save time, used a good no sugar jarred sauce instead (my favorites are Rao's, DelGrosso, and Mezzetta). If you make the cannelloni (tortilla/crepes) ahead of time as well as the thick meat filling/ragout, this meal is a snap to put together on a work night and just pop in the oven. This dish consists of a thick meaty ragout filling with spinach and mozzarella wrapped up in a crepe-like bundle. It's topped with a light layer of pasta sauce and then a final layer of bechamel sauce (white sauce). It turned out great. I snapped a few photos for you to see below. Enjoy!
Sunday, April 13, 2014
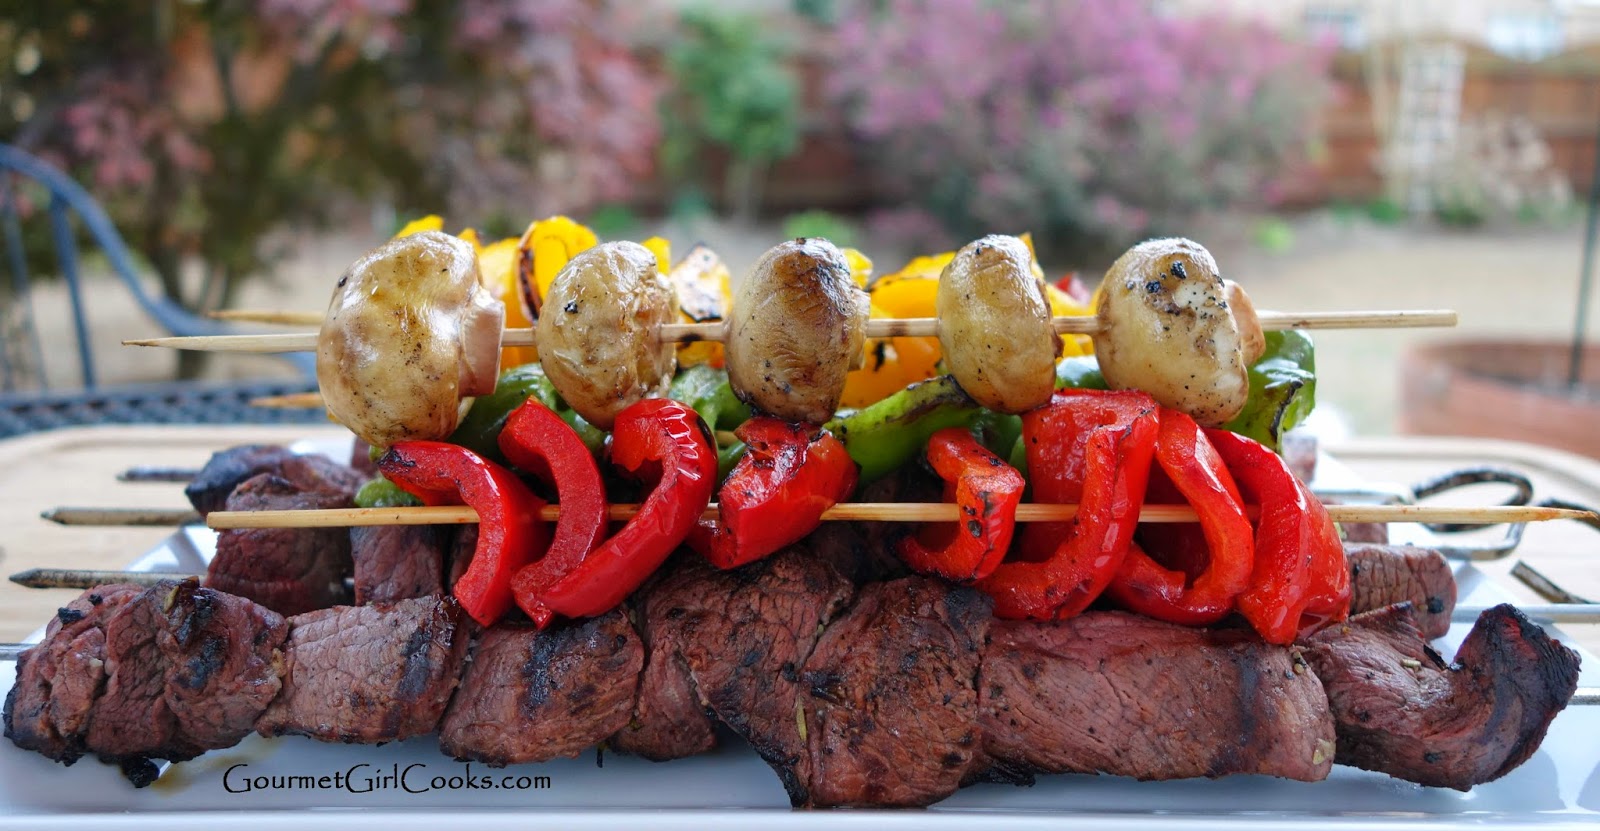
Grilled Shish Kebabs -- Simple, Fresh & Low Carb
Today hubby and I worked almost all day long doing work around the house and trying to get rid of clutter (also known as spring cleaning). It's amazing how fast things accumulate, isn't it? I was so excited about grilling something for dinner tonight because our new grill was supposed to be delivered this morning, so in anticipation (and the assumption hubby would be able to put it together in time), I marinated beef last night to make Grilled Shish Kebabs for dinner this evening.
Hubby and I got up early this morning and decided to continue our "spring cleaning" while we excitedly awaited for our new grill to arrive. Our 2-hour delivery window came and went and the hours began ticking by. Initially we figured that they were just running behind, but after another 2 hours went by and we received a "follow-up" call asking us if we were pleased with our delivery service and happy with our grill (you know, the one we didn't get), we knew there was a problem, considering we hadn't received it or any calls saying they were running late and we were home so there was no chance we missed them. They actually called us last night telling us the delivery would be this morning between 10:00 and 12:00. Long story short, at 4:00 we got "the call" telling us there was a major mistake and that there was NO grill and that they had to special order it??? So, my enthusiasm for using the new grill today got totally squashed. We made our kebabs on the old grill which is on its last legs and doesn't heat evenly any more.
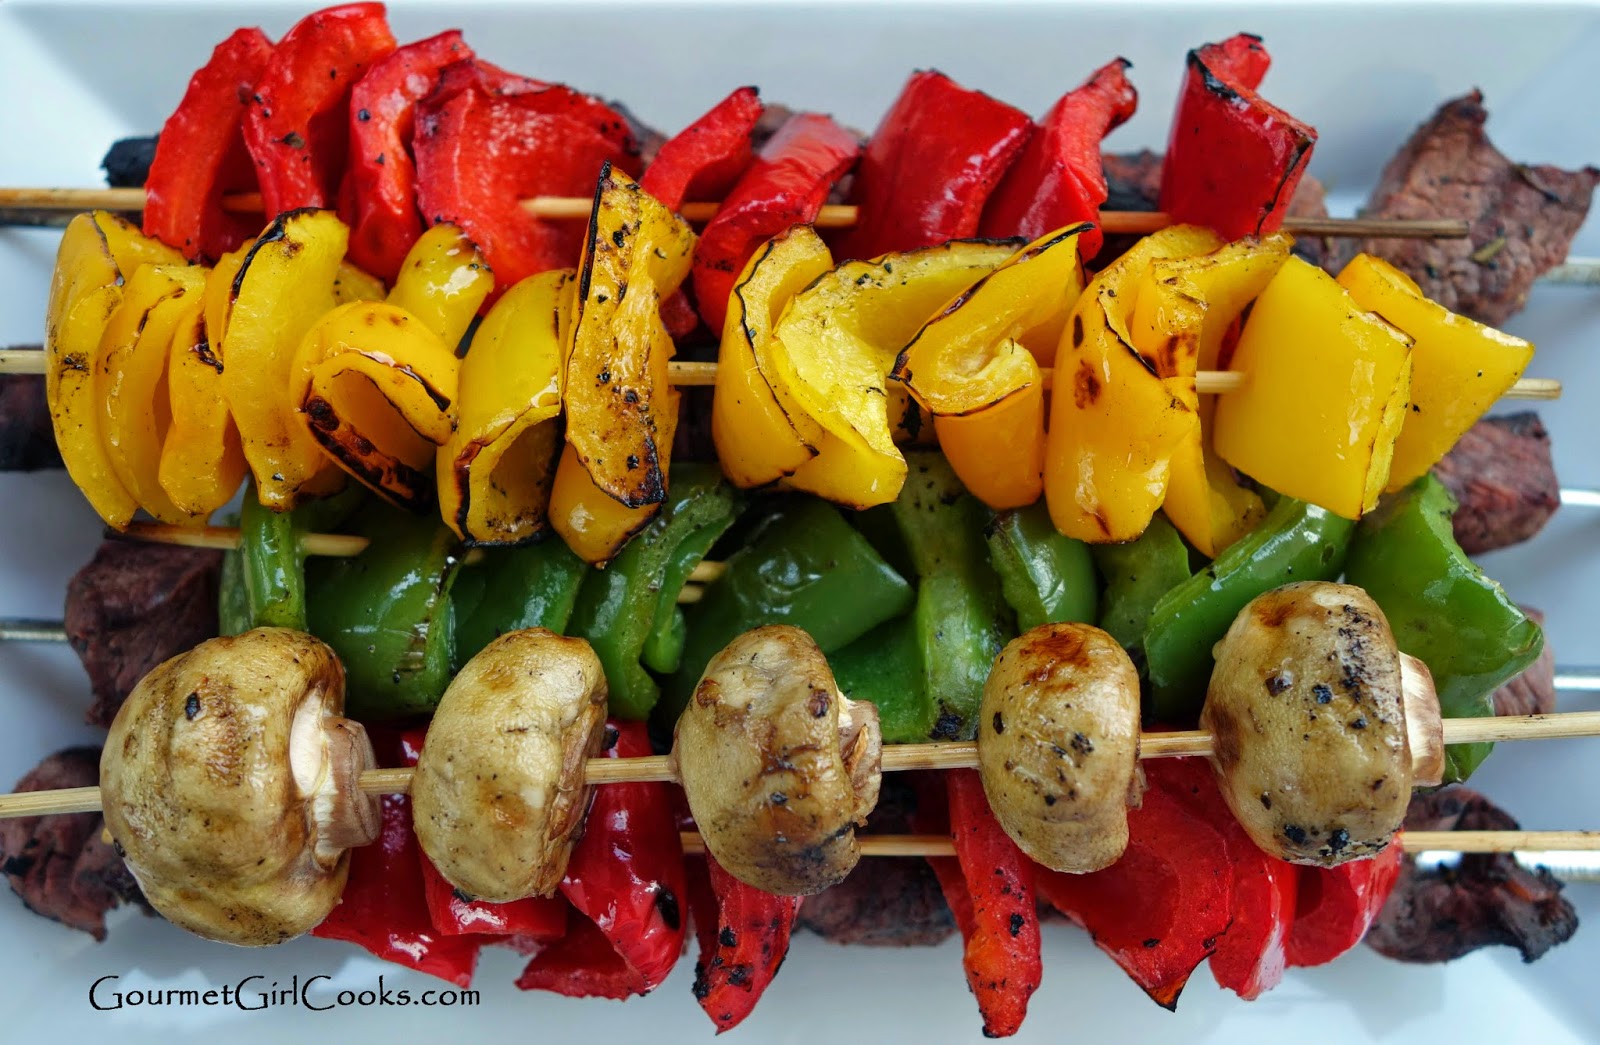
On the bright side, waiting all day forced us to work all day long in the house and while not fun, it was definitely needed. Both sons came for dinner this evening. I made rice for hubby and the boys to go with our kebabs. I initially planned to make cauli-rice (steamed grated cauliflower) for myself but at the last moment decided I didn't really want it. I ate the Shish Kebab as is and had one of my little cheese breadsticks with it that I made yesterday. It was a simple meal that is easy enough to make on a weeknight if you marinate the meat overnight. It takes 5 or 10 minutes to thread on skewers and then about 10-15 minutes to grill. I like to use metal skewers for cooking the meat and bamboo skewers for the veggies since they grip the veggies a little better. If you use bamboo skewers, make sure to soak the for 20-30 minutes so they don't burn while cooking the veggies. I snapped a few photos and included the easy recipe. Enjoy!
Hubby and I got up early this morning and decided to continue our "spring cleaning" while we excitedly awaited for our new grill to arrive. Our 2-hour delivery window came and went and the hours began ticking by. Initially we figured that they were just running behind, but after another 2 hours went by and we received a "follow-up" call asking us if we were pleased with our delivery service and happy with our grill (you know, the one we didn't get), we knew there was a problem, considering we hadn't received it or any calls saying they were running late and we were home so there was no chance we missed them. They actually called us last night telling us the delivery would be this morning between 10:00 and 12:00. Long story short, at 4:00 we got "the call" telling us there was a major mistake and that there was NO grill and that they had to special order it??? So, my enthusiasm for using the new grill today got totally squashed. We made our kebabs on the old grill which is on its last legs and doesn't heat evenly any more.
On the bright side, waiting all day forced us to work all day long in the house and while not fun, it was definitely needed. Both sons came for dinner this evening. I made rice for hubby and the boys to go with our kebabs. I initially planned to make cauli-rice (steamed grated cauliflower) for myself but at the last moment decided I didn't really want it. I ate the Shish Kebab as is and had one of my little cheese breadsticks with it that I made yesterday. It was a simple meal that is easy enough to make on a weeknight if you marinate the meat overnight. It takes 5 or 10 minutes to thread on skewers and then about 10-15 minutes to grill. I like to use metal skewers for cooking the meat and bamboo skewers for the veggies since they grip the veggies a little better. If you use bamboo skewers, make sure to soak the for 20-30 minutes so they don't burn while cooking the veggies. I snapped a few photos and included the easy recipe. Enjoy!
Saturday, April 12, 2014
Spicy Pepper-Jack Crackers - A Delicious Grain-Free Snack
This afternoon I made a batch of crackers so I could use them to eat as a snack, with cheese or dipped in my Holy Moly Guacamole. I made Spicy Pecan Pepper-Jack Crackers. These crackers have a higher ratio of pecan meal to almond flour which gives them a slightly "grainier" quality as well as a dark "whole wheat" cracker look. I added some chia seeds to give them a little bit of crunch. I used a simple hand dough blender to cut Monterey pepper-jack cheese into the dry ingredients. If you don't like spicy things, you could swap some nice sharp cheddar, or your favorite cheese in its place. To give it an extra kick, add a bit of sriracha or if you have it, a couple teaspoons of spicy chili infused olive oil. Adding the pecans to the cracker mixture produces a darker cracker so don't think that these are burned because they are dark. The dough itself was dark before being baked. Notice how the little bits of cheese got browned and golden in the crackers (in the photos below). These are tasty to eat "as is" and were really good when hubby and I enjoyed them with some sliced cheese and fresh berries for our late afternoon snack today. One of my favorite little snacks is putting a little smear of cream cheese on crackers -- especially crackers that taste good (like these) because it doesn't overpower their taste. My big breakfast this morning kept me going until around 4:00 when I felt like I wanted a little snack since I rarely eat lunch on the weekends. It was nice having crackers available to pull out. I don't have to cook dinner this evening since I have plenty of leftover Chicago Style Deep Dish Skillet Pizza from last night (I was only able to eat one piece). I snapped a few photos and included the easy recipe below. Enjoy!


Steak & Eggs w/ Cheesy Breadsticks - Saturday Brunch
This morning we got up early because hubby had a board meeting to attend. After he got out of the house this morning, I wanted to make myself a good breakfast before I got started with my spring cleaning around the house. As I glanced around in the fridge, I saw opportunity where others might simply see "leftovers". I pulled out the little bit of leftover grilled skirt steak from the Grilled Beef Fajitas w/ Chipotle Lime Marinade that I made a few nights ago. I pulled out the eggs and the tennis ball sized piece of dough leftover from last night's Chicago Style Deep Dish Skillet Pizza.
Suddenly it all began to come together...I rolled the little ball of dough out between parchment paper until it was about 3/4-inch thick. I shaped it into a rectangular shape and cut it into sticks to make cheesy breadsticks to go with my breakfast. Since the steak had a southwestern marinade flavor I decided to continue that theme with my eggs. I simply scrambled 2 eggs and cooked them in a tiny bit of coconut oil and added in a slice of Kraft's white cheddar jalapeno cheese. I had the most amazing breakfast compiled mostly of leftover odds and ends! I absolutely love making "something" out of a small amount of leftovers that some might toss out or dread using up (like my hubby)! LOL Because he seems to have such an aversion to leftovers, maybe that's why I've become more creative in revitalizing them. So, while he munches on bagels and other "stuff" at his meeting this morning...I was dining like a queen eating primarily leftovers.
That leftover little ball of dough from last night's pizza provided me 5 chubby little cheesy breadsticks. I placed 2 on my plate to eat this morning but ended up putting one back because I was too full. I now have 4 breadsticks left to enjoy with my other meals. If you want to make easy breadsticks, this deep dish pizza dough would be great to use -- you could change up the cheese and add cheddar, pepper-jack, etc. To use it for breadsticks, I would chill it for several hours to make it nice and stiff and easy to roll out. Did I mention how much I loooooove leftovers? :-) Check out the photos of my delicious "leftover" breakfast! Enjoy!
Suddenly it all began to come together...I rolled the little ball of dough out between parchment paper until it was about 3/4-inch thick. I shaped it into a rectangular shape and cut it into sticks to make cheesy breadsticks to go with my breakfast. Since the steak had a southwestern marinade flavor I decided to continue that theme with my eggs. I simply scrambled 2 eggs and cooked them in a tiny bit of coconut oil and added in a slice of Kraft's white cheddar jalapeno cheese. I had the most amazing breakfast compiled mostly of leftover odds and ends! I absolutely love making "something" out of a small amount of leftovers that some might toss out or dread using up (like my hubby)! LOL Because he seems to have such an aversion to leftovers, maybe that's why I've become more creative in revitalizing them. So, while he munches on bagels and other "stuff" at his meeting this morning...I was dining like a queen eating primarily leftovers.
That leftover little ball of dough from last night's pizza provided me 5 chubby little cheesy breadsticks. I placed 2 on my plate to eat this morning but ended up putting one back because I was too full. I now have 4 breadsticks left to enjoy with my other meals. If you want to make easy breadsticks, this deep dish pizza dough would be great to use -- you could change up the cheese and add cheddar, pepper-jack, etc. To use it for breadsticks, I would chill it for several hours to make it nice and stiff and easy to roll out. Did I mention how much I loooooove leftovers? :-) Check out the photos of my delicious "leftover" breakfast! Enjoy!
![]() |
| This is a good way to use any leftover pizza dough -- it's good enough to make the dough simply for these breadsticks -- you can use cheddar cheese or your favorite cheese. |
Friday, April 11, 2014
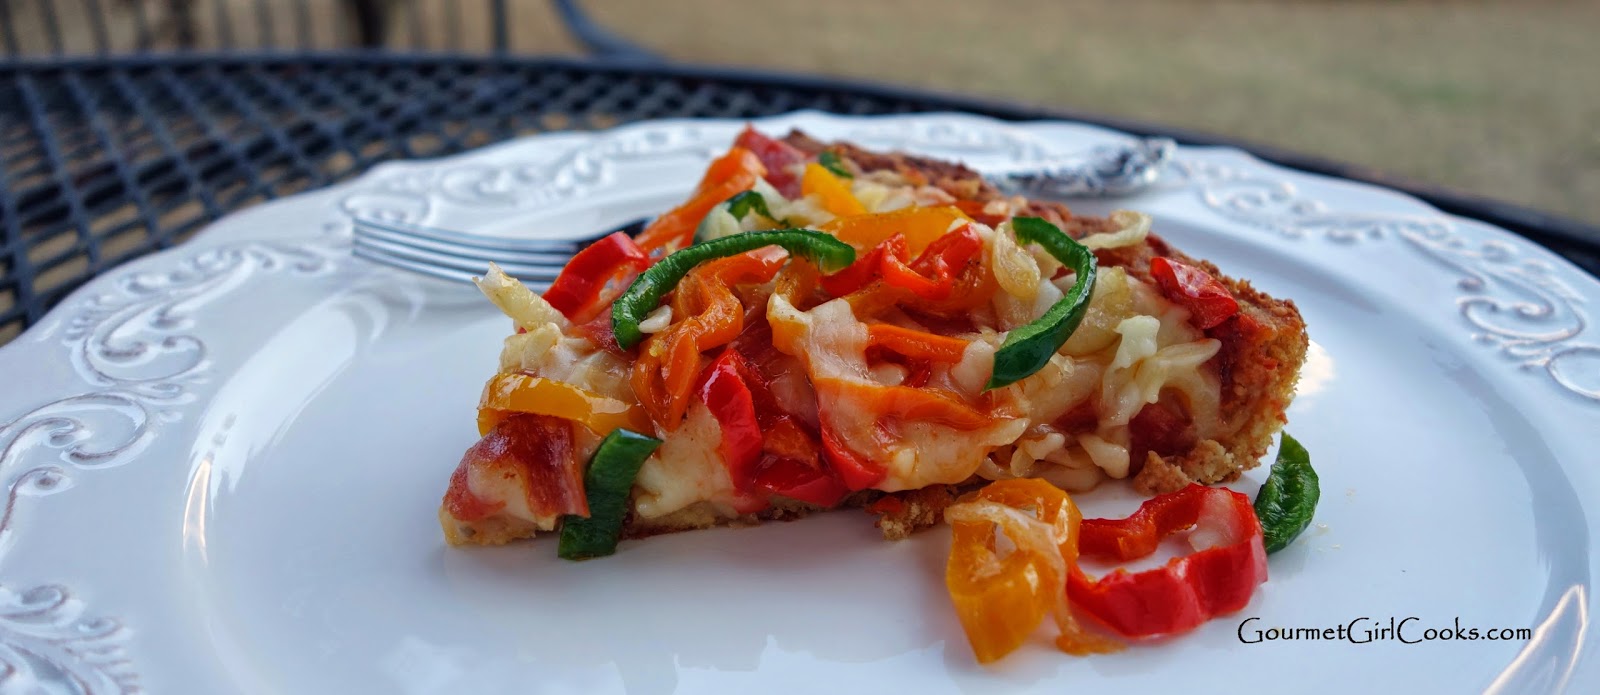
Chicago Style Deep Dish Skillet Pizza -- Wheat, Grain & Gluten-Free
This evening I decided to break in my new Lodge cast iron skillet to make Chicago Style Deep Dish Skillet Pizza. Believe it or not this was my first time cooking in cast iron AND my first time making deep dish pizza. I typically tend to prefer thin crust style pizza. The only time I really enjoyed deep dish pizza was years ago when I lived right beside Old Town Alexandria, Virginia. I used to enjoy eating at the Uno's Pizzeria there that served its legendary "Chicago Style Deep Dish Pizza". They had the BEST deep dish pizza. The only problem was you couldn't eat more than a slice or 2 because it was so thick. I wanted to use my cast iron skillet tonight so I decided to travel back down memory lane a bit and recreate a grain-free version of the Chicago style pizza I remembered.
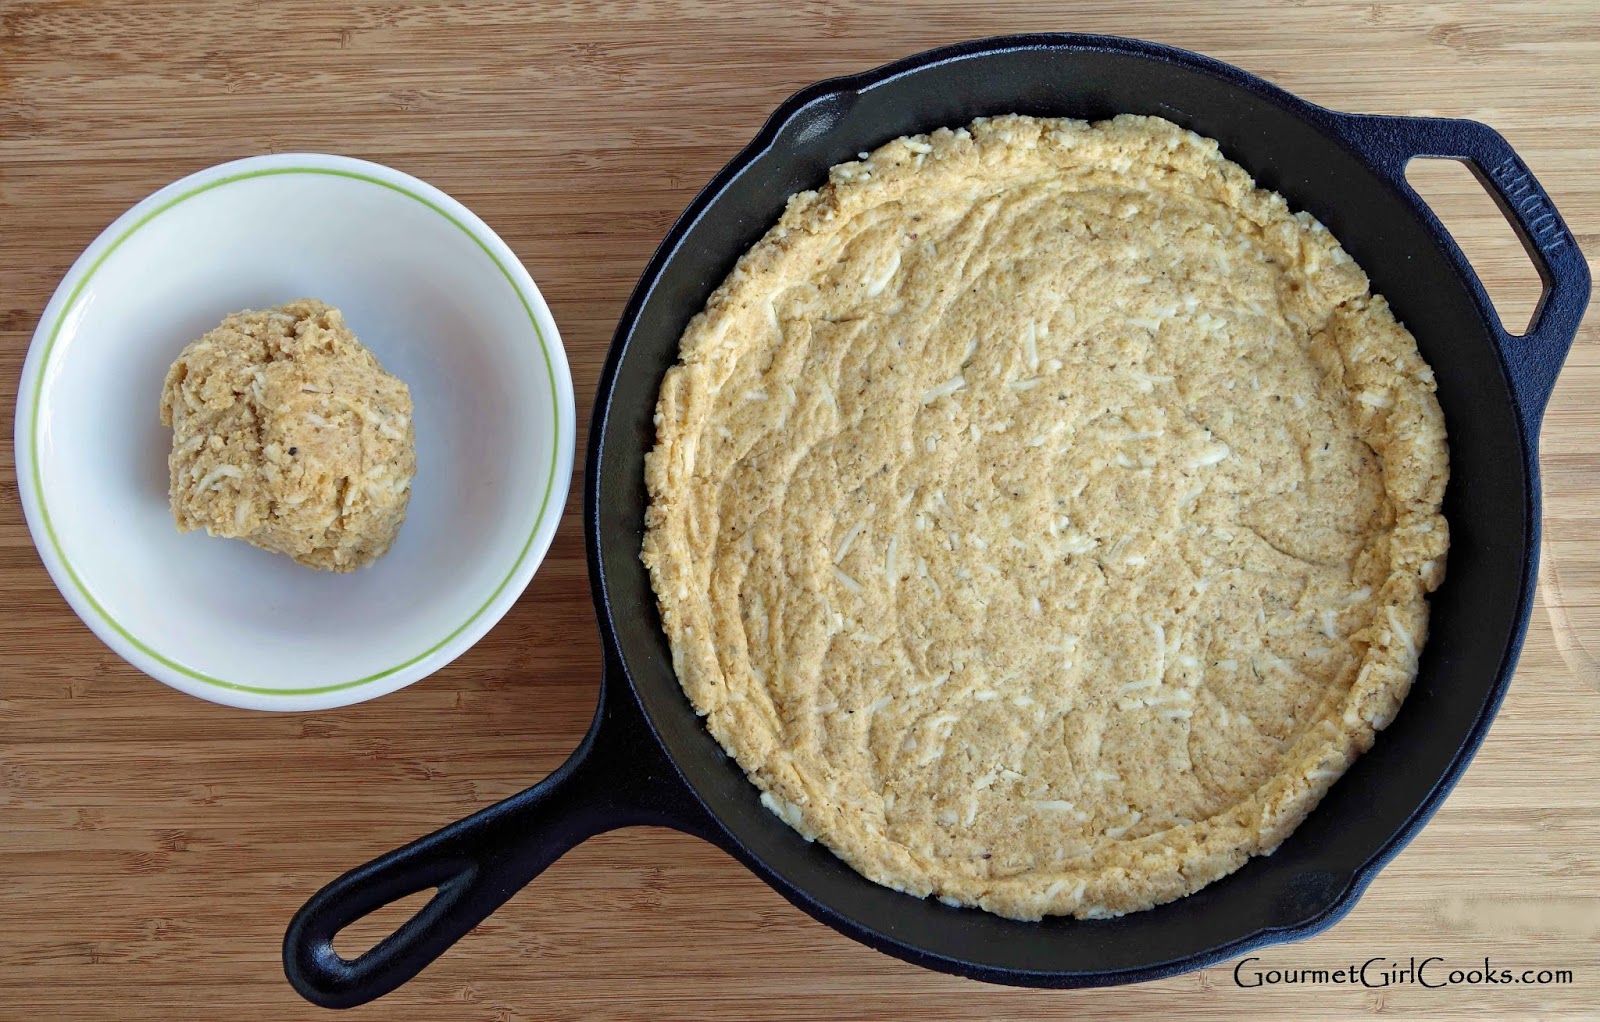
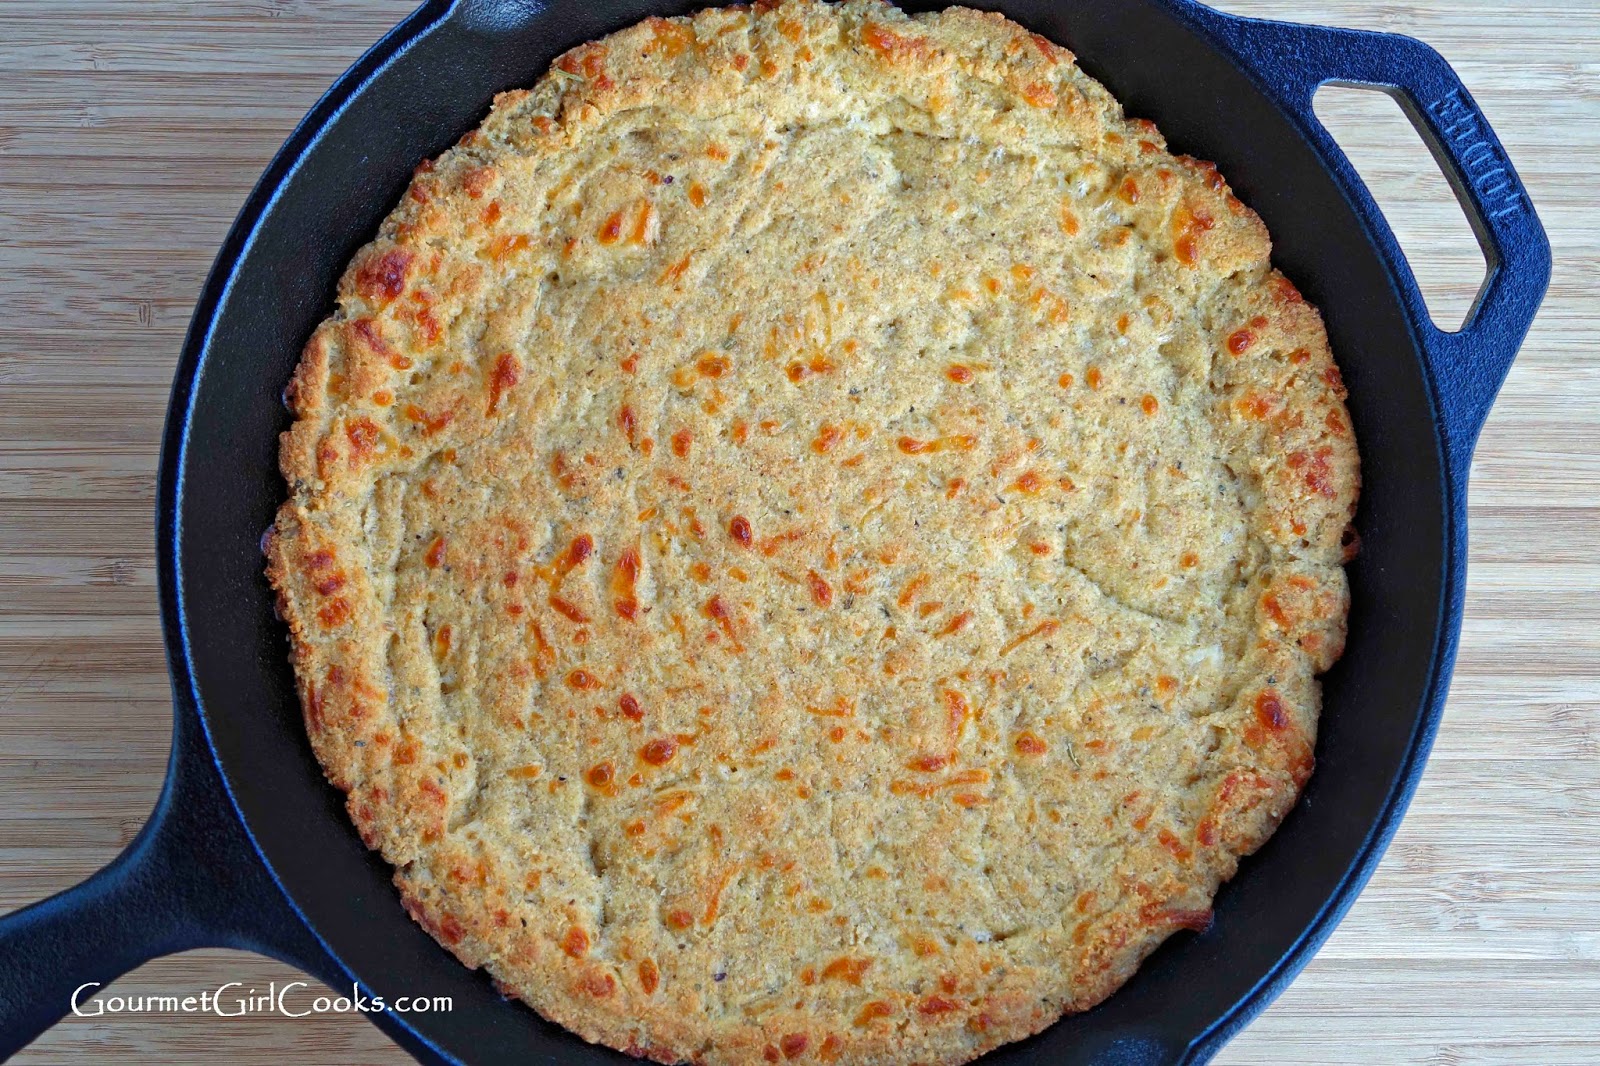
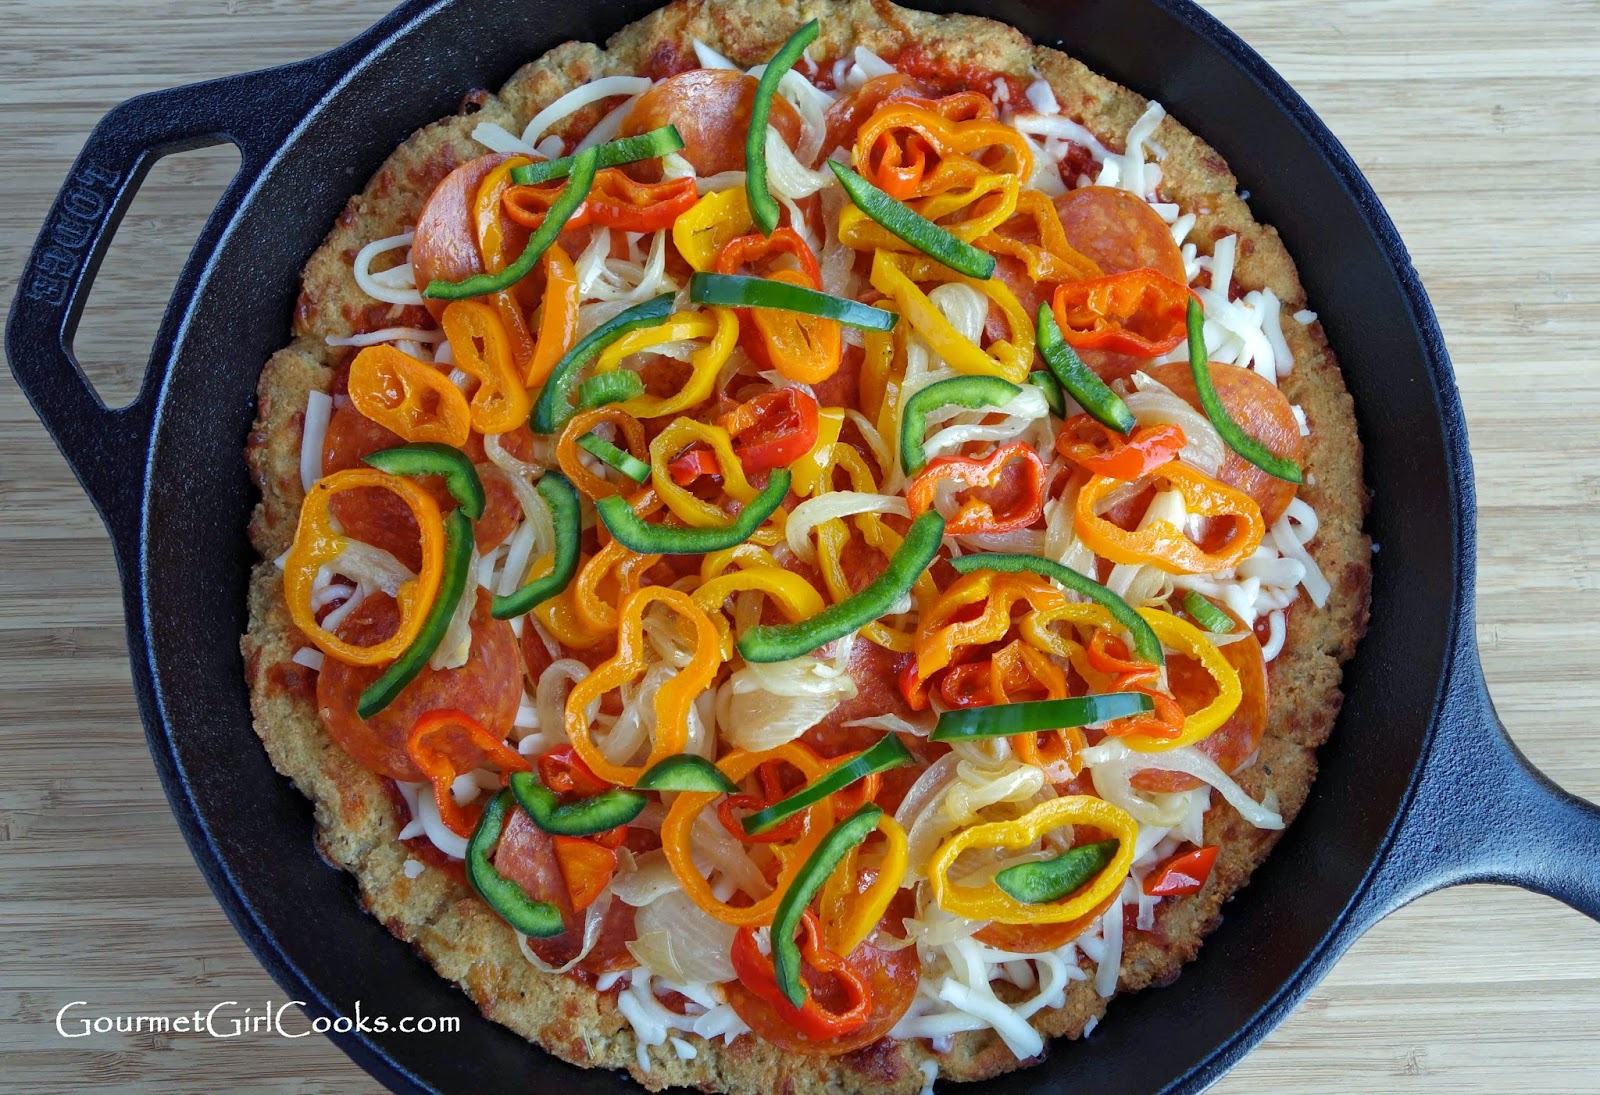
I needed to make more of a "bready" crust which meant I couldn't use my regular pizza crust recipe. I wanted it to be kinda-sorta like my Bagel Squagel, Bagel Sticks and Bagel Bread recipe...but not exactly. So, I came up with a nice dough that was easy to spread out in the skillet and it rose nicely and became fluffy, too. I was very pleased with how it turned out. I pre-baked the crust in my skillet until almost done and then added the toppings and baked it until done. I was a bit nervous trying this pizza out in a brand new cast iron skillet because from everything I've read, some foods (like breads) tend to stick more easily to a new skillet until it has been used repeatedly and become well seasoned. I just liberally greased the skillet with coconut oil (not enough to saturate the crust) to make sure it wouldn't stick. As my pizza baked, I kept my fingers crossed that I would be able to actually take a slice out of the pan. It worked amazingly!!! So, I did a double "happy dance"...both for my successful maiden voyage using cast iron and second for my first attempt ever at making a Chicago style deep dish pizza. My deep dish pizza crust recipe makes enough dough for a 12-inch pizza. Since I only used a 10-1/2-inch skillet, I had about a tennis ball sized piece of dough left. I will use it for something else this weekend. If you've missed enjoying deep dish pizza since going grain free...you will enjoy this pizza recipe. This isn't just "kind of like" deep dish pizza dough...it IS deep dish pizza dough. I put pepperoni, onion, red, yellow, orange and green peppers on mine. I snapped a few photos below as well as the recipe for my wheat, grain and gluten free Chicago Style Deep Dish Skillet Pizza. Enjoy!
Chicago Style Deep Dish Skillet Pizza
Ingredients:
For the Crust
3 tablespoons coconut flour, sifted
1/2 cup blanched almond flour
3/4 cup golden ground flaxseed
2 teaspoons baking powder
1/2 teaspoon baking soda
1 teaspoon Italian seasoning
1/2 teaspoon sea salt, or to taste
1/2 teaspoon onion powder
1/4 teaspoon garlic powder
1 cup shredded mozzarella cheese
1/4 cup finely grated Parmesan cheese
3 large eggs, lightly beaten
1/4 cup PLUS 2 tablespoons buttermilk
3 tablespoons olive oil
For the Toppings, Etc.
3/4 to 1 cup pizza sauce, or to taste
1-1/2 to 2 cups shredded mozzarella cheese
Olive oil or coconut oil for greasing pan
Toppings, as desired (pepperoni, cooked sausage, peppers, onions, cooked mushrooms, etc.)
Directions:
Preheat oven to 375 degrees F. In a medium sized bowl, mix first 9 ingredients together with a whisk to help break up any lumps; stir in 1 cup mozzarella cheese and Parmesan.
Add eggs, buttermilk and olive oil; mix until combined and a dough is formed. Dough will be thick and slightly sticky. Generously grease a 10 to 12-inch cast iron skillet with olive oil or coconut oil (an ovenproof skillet can also be used). Using a rubber spatula sprayed lightly with oil, place the dough in the center of the baking pan and begin working your way pressing the dough out toward the edges, about 3/4 to 1-inch thick spreading the dough up the sides of the pan about 1-inch high.
Bake for 20-25 minutes, or until light golden brown. Remove from oven and add sauce, mozzarella, and desired toppings. Bake an additional 8 to 10 minutes or until the cheese is melted. If additional browning is desired, run under broiler for a few minutes until bubbly and cheese is lightly browned. Carefully remove from oven and let sit about 5 to 10 minutes for cheese to set. Cut into wedges and serve. If using a nonstick ovenproof skillet, adjust baking time as necessary (it will heat more quickly than cast iron), then slide finished pizza onto a cutting board before slicing so you don't damage your pan.
*Note: Pre-cooking vegetables containing lots of moisture like mushrooms, spinach, etc. will help prevent the pizza from becoming soggy.
I needed to make more of a "bready" crust which meant I couldn't use my regular pizza crust recipe. I wanted it to be kinda-sorta like my Bagel Squagel, Bagel Sticks and Bagel Bread recipe...but not exactly. So, I came up with a nice dough that was easy to spread out in the skillet and it rose nicely and became fluffy, too. I was very pleased with how it turned out. I pre-baked the crust in my skillet until almost done and then added the toppings and baked it until done. I was a bit nervous trying this pizza out in a brand new cast iron skillet because from everything I've read, some foods (like breads) tend to stick more easily to a new skillet until it has been used repeatedly and become well seasoned. I just liberally greased the skillet with coconut oil (not enough to saturate the crust) to make sure it wouldn't stick. As my pizza baked, I kept my fingers crossed that I would be able to actually take a slice out of the pan. It worked amazingly!!! So, I did a double "happy dance"...both for my successful maiden voyage using cast iron and second for my first attempt ever at making a Chicago style deep dish pizza. My deep dish pizza crust recipe makes enough dough for a 12-inch pizza. Since I only used a 10-1/2-inch skillet, I had about a tennis ball sized piece of dough left. I will use it for something else this weekend. If you've missed enjoying deep dish pizza since going grain free...you will enjoy this pizza recipe. This isn't just "kind of like" deep dish pizza dough...it IS deep dish pizza dough. I put pepperoni, onion, red, yellow, orange and green peppers on mine. I snapped a few photos below as well as the recipe for my wheat, grain and gluten free Chicago Style Deep Dish Skillet Pizza. Enjoy!
Chicago Style Deep Dish Skillet Pizza
Ingredients:
For the Crust
3 tablespoons coconut flour, sifted
1/2 cup blanched almond flour
3/4 cup golden ground flaxseed
2 teaspoons baking powder
1/2 teaspoon baking soda
1 teaspoon Italian seasoning
1/2 teaspoon sea salt, or to taste
1/2 teaspoon onion powder
1/4 teaspoon garlic powder
1 cup shredded mozzarella cheese
1/4 cup finely grated Parmesan cheese
3 large eggs, lightly beaten
1/4 cup PLUS 2 tablespoons buttermilk
3 tablespoons olive oil
For the Toppings, Etc.
3/4 to 1 cup pizza sauce, or to taste
1-1/2 to 2 cups shredded mozzarella cheese
Olive oil or coconut oil for greasing pan
Toppings, as desired (pepperoni, cooked sausage, peppers, onions, cooked mushrooms, etc.)
Directions:
Preheat oven to 375 degrees F. In a medium sized bowl, mix first 9 ingredients together with a whisk to help break up any lumps; stir in 1 cup mozzarella cheese and Parmesan.
Add eggs, buttermilk and olive oil; mix until combined and a dough is formed. Dough will be thick and slightly sticky. Generously grease a 10 to 12-inch cast iron skillet with olive oil or coconut oil (an ovenproof skillet can also be used). Using a rubber spatula sprayed lightly with oil, place the dough in the center of the baking pan and begin working your way pressing the dough out toward the edges, about 3/4 to 1-inch thick spreading the dough up the sides of the pan about 1-inch high.
Bake for 20-25 minutes, or until light golden brown. Remove from oven and add sauce, mozzarella, and desired toppings. Bake an additional 8 to 10 minutes or until the cheese is melted. If additional browning is desired, run under broiler for a few minutes until bubbly and cheese is lightly browned. Carefully remove from oven and let sit about 5 to 10 minutes for cheese to set. Cut into wedges and serve. If using a nonstick ovenproof skillet, adjust baking time as necessary (it will heat more quickly than cast iron), then slide finished pizza onto a cutting board before slicing so you don't damage your pan.
*Note: Pre-cooking vegetables containing lots of moisture like mushrooms, spinach, etc. will help prevent the pizza from becoming soggy.
Thursday, April 10, 2014
Holy Moly Guacamole -- Quick, Fresh & Easy!
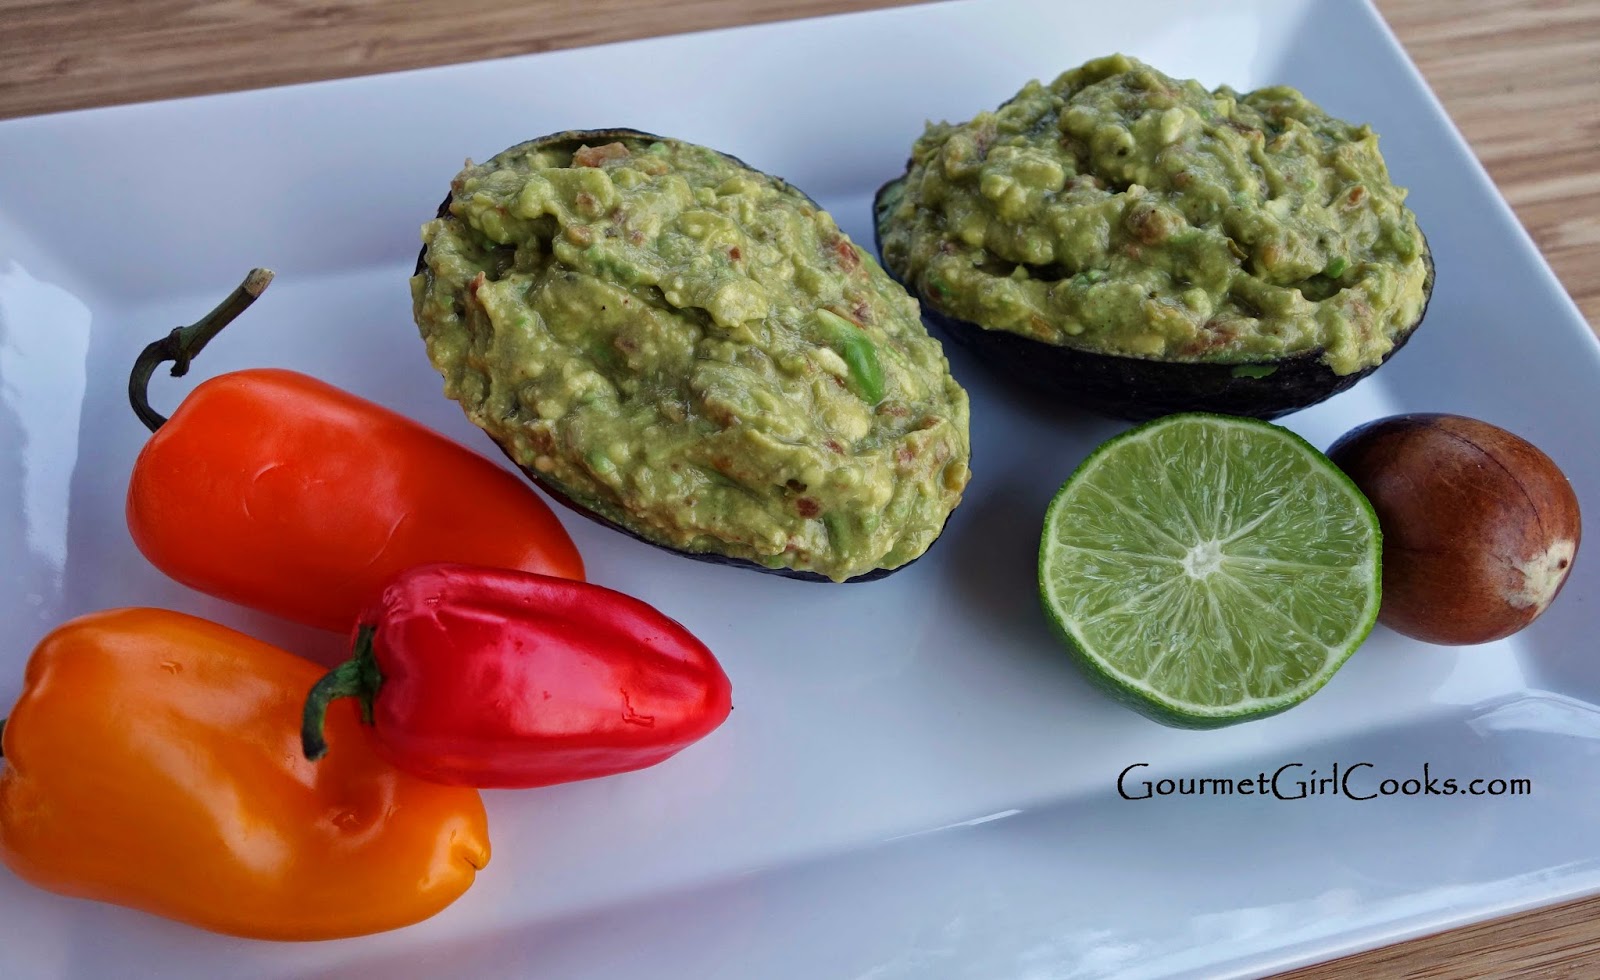
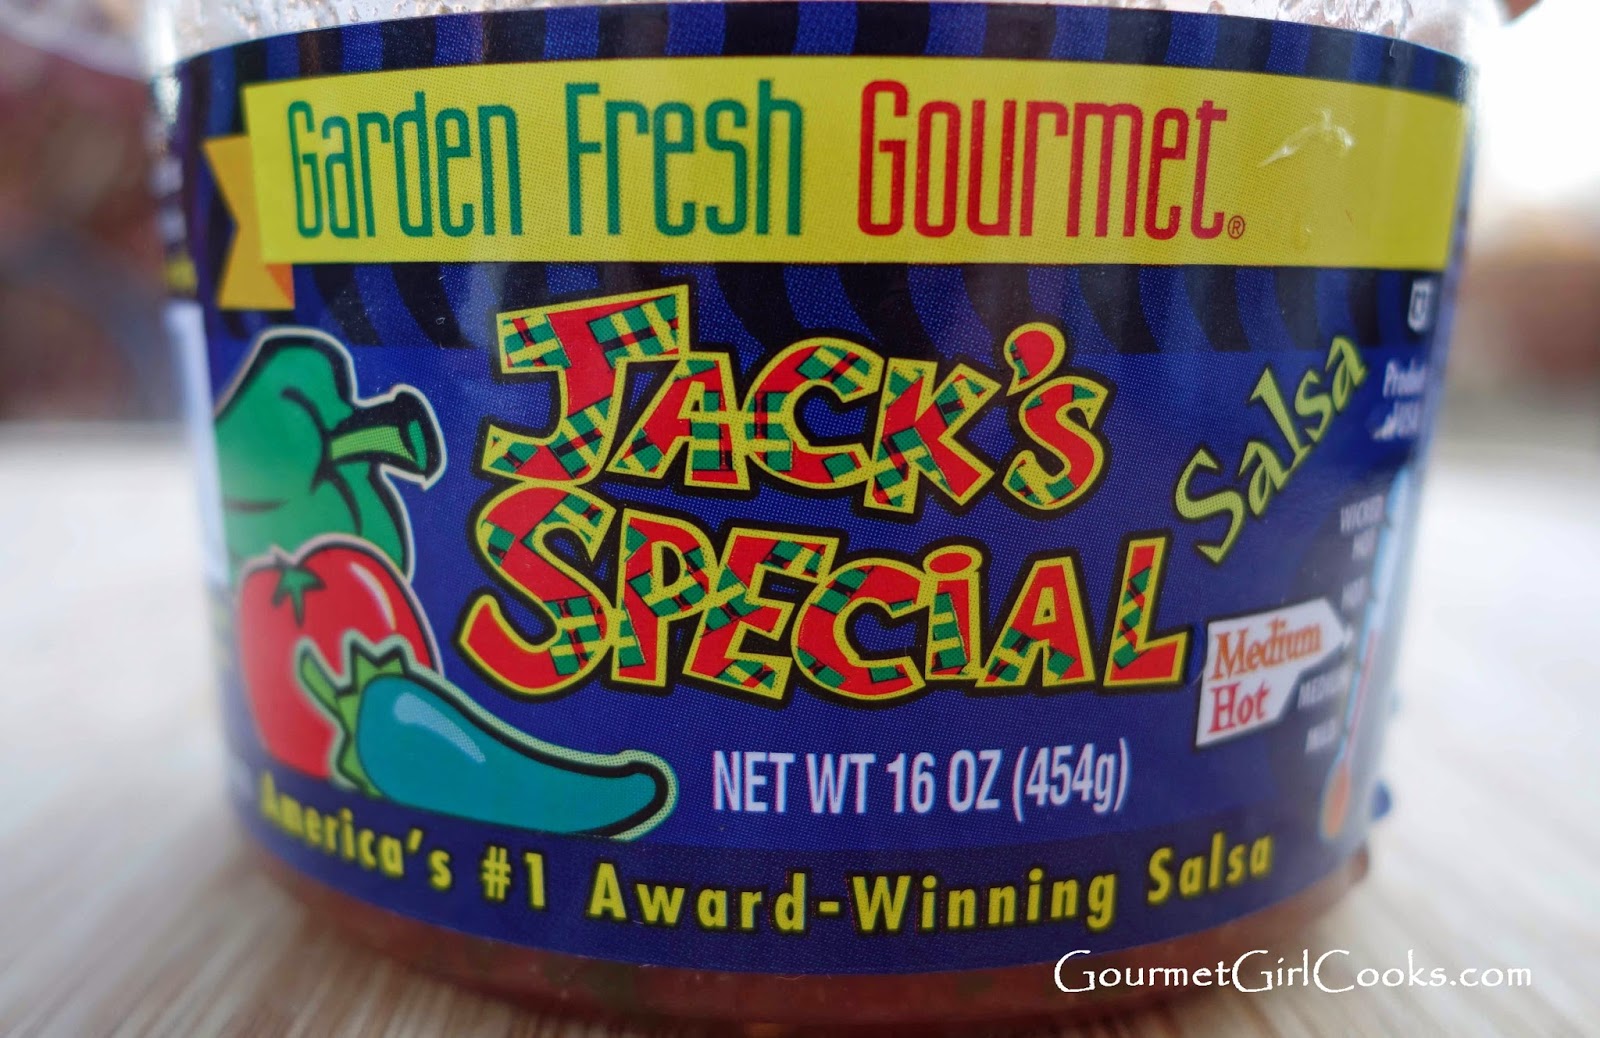
Today hubby and I both took off from work to tackle projects around the house. It was a gorgeous, bright and beautiful day (except for the crazy pollen). This afternoon we went and purchased a new gas grill -- our CharBroil grill just didn't last the way we had hoped it would so we decided to really shop around and do our research before purchasing another one. So, we finally bit the bullet and bought a new Weber gas grill -- we looked at others but kept coming back to Weber. I'm so excited -- it has a special sear station burner on it which I'm looking forward to using. It's supposed to be delivered Saturday, so hopefully hubby will get it put together so we can grill dinner on it Saturday or Sunday (or both). This evening I had plenty of leftover Grilled Beef Fajitas w/ Chipotle Lime Marinade left from last night's dinner...so I simply needed to reheat our dinner. I enjoyed a nice "side" of my delicious guacamole along with my fajitas. I ate it "as is" (like mashed potatoes)...LOL. Tomorrow I'm going to make some crackers to dip in the rest of it. I snapped a few photos below of my simple guacamole. I added some fresh salsa (sold in the refrigerated section of the grocery store). My favorite fresh salsa is Jack's Salsa (medium-hot) by Garden Fresh Gourmet. I also added lime juice (for both flavor and to keep the avocado nice and green) and I also added ground ancho chile pepper for some smoky spiciness. It was absolutely delicious. In the recipe below, I included the amounts that I used based on my taste -- but I would suggest you make it and taste it as you go. It's so easy and so good. Enjoy!
Wednesday, April 9, 2014
Grilled Beef Fajitas w/ Chipotle Lime Marinade w/ Grain-free Tortillas
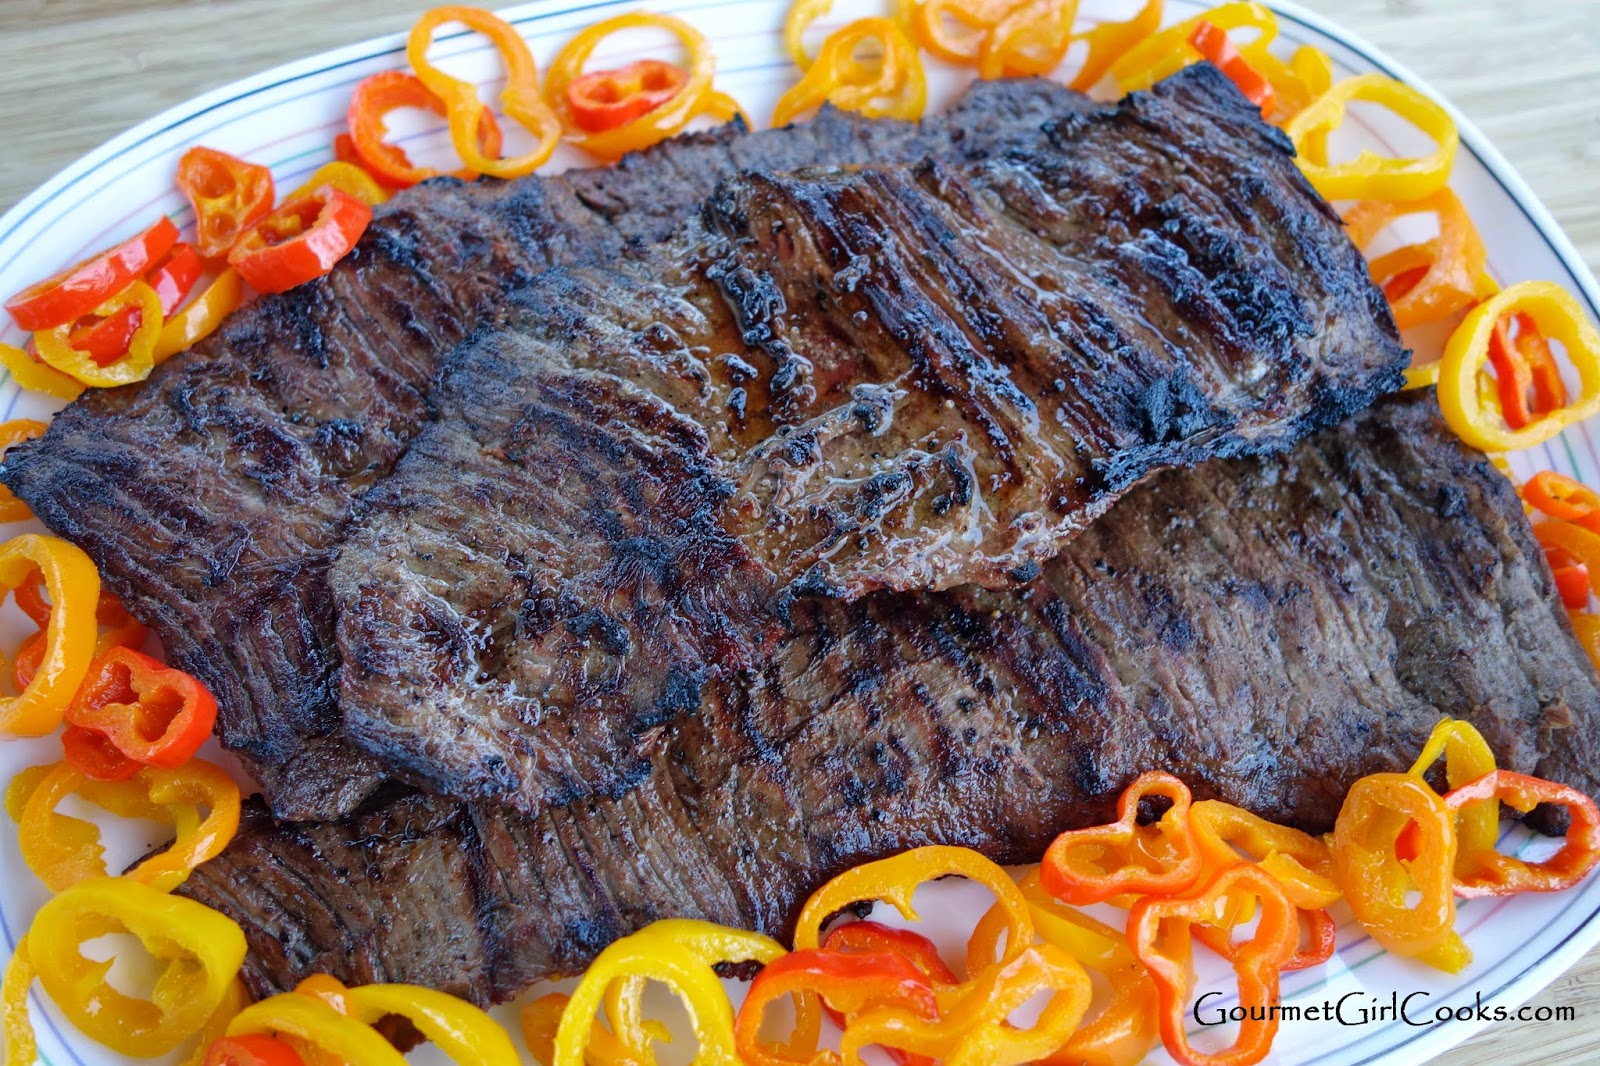
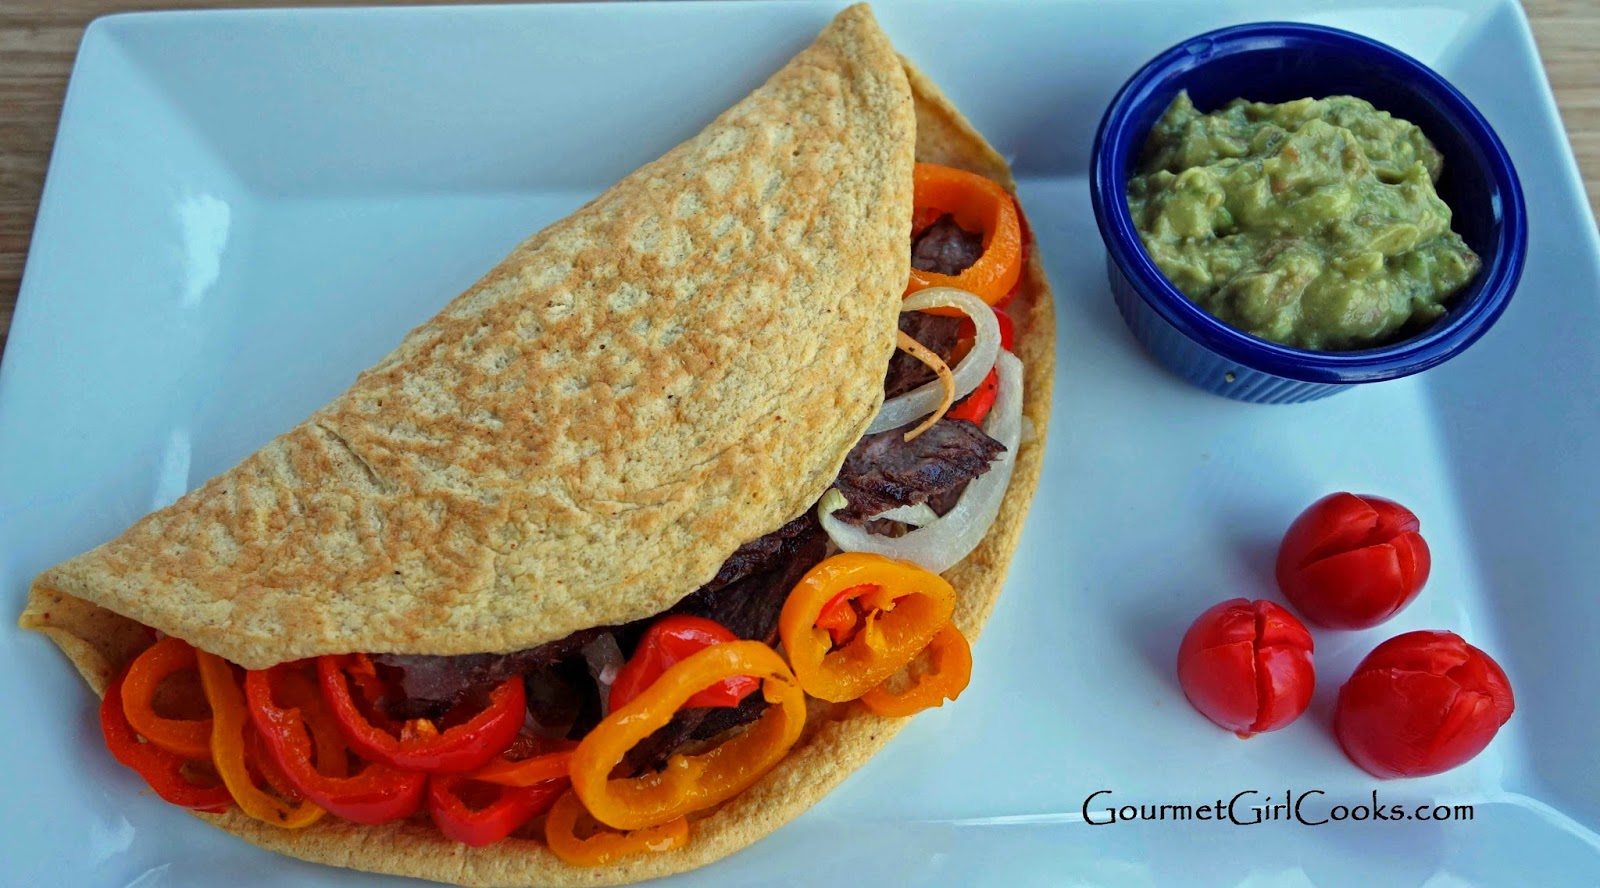
This evening I made delicious Grilled Beef Fajitas w/ Chipotle Lime Marinade for dinner. I served them in my super easy Grain-free Tortillas. This is the sturdier version of my tortillas which essentially means I don't thin the batter down with water like I do when I make my thinner sandwich wrap version or the version I use as a lasagna noodle substitute. You can add whatever seasoning you like to them to complement what you are using them for. In tonight's version of tortilla, I used a couple dashes of garlic powder, some ground ancho chile pepper and a little smoked paprika. Besides adding flavor to them, it adds nice color as well. I forgot to marinate my skirt steak overnight last night so when I came home at lunch time today, I put the marinade together quickly and let them marinate for about 7 hours until dinner time. The steak takes about 10 minutes to cook since it's so thin. I also made fresh homemade guacamole to go with our fajitas. I'll post that recipe tomorrow...it's so simple it might make you shed a few tears (of joy)! LOL I snapped a few photos of tonight's meal below as well as the recipe for the beef fajitas and the tortillas (the recipe to make 1 tortilla at a time or 4 is included -- I actually got 5 tortillas from my "4-tortilla recipe" this evening). I'll post the guacamole recipe tomorrow. Enjoy!
Grilled Beef Fajitas w/ Chipotle Lime Marinade w/ Grain-free Tortillas
Ingredients:
For the fajitas:
2 pounds skirt steak
2 large cloves garlic, coarsely minced
3/4 teaspoon roasted ground cumin
1/2 - 3/4 teaspoon ground chipotle chile
1/2 - 1 teaspoon kosher salt
1/2 teaspoon freshly ground black pepper
Juice of 2 - 3 limes
Zest of 1 lime
1/4 cup olive oil
Toppings of choice: grilled or sauteed bell peppers or onions, salsa, avocado, sour cream, etc.
Grain-free tortillas, optional (recipe below)
For the tortillas (makes 1 8-inch tortilla):
1/4 cup egg whites or Egg Beaters
2 tablespoons blanched almond flour
2 teaspoons ground golden flax
1 teaspoon finely grated Parmesan
Dash of sea salt
Generous dash of ground chipotle chile (or seasoning of choice such as smoked paprika, etc.)
Directions:
For the fajitas:
Place steak and garlic in a large (gallon size) Ziploc type bag. In a small bowl, whisk remaining ingredients together (cumin, chipotle, salt, pepper, lime juice, zest and olive oil) and pour into bag with steak. Seal the bag, removing as much air as possible; massage the bag to distribute all the marinade throughout the meat. Refrigerate at least one hour or up to overnight. Grill on a medium-hot grill for approximately 4 minutes on each side; remove and let rest for about 5 to 10 minutes. Slice the beef thinly against the grain. If desired, serve on a grain free tortilla. Top with your favorite grilled or cooked veggies and other toppings of choice.
To make the tortillas:
Whisk all ingredients together in a small bowl to form a smooth, thin batter. Lightly spray a 10-inch non-stick skillet with olive oil spray and heat over medium-high heat. Pour batter into hot skillet, tilting the pan and using a circular motion to evenly distribute the batter in the bottom. Cook for 1 to 2 minutes until very lightly browned and cooked around edges. Carefully loosen and flip using a rubber spatula; cook for another 1 to 2 minutes. Serve and fill with your favorite fajita, taco or sandwich fixings.
*Note: To make 4 tortillas, use the following amounts: 1 cup egg whites/egg substitute, 1/2 cup blanched almond flour, 2 tablespoons plus 2 teaspoon of ground golden flax, 4 teaspoons finely grated Parmesan, 1/4 teaspoon salt and 1/4 teaspoon seasoning (or to taste). Pour approximately 1/4 cup of batter in hot skillet to make each tortilla.
![]() |
| This is why I make sturdy tortillas -- I always over-stuff them! |
Grilled Beef Fajitas w/ Chipotle Lime Marinade w/ Grain-free Tortillas
Ingredients:
For the fajitas:
2 pounds skirt steak
2 large cloves garlic, coarsely minced
3/4 teaspoon roasted ground cumin
1/2 - 3/4 teaspoon ground chipotle chile
1/2 - 1 teaspoon kosher salt
1/2 teaspoon freshly ground black pepper
Juice of 2 - 3 limes
Zest of 1 lime
1/4 cup olive oil
Toppings of choice: grilled or sauteed bell peppers or onions, salsa, avocado, sour cream, etc.
Grain-free tortillas, optional (recipe below)
For the tortillas (makes 1 8-inch tortilla):
1/4 cup egg whites or Egg Beaters
2 tablespoons blanched almond flour
2 teaspoons ground golden flax
1 teaspoon finely grated Parmesan
Dash of sea salt
Generous dash of ground chipotle chile (or seasoning of choice such as smoked paprika, etc.)
Directions:
For the fajitas:
Place steak and garlic in a large (gallon size) Ziploc type bag. In a small bowl, whisk remaining ingredients together (cumin, chipotle, salt, pepper, lime juice, zest and olive oil) and pour into bag with steak. Seal the bag, removing as much air as possible; massage the bag to distribute all the marinade throughout the meat. Refrigerate at least one hour or up to overnight. Grill on a medium-hot grill for approximately 4 minutes on each side; remove and let rest for about 5 to 10 minutes. Slice the beef thinly against the grain. If desired, serve on a grain free tortilla. Top with your favorite grilled or cooked veggies and other toppings of choice.
To make the tortillas:
Whisk all ingredients together in a small bowl to form a smooth, thin batter. Lightly spray a 10-inch non-stick skillet with olive oil spray and heat over medium-high heat. Pour batter into hot skillet, tilting the pan and using a circular motion to evenly distribute the batter in the bottom. Cook for 1 to 2 minutes until very lightly browned and cooked around edges. Carefully loosen and flip using a rubber spatula; cook for another 1 to 2 minutes. Serve and fill with your favorite fajita, taco or sandwich fixings.
*Note: To make 4 tortillas, use the following amounts: 1 cup egg whites/egg substitute, 1/2 cup blanched almond flour, 2 tablespoons plus 2 teaspoon of ground golden flax, 4 teaspoons finely grated Parmesan, 1/4 teaspoon salt and 1/4 teaspoon seasoning (or to taste). Pour approximately 1/4 cup of batter in hot skillet to make each tortilla.
Tuesday, April 8, 2014
Chicken-Apple Sausage & Sprouts -- My Kind of Fast Food!
This evening I made one of my favorite kinds of "fast food". I made Chicken-Apple Sausage & Sprouts using Aidells Chicken & Apple Smoked Chicken Sausage that I sliced and lightly stir fried along with a slightly over one pound of very lightly steamed baby brussels sprouts (I steam them in a tiny bit of water for about 3 to 4 minutes in the microwave before stir-frying with the sausage). It is such a simple meal that can be put together in just minutes and the combination of the smoky-sweet flavor of the sausage combined with the earthy and faintly bitter flavor of the sprouts just go perfectly together. Toss in a bit of butter and it's almost magical! Brussels sprouts are one of those types of vegetables that people either love or hate...or think they hate. Overall brussels sprouts receive a bad rap...but it isn't THEIR fault...it's more often than not the cook's fault (our mothers tended to boil them to death) so they morphed into little dull green stinkballs instead of the bright green beautiful little jewels they really are.
I find that many folks (including myself) that never cared for boiled brussels sprouts...absolutely love them when tossed with a little olive oil, salt and pepper and then roasted in the oven until their nutty flavor emerges. They are also delicious when lightly steamed (in very little water...no bathing allowed for these guys) and then either tossed with butter, or better yet tossing the lightly steamed sprouts into a skillet with some butter and stir frying them for a little bit until very lightly bronzed. Almost every time I post a meal or recipe where brussels sprouts are featured...I get comments like "yuck"..."ewww"....or "I hate brussels sprouts"...LOL. They are such controversial little green devils! While I was never much of a brussels sprouts fan before...I am a B.S. lover now! ;-) I snapped a few photos below of my simple dinner as well as a couple photos of the emerging spring flowers in my yard (viburnum and coral bells azalea). If you want the easy peasy recipe for my dinner, here is a link to this recipe where I also added in some red cabbage, too. Just omit the red cabbage and you will have tonight's meal...or better yet, if you have red cabbage in your fridge, toss some in, too! Here's the link to the recipe: Sausage & Sprouts. Enjoy!
P.S. -- Did you know that in the word "Brussels sprouts" that the correct spelling includes the "s" at the end of brussels? Many people mistakenly think that they are "brussel sprouts" (without the "s"). They are named after Brussels, a city in Belgium. Now, as to whether or not you should capitalize the "B" in brussels is a whole different story. Some experts say yes and others say no, it's not necessary. Personally, I have decided to just keep it "low key" and lower case! ;-)
Monday, April 7, 2014
Sweetened Condensed Coconut Milk (Sugar Free & Low Carb) -- It's a Dessert Fiesta!
I first created this recipe for Sweetened Condensed Coconut Milk back in March of 2013 when I was working on creating my recipe for Absolutely Magical Cookie Bars. Here are a few of the other recipes I've made using the sweetened condensed milk. I've placed the links to the recipes underneath each of the photos (click on them to take you to the recipe). If you are lucky, you can pick up Swerve locally at your supermarket (they are carrying it in more locations now; my Whole Foods and Sprouts carry it) or you can order it from Amazon here: Swerve.
![]() |
| Rich and thick Sweetened Condensed Coconut Milk (makes 2-1/2 to 3 cups) |
![]() |
| Key Lime Pie w/ Almond Coconut Crust |
![]() |
| Seedy Power Bars |
![]() |
| Grainless-ola Bars |
![]() |
| Lemon Coconut Chiffon Fluff w/ Toasted Coconut Chips (no bake) |
![]() |
| Chocolate Hazelnut Cookie Bars |
![]() |
| Magical Cookie Bars |
![]() |
| Chocolate Pecan Pie |
I hope you find this recipe for sugar free Sweetened Condensed Coconut Milk helpful to you in assisting your recreation of some of your favorite recipes that use the regular (sugar and carb laden) sweetened condensed milk. The recipe makes 2-1/2 to 3 cups (depending on how long you reduce it). You can easily cut it in half for most recipes (using only 1 can of coconut milk and halving the other ingredients), but you may find that you like making the larger batch to make other recipes with, too. It takes a little while to make (about 45 minutes) but is so worth it. If a slightly thicker condensed milk is desired, you can add a pinch of xanthum gum (literally, just a pinch using your thumb and forefinger) and whisk that in during the last 5 minutes of cooking. With this recipe, the possibilities of low carb, wheat free, sugar free desserts you can recreate will be endless. It uses very few ingredients and is very easy to make. The recipe for the Sweetened Condensed Coconut Milk and a couple photos are below. Enjoy!
![]() |
| Rich and thick Sweetened Condensed Coconut Milk (makes 2-1/2 to 3 cups) |
Sweetened Condensed Coconut Milk - Sugar Free & Low Carb
Makes approximately 2-1/2 cups
Ingredients:
2 (14-ounce) cans unsweetened coconut milk (I like Native Forest organic)
2 tablespoons butter
1 teaspoon vanilla extract
Stevia drops, optional (if additional sweetness is desired)
Directions:
Add coconut milk to a small heavy saucepan and stir in Swerve (or sweetener of choice), butter and vanilla. Bring to a boil over medium-high heat. After milk comes to a boil, reduce heat to low-medium and simmer, stirring and whisking frequently for about 45 minutes until reduced by almost half. Taste for sweetness. If additional sweetness is desired, add liquid stevia drops, additional Swerve, (or other sweetener of choice) until desired sweetness is achieved. Makes approximately 2-1/2 cups of sweetened condensed coconut milk. Cool before using in recipes. Refrigerate any unused portion.
*Note: For a dairy free version, substitute coconut oil in place of butter. If additional thickening is desired, whisk in a pinch or two of xanthum gum; cook on low for an additional 5 minutes, whisking frequently.
Add coconut milk to a small heavy saucepan and stir in Swerve (or sweetener of choice), butter and vanilla. Bring to a boil over medium-high heat. After milk comes to a boil, reduce heat to low-medium and simmer, stirring and whisking frequently for about 45 minutes until reduced by almost half. Taste for sweetness. If additional sweetness is desired, add liquid stevia drops, additional Swerve, (or other sweetener of choice) until desired sweetness is achieved. Makes approximately 2-1/2 cups of sweetened condensed coconut milk. Cool before using in recipes. Refrigerate any unused portion.
*Note: For a dairy free version, substitute coconut oil in place of butter. If additional thickening is desired, whisk in a pinch or two of xanthum gum; cook on low for an additional 5 minutes, whisking frequently.
Check out the hundreds of FREE eBooks: Free Grain-Free eBooks
Subscribe to:
Posts (Atom)