
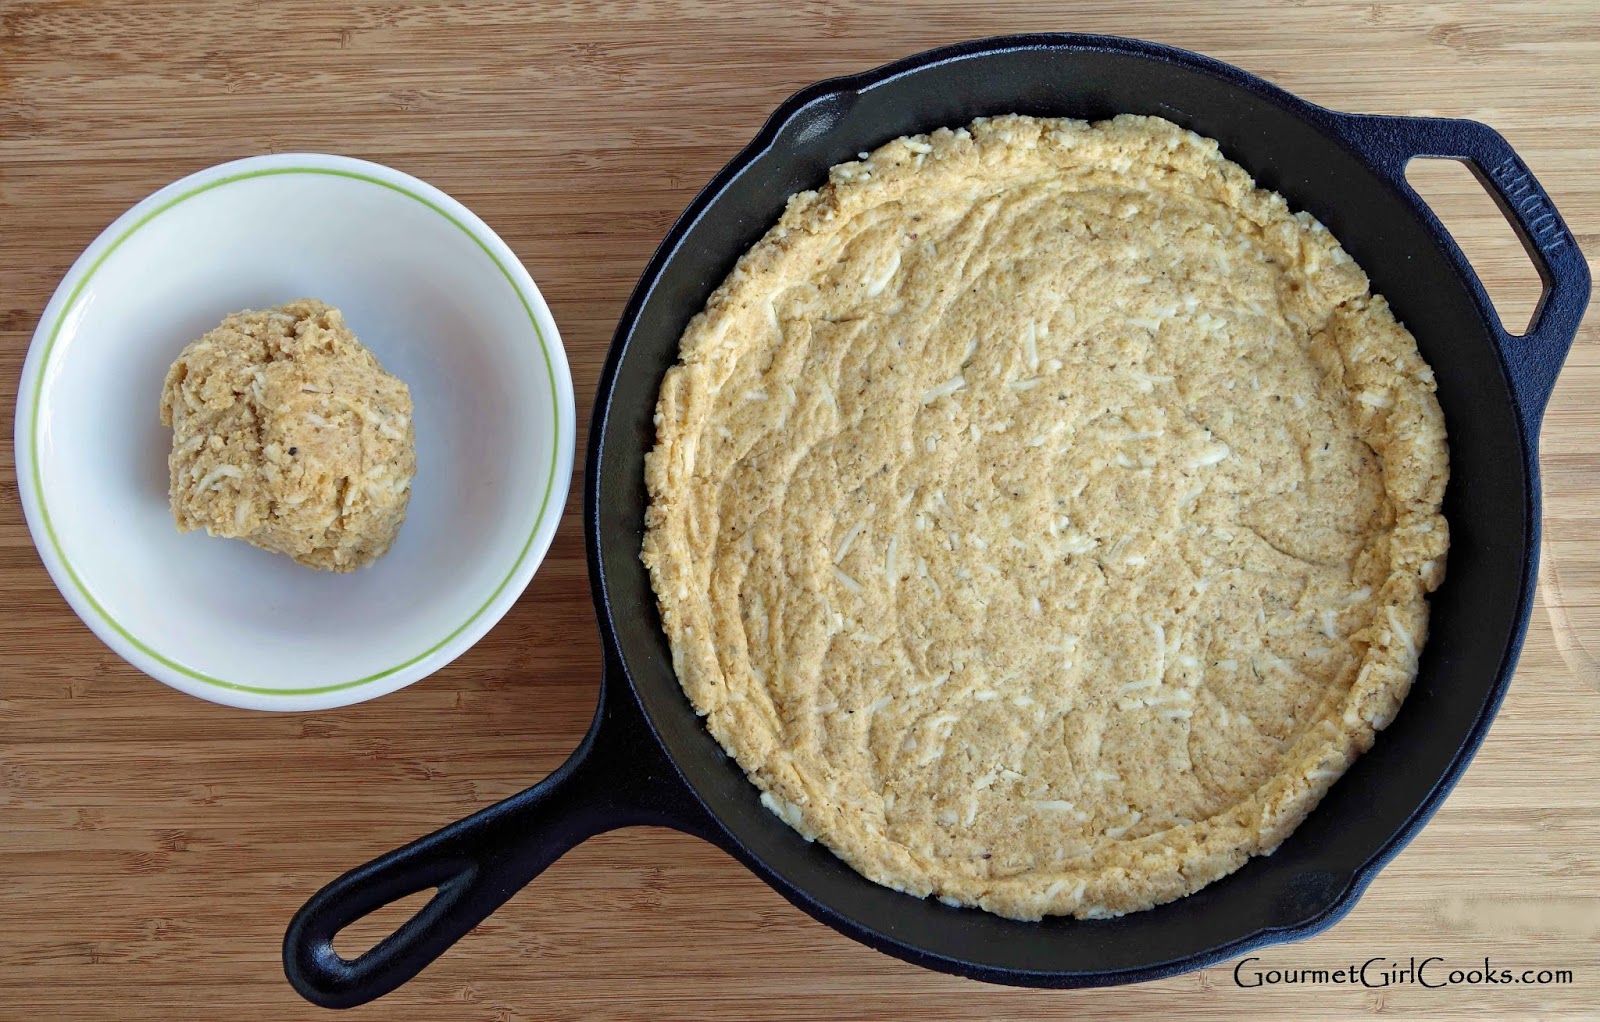
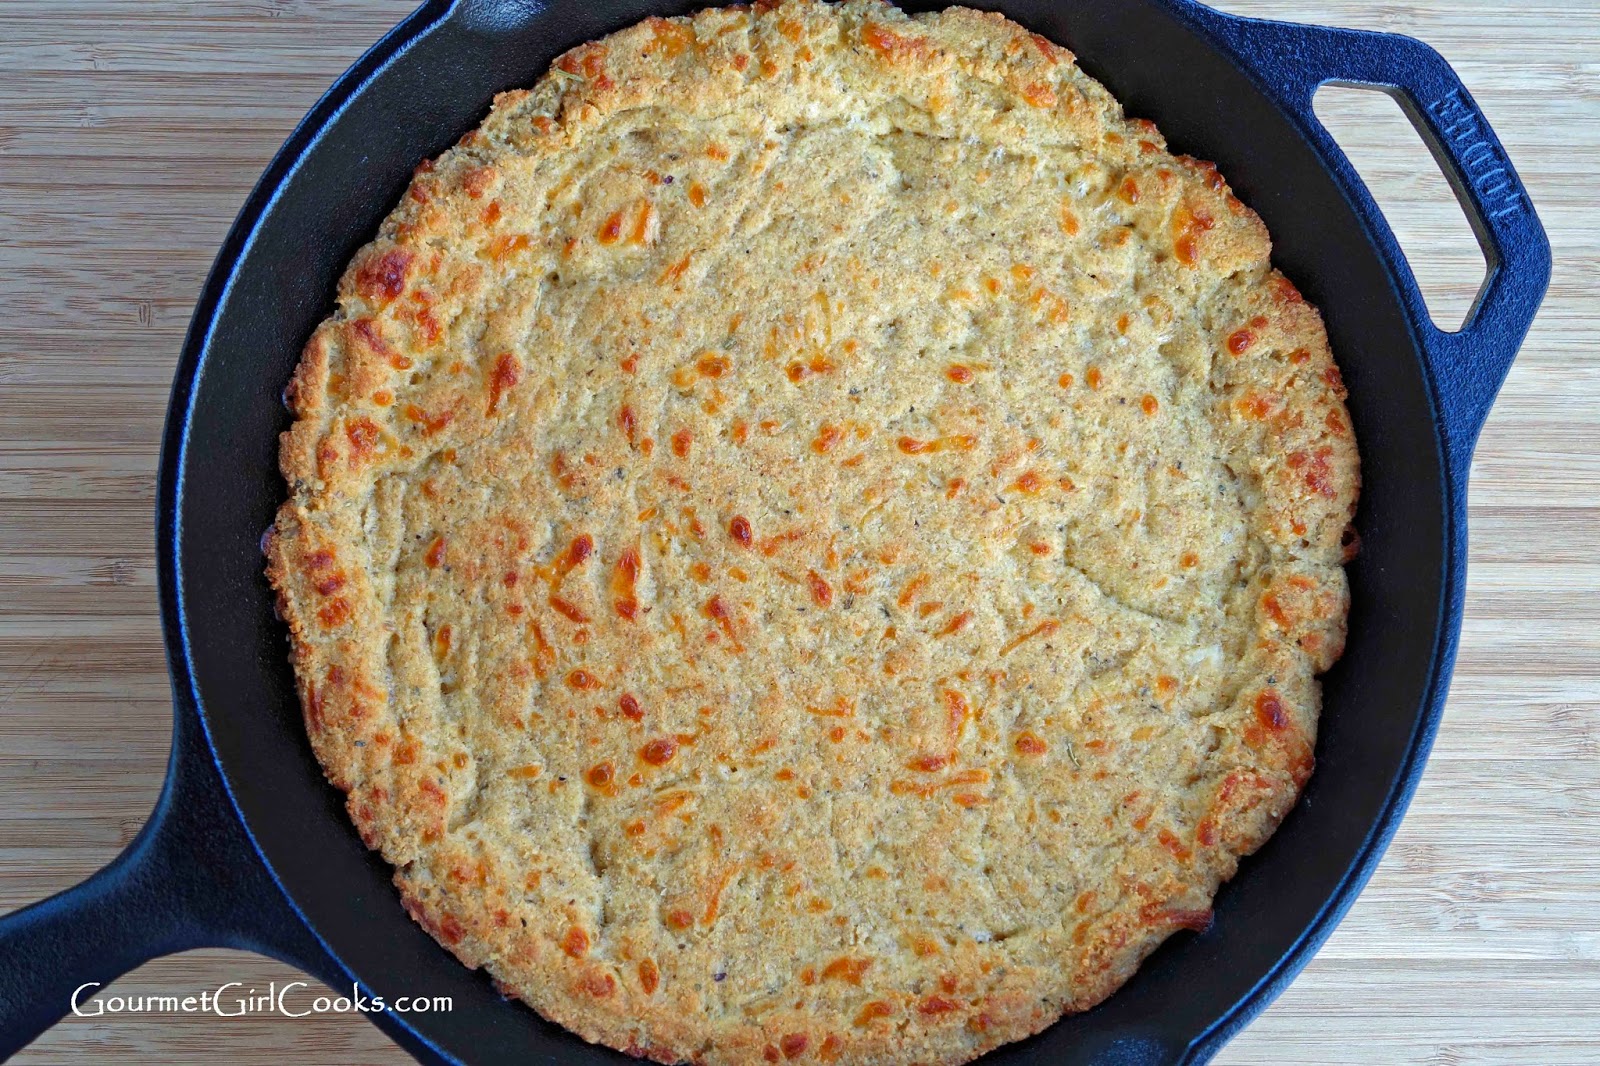
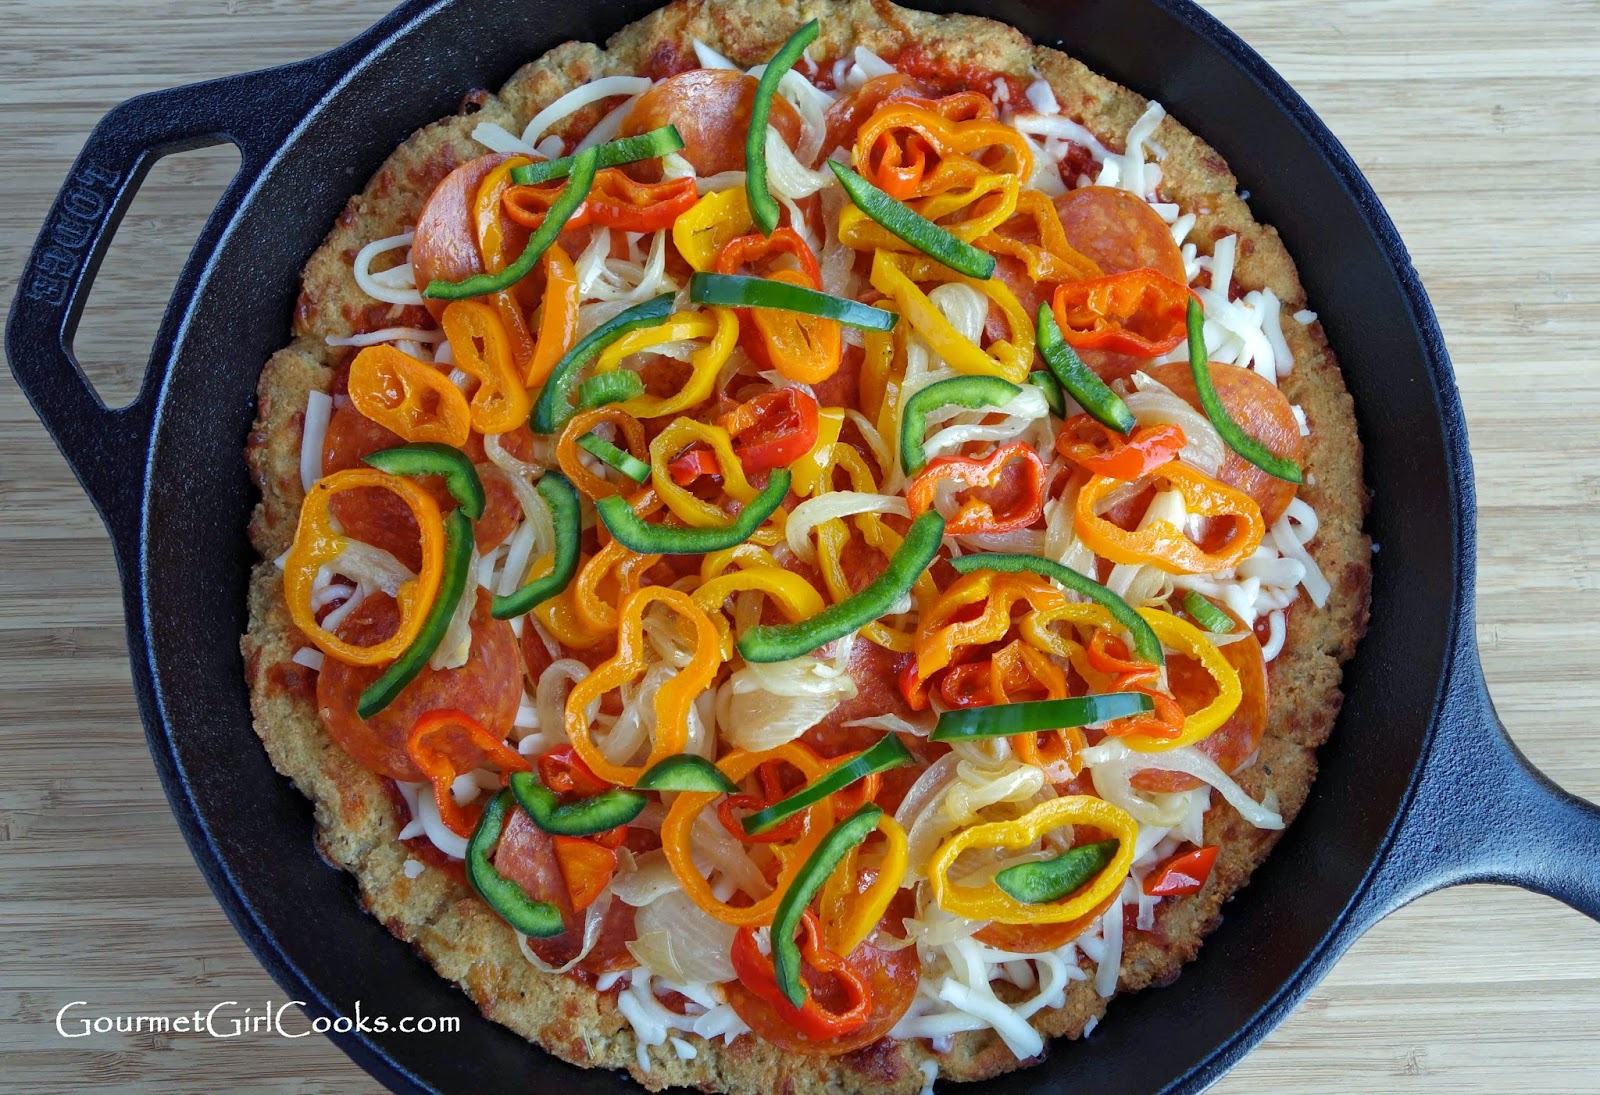
I needed to make more of a "bready" crust which meant I couldn't use my regular pizza crust recipe. I wanted it to be kinda-sorta like my Bagel Squagel, Bagel Sticks and Bagel Bread recipe...but not exactly. So, I came up with a nice dough that was easy to spread out in the skillet and it rose nicely and became fluffy, too. I was very pleased with how it turned out. I pre-baked the crust in my skillet until almost done and then added the toppings and baked it until done. I was a bit nervous trying this pizza out in a brand new cast iron skillet because from everything I've read, some foods (like breads) tend to stick more easily to a new skillet until it has been used repeatedly and become well seasoned. I just liberally greased the skillet with coconut oil (not enough to saturate the crust) to make sure it wouldn't stick. As my pizza baked, I kept my fingers crossed that I would be able to actually take a slice out of the pan. It worked amazingly!!! So, I did a double "happy dance"...both for my successful maiden voyage using cast iron and second for my first attempt ever at making a Chicago style deep dish pizza. My deep dish pizza crust recipe makes enough dough for a 12-inch pizza. Since I only used a 10-1/2-inch skillet, I had about a tennis ball sized piece of dough left. I will use it for something else this weekend. If you've missed enjoying deep dish pizza since going grain free...you will enjoy this pizza recipe. This isn't just "kind of like" deep dish pizza dough...it IS deep dish pizza dough. I put pepperoni, onion, red, yellow, orange and green peppers on mine. I snapped a few photos below as well as the recipe for my wheat, grain and gluten free Chicago Style Deep Dish Skillet Pizza. Enjoy!


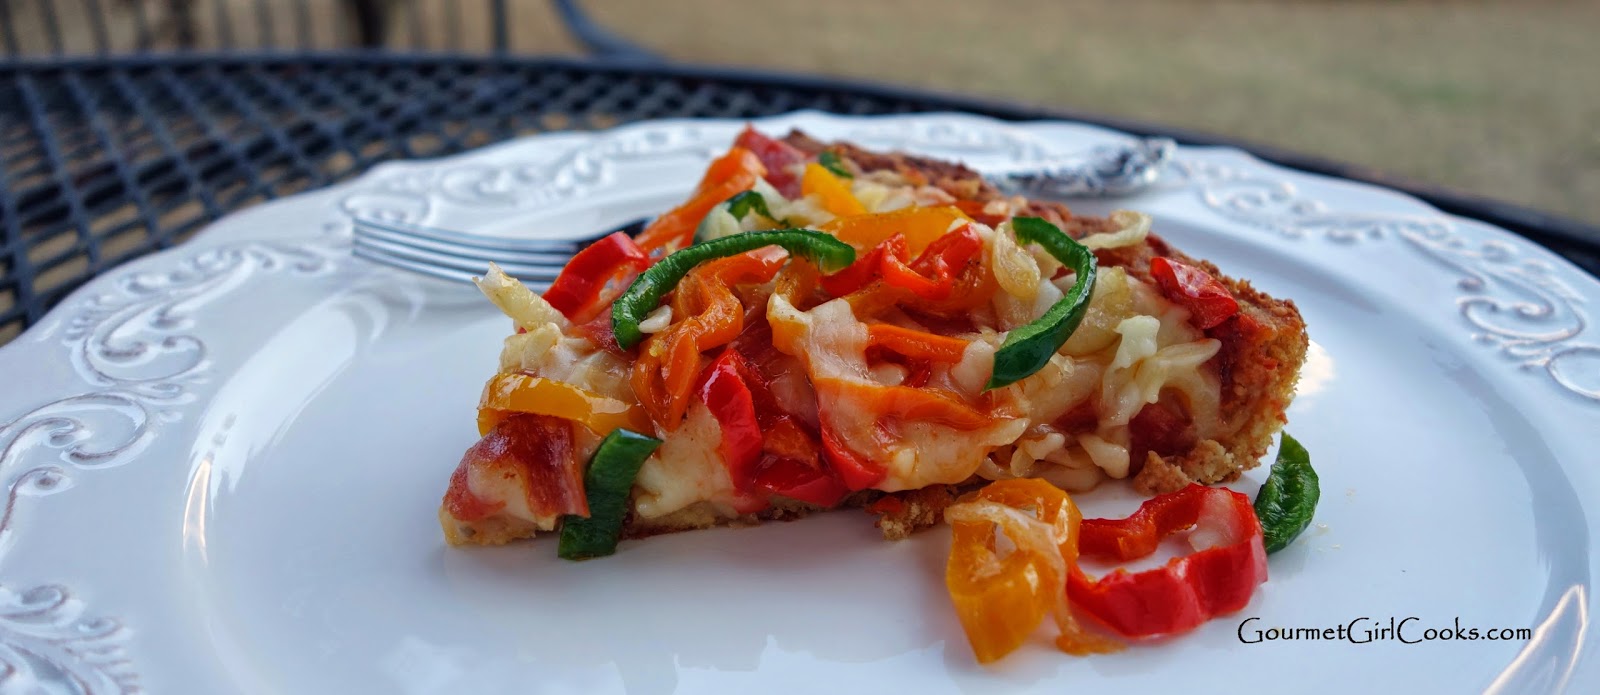


Chicago Style Deep Dish Skillet Pizza
Ingredients:
For the Crust
3 tablespoons coconut flour, sifted
1/2 cup blanched almond flour
3/4 cup golden ground flaxseed
2 teaspoons baking powder
1/2 teaspoon baking soda
1 teaspoon Italian seasoning
1/2 teaspoon sea salt, or to taste
1/2 teaspoon onion powder
1/4 teaspoon garlic powder
1 cup shredded mozzarella cheese
1/4 cup finely grated Parmesan cheese
3 large eggs, lightly beaten
1/4 cup PLUS 2 tablespoons buttermilk
3 tablespoons olive oil
For the Toppings, Etc.
3/4 to 1 cup pizza sauce, or to taste
1-1/2 to 2 cups shredded mozzarella cheese
Olive oil or coconut oil for greasing pan
Toppings, as desired (pepperoni, cooked sausage, peppers, onions, cooked mushrooms, etc.)
Directions:
Preheat oven to 375 degrees F. In a medium sized bowl, mix first 9 ingredients together with a whisk to help break up any lumps; stir in 1 cup mozzarella cheese and Parmesan.
Add eggs, buttermilk and olive oil; mix until combined and a dough is formed. Dough will be thick and slightly sticky. Generously grease a 10 to 12-inch cast iron skillet with olive oil or coconut oil (an ovenproof skillet can also be used). Using a rubber spatula sprayed lightly with oil, place the dough in the center of the baking pan and begin working your way pressing the dough out toward the edges, about 3/4 to 1-inch thick spreading the dough up the sides of the pan about 1-inch high.
Bake for 20-25 minutes, or until light golden brown. Remove from oven and add sauce, mozzarella, and desired toppings. Bake an additional 8 to 10 minutes or until the cheese is melted. If additional browning is desired, run under broiler for a few minutes until bubbly and cheese is lightly browned. Carefully remove from oven and let sit about 5 to 10 minutes for cheese to set. Cut into wedges and serve. If using a nonstick ovenproof skillet, adjust baking time as necessary (it will heat more quickly than cast iron), then slide finished pizza onto a cutting board before slicing so you don't damage your pan.
*Note: Pre-cooking vegetables containing lots of moisture like mushrooms, spinach, etc. will help prevent the pizza from becoming soggy.
36 comments:
This looks SO GOOD! Have to try it really soon!
This crust looks amazing, I will have to give it a try! Thank you so much for posting these lovely recepies....
Hi George! Thank you. I can attest that it's good reheated, too. I just had a piece for dinner tonight and it was good. Hope you enjoy it and thanks! :-)
Hi Anonymous -- I hope you enjoy it if you decide to make it. You are more than welcome! :-)
Hi GGC,
I was just about to comment when we got a *furious* thunderstorm and I had to shut everything down! This pizza looks amazing and it will give me another reason to use my 10" iron skillet. I use my 8" all the time! I have a 12" which I haven't used yet ... it's so *heavy*! But Kroger had such a great sale on Lodge a while ago that I couldn't resist so I ended up with all three.
Great idea using the extra dough for bread sticks. I use your "regular" pizza dough for crackers. Yum!
Hi CyberSis!
Wow...a thunderstorm is what you think about when the weather is warm. At least you didn't have thunder snow! When I got this 10" skillet, I almost got the 8-inch too but decided to wait and test this one first. Not sure what I will make in it next! What is your favorite thing to make in your cast iron -- the usual stuff or have you tried baking with it, etc.?
Has your skillet become smoother with use? Some people say they are rough and pebbly but mine doesn't seem to be like that. It isn't perfectly smooth like a nonstick pan, but I was happy when the first item I used it for, it turned out great.I was afraid it might burn the crust but it didn't at all. Last question (I promise)...LOL. What kind of oil do your typically re-season your skillet with? I used coconut oil but don't know if that is the right kind to use. Glad your storm has passed! :-)
Hi GGC,
I use the 8" skillet almost exclusively for frittatas ... well, I *should* say my hubby uses it for that. I've also used it for scrambled eggs and for caramelizing sliced onions. So far I've made fried eggs, pancakes, and bacon in the 10" and an omelet or two. The only baking I've done in it is your Irish soda bread, but I'd like to try more baked stuff (like the pizza!)
The surface of my pans is a little grainy. It doesn't seem to cause the food to stick, though. I read somewhere that the older Lodge cookware is very smooth and the more recently produced cookware is somewhat rough. I don't remember the time-frames that were given, but if you have some that was passed down from your grandmother, it's likely smooth, whereas what you buy now-a-days will have a rough surface.
I'm certainly no expert, but I guess one of the "tricks" is to not disturb the food until it's "set" on the bottom, at which point it should release easily from the pan. Another trick is to use the pan frequently ... it's supposed to become more non-stick with use. And just rinse it out with plain water. If anything should stick you can soak it for a bit and use a nylon scrubber or natural bristle brush on it, but that really shouldn't be a problem. You're not supposed to let it air-dry so after wiping with a dish towel I set the pan on the burner on med-low for a few minutes just to heat it up enough to make sure it's *really* dry and to melt a little coconut oil. I pick some up with a salad fork and carry it all around the surface, spreading it and wiping the excess off with a paper towel. (Don't burn yourself!) After it cools down I stand it on its edge in the cupboard. I'm sure that if you ask 50 different people how they use and care for their c/i cookware you'd get 50 different responses. :-)
I haven't had mine long enough to see if it gets smoother with use. It's supposed to build up a layer of "seasoning" so you'd think that it would eventually get smoother. I read someone's comment "somewhere" that she uses a thin layer of melted Crisco before putting the pan away. That's the ONLY thing she uses Crisco for, BTW. She said it makes for a really nice cooking surface. Hmm ... sounds like it might be a good idea but somehow I haven't been able to talk myself into actually buying a can of Crisco! I have a small jar of LouAna that I use for the skillet, not the more expensive virgin coconut oil. The info on the LouAna website doesn't disclose how they process it so I haven't been eating it or cooking with it; I've only been using it for seasoning the skillet.
The Lodge web site has some pretty interesting info and helpful hints. http://www.lodgemfg.com/ And there are cast iron blogs galore!
Yes, no thunder-snow this time! It was a *very* intense storm cell, though. It sounded like hail against the windows, but it was just rain, thank goodness! They had two *inches* of hail not far from here. Trees uprooted, too, and power outages. So glad that stuff stayed to the north of us ... whew! Yes, it's crazy to have that type of storm while the temps are still so cool. I guess we'll just have to expect the unexpected these days!
Hi CyberSis! Thanks for all the information. I did read somewhere about the skillet becoming smoother surfaced with use and that you could use metal utensils to remove food from it, which made it smoother over time. The only thing I'm not really sure about is if you are supposed to season the exterior of the pan, too. I did just to be safe but need to do some research about that. I have a gas stove and would hate to put it on the stove one day and have a grease fire with my skillet blazing...LOL. Thanks again for the info - I will check out the Lodge site. :-)
Hi GGC,
I read somewhere that since Lodge cookware is already "pre-seasoned" you need to oil only the interior after each use. I'm thinking also that you might end up with a greasy mess on your stove or oven if you greased up the exterior surfaces. The fire aspect you mentioned is something to consider, too. The Lodge web site says not to fill the pan more than 1/3 full of grease when deep-fat frying ... I'm thinking that's to keep the sizzling grease well away from the hot stove. So maybe we wouldn't want a greasy surface touching the burner, either.
It's just a bit of a learning curve, and I'm still learning. Still wondering what on earth I'm going to do with that *Very Heavy* 12" skillet, though. Oh, but it was such a good price! :-)
Thanks, CyberSis! I won't be oiling the exterior any more. Worst case scenario, my pan rusts on the outside and I have to buy a new pan versus having a kitchen fire and maybe burning the house down! LOL When I went to Kroger late this afternoon, I looked for Lodge and the store I went to had the 10 and 12-inch sizes. They didn't carry the 8-inch for some reason. The 12-inch doesn't sound a lot bigger but it sure does look significantly bigger AND heavier! I can totally relate to the "what am I going to do with this big heavy pan, but it was SUCH a good price" thought process! As I work on de-cluttering my house, I see a LOT of that thought process around me! ;-)
This looks amazing! So does it absolutely have to be made in a cast iron pan? If so, I'll have to get one!
Hi Darlene -- I would say NO, it shouldn't have to be only in a cast iron pan. You could use an ovenproof skillet, too (like I did/do with my "no-flip" pancakes). Just check on the bake time because it might cook more quickly in a lighter pan. If you decide you want to try cast iron, they are cheap -- around $15.00-ish for a 10-inch and you can pick them up at many grocery stores or Walmart, etc. You can also order via Amazon -- but make sure you get free shipping or the shipping would be more costly than the pan! I'm actually having a piece for lunch today. I can't eat more than 1 piece at a time -- have 2 pieces left for my next 2 days of lunch! :-)
We tried this last night, it was fantastic! Thanks so much for the recipe!
Thanks so much, Kathleen -- glad you enjoyed it! :-)
My 12-inch Lodge cast iron skillet is the most-used pan in my kitchen! I use Mark Bittman's method to make the easiest and best roast chicken. Preheat the oven to 400 with the rack in the lower third. When it's hot, put your skillet in the oven to heat for 10-15 minutes. Pat a 3 - 4 pound chicken dry with paper towels. Sprinkle generously with salt and pepper. When the skillet is hot, put the chicken in breast-side up. Roast for 45 - 60 minutes. (Time depends on the size of your chicken.) The hot skillet helps the dark meat get done faster so you don't have over-cooked breast meat waiting for the thighs to be done. It's genius!
P.S. This looks like your best pizza ever! I'm looking forward to trying it! :)
This recipe does look good. I'm going to try it. Black cast iron cookware is seasoned, so don't worry about the surface being nonstick for cooking. If it was not seasoned, it would be a gun metal gray color with a rough surface - I've had one of those. I had to season it myself by greasing it inside & out and heating for a long time in a very hot oven. It's black now, and becoming a better surface with each use. Just don't clean your pans with soap, soak them, or clean in a dishwasher. Just wipe them out with a wet cloth under running water, then place on a hot stove top burner for a bit to dry them out. Just a minute on medium heat will do -- then let them sit and cool off before storing. That's what my Mamma always did with her Mamma's pans that she inherited. I'll do the same when they're mine.
Hi there. I'm a new subscriber and just wanted to "weigh-in" though a little late. on the cast iron skillets. I think that you'll be glad that you found them. I now have skillets used by my mother, my grandmother and great grandmother. I have used them daily since I started cooking many years ago and there are many recipes that I just wouldn't attempt without them. The crust on the cornbread I used to make BD (before dieting) had a crust that would be hard to duplicate I believe, and the large 12 inch (- though heavy-) cooks like a griddle, but better I think, for meats like fajita or chicken breasts. Just be careful and put everything in there DRY because it will definitely sizzle otherwise. I put in the meat and pile it with onions, peppers, mushrooms and whatever applies and cover it will a lid till the pan juices form.
The trick with cooking anything on cast iron, in my opinion. is to use just enough oil to coat the pan, in most cases, and get the surface hot enough that a drop of water will sizzle on it. At that point I have really never had anything stick on it - not even scrambled eggs. Of course mine are well seasoned and if you coat it with oil before putting it away, just use wesson oil or something and wipe it down with the oil ...otherwise you could get a gooey crust in it if you store it too oily.
Basically, by putting the light coating of oil on the pan and heating it well before cooking you are seasoning it every time you use it. Of course, I am speaking of the older kind and have no experience at all with the newer ones so I hope some of this applies.
Thank you so much for sharing your recipes, I am enjoying them immensely and sharing them often.
Hi Nana's Little Kitchen! Welcome -- so glad you found me. Thanks so much for the great tips about cast iron. How lucky to have the same skillets from your grandmother and great grandmother! From everything I've read, it sounds like the older ones are the best and are even collectible. People specifically look to buy the older ones. I am trying to find as many ways possible to use my skillet for things I can. So far, I love it and would love to have it all worn down and smooth some day like your old skillets. So glad you are enjoying the blog and recipes. Thanks so much again for the tips! :-)
Hi B,
Thanks so much for the cast iron info. I learned something from you already. Since I cooked fish (salmon) in mine this evening, I wasn't sure if I needed to wash it with more than water -- so I added 1 drop of soap to it to cleaning with hot water. I guess I won't do that any more. I did re-oil it though just in case I removed any of the oils. Thanks for the tips! :-)
Hi Kath! Thanks -- I hope you enjoy the pizza. Wow, that chicken recipe sounds so simple AND good! I will definitely give that a try one day. I'm assuming it gets roasted uncovered and open? It almost sounds too easy but I bet its delicious. I will definitely be making that one! Thank you! :-)
Hi Kathy,
I've been following you for a few weeks now and wanted to let you know that I've tried numerous of your dishes and they are fabulous!! I just finished making this pizza, but did not see that all of the dough is not used, so the crust and not fully cooked…..boo for me, other than that (and I'm thinking for reheating in the toaster, it should all cook up nicely), the pizza is very good. I topped it with my homemade sauce, pepperoni, mozzarella and a few spoonfuls of ricotta cheese….yum-o!!! Thanks for your beautiful site :)
Debbie Cozzetto
Hi Debbie,
Sorry you missed that (about it not using all the dough) -- I've made breadsticks with the leftover dough once -- still have the rest of my dough in the fridge to make something else with this week. Glad you are enjoying it...and next time you will know that you have an extra ball of dough to make something else with! :-)
This was a very good dish! I have been following you a little over 4 or 5 months now! Thanks for creating this blog!
Do u know the net carbs or protein for this?
Here's a site I use to calculate recipes. You can use it to do the entire recipe (including toppings you add and amounts, etc.) and then divide between your servings. Hope this helps! :-)
http://caloriecount.about.com/cc/recipe_analysis.php
I have everything but the buttermilk:/ I have coconut milk and I have half and half. Is it ok to use one of those instead of buttermilk?
Hi Cyndi,
Yes you could sub one of the milks you have on hand and make your own buttermilk substitute with them by simply adding 1-1/2 teaspoons white vinegar OR lemon juice to your measuring cup, then fill to the 1/2-cup line. Let it sit 5 to 10 minutes and then use as buttermilk. The acidity helps with the rise and texture. :-)
Can you just cook it in the oven? I don't have a cast-iron pan can use the pizza pan?
Do you have a nutrition breakdown for the pizza crust recipe?
Hi Anonymous,
Here is the nutrition calculator I use. You can add it up and divide by the portion size you actually eat. http://www.caloriecount.com/cc/recipe_analysis.php
I believe Spark People and My Fitness Pal also have nutrition calculators as well. :-)
Hi Pattie,
Yes, you can use a pizza pan or even a round cake pan if you want it to be deep dish style. :-)
If you're going to give a shout out to Uno's which is good, but a global chain you need to give props to the DC chain with better pizza Armand's... as a kid we used to park our boats in old town (sailing camp) just to get the pizza. They had locations in DC/Montgomery county too (our summer camps would do pizza day there)... Sadly most are closed at the moment.
Hi Andrew,
Yes, they had good pizza too. Hadn't thought about them in years. I think they might still have a location in DC though. :-)
Can you substitute anything in place of the flax?
Finally found this recipe again...it's my FAVE low carb crust. Time consuming to mix up and several ingredients to have on hand BUT so worth it...it's fabulous and even better reheated in the oven second day...if you have left overs ;)
Thanks so much for sharing
Post a Comment