Tuesday, April 29, 2014

Deep Dish Pizza (Chicago Style) -- Low Carb, Wheat, Grain & Gluten-Free

This evening I was in the mood for my deep dish pizza. A couple of weeks ago, I created my first wheat and grain free Chicago Style Deep Dish Pizza. Traditional "Chicago Style" deep dish pizza has sauce on top rather than on the bottom...but the beauty of making it yourself means you can put it wherever you want to! So, being the rebel I am...I put my sauce on the bottom. The crust on this pizza is absolutely amazing. It is thick, bready and has a light texture rather than dense and heavy. This dough would make an amazing foccacia bread by adding herbs, cheese and some olive oil and maybe a few veggies. It's a dough that is versatile and can be used for a variety of uses. Tonight's pizza was topped with a little pizza sauce, provolone, mozzarella, pepperoni, oven roasted tomatoes packed in oil, cooked fresh mushrooms, diced red bell pepper and thinly sliced onions. When it came out of the oven, I topped it with sliced fresh basil. It was awesome! It is so thick and satisfying that one slice is all I can eat. It's a nice change of pace from my regular pizza crust. It reminds me so much of the deep dish pizza I used to get at Uno's Chicago Style Pizzeria. I snapped a few photos below. I made this pizza in my 10-inch Lodge cast iron skillet that I greased well with coconut oil. It is the perfect pan to make a deep dish pizza with. The pizza slices easily and comes out of the skillet beautifully. The link to the recipe is here: Chicago Style Deep Dish Pizza. Enjoy!


Monday, April 28, 2014

Crusted Cashew Chicken -- Wheat, Grain & Gluten-Free

This evening we are getting ready to be pounded with severe storms, hail and potential tornadoes for the next couple of days with rainfall as much as 5 inches predicted. We tried to remove most of the loose items in the backyard (like the umbrella on our table) that could become missiles if the storm pans out the way they say it will. 

I made a quick and simple meal this evening using a package of chicken cutlets. I made Crusted Cashew Chicken using the cashew meal I picked up a while back at Trader Joe's (they have the best price on cashew meal). Cashews are mild and naturally sweeter tasting than other nuts. I didn't want to over-season my cashew meal but wanted to give it some flavor since it's pretty neutral tasting. I added a little salt, onion powder, garlic powder, sea salt, cayenne and finally a bit of sweetener to enhance the natural sweetness of the cashews. I topped it with roasted cashews and a bit of finely diced red bell pepper and green onion to add a bit of Asian flair. We enjoyed it. It was simple and delicately flavored. I snapped a few photos and included the recipe below. Enjoy!


Sunday, April 27, 2014

Hot Dog Buns - Wheat, Grain & Gluten-Free

We've had a busy weekend working on lots of outdoor projects. We worked from early Saturday morning until late on Saturday and then all day long again today. We had to stick around the house a good part of the day Saturday because our new grill was scheduled for delivery (for the second time). The good news is that it actually was delivered this time! It didn't come until very late afternoon but we got a lot done since we were forced to stay at home. While we had hoped to "break-in" the new grill for dinner last night, we didn't because it was so late by the time it came and we wanted to have a chance to read through the brochures and instructions that came with it (and it poured down rain at dinner time tonight, so I just made pasta with yellow summer squash noodles when the boys came for dinner this evening). 

Since we were so exhausted last night, I just fixed some Applegate Organic Grass-Fed Beef Hot Dogs for dinner. Instead of grilling them, I just simmered them on the stovetop. One of the things I did inside the house while hubby was pressure washing our patio, sidewalks and driveway was try to make hot dog rolls to put our hot dogs in. Not because I "need" them...but simply to see if I could. They turned out great. I wasn't prepared for how they would spread out as they baked on a pan without any borders to hold the dough in place like the muffin top pan I use for my Sesame Seed Sandwich Buns. I simply regrouped and made 2 buns out of one little oblong loaf, giving me a total of 8 buns from the 4 small loaves the recipe yielded. These were more like a type of bun I used to buy many years ago -- I liked them so much better than traditional big fluffy hot dog buns. They were called "snuggles" and they were thinner and cradled the hot dog rather than trying to force it between 2 chubby pieces of bread like a traditional roll. I snapped several photos of the different stages of making the buns to help you understand what I'm talking about. Also, these loaves, as is, would make great sub rolls. This dough also makes awesome dinner rolls, too. I had enough dough leftover yesterday and used it to make a "test roll" with. I actually ate it tonight with my "pasta dinner." It was just like a regular dinner roll. Check out the photos and recipe below. Enjoy!  (P.S. -- there are a few garden photos and a snapshot of my new grill at the end of the recipe. Beware...many grill recipes and photos will be coming in the near future!)

Organic Grass-fed Hot Dog (nitrite/nitrate free), Grain Free Hot Dog Bun, Bubbies Sauerkraut and a Bubbies Dill Pickle
Before baking
Fresh out of the oven (note my "test dinner roll on the upper right")
Sliced in half and ready to make into "hot dog buns"

I cut a pocket in each half to create a snuggly hot dog bun to cradle the hot dogs

Friday, April 25, 2014

Chicken Salad Sandwich on a Sesame Seed Bun -- Wheat, Grain and Gluten Free

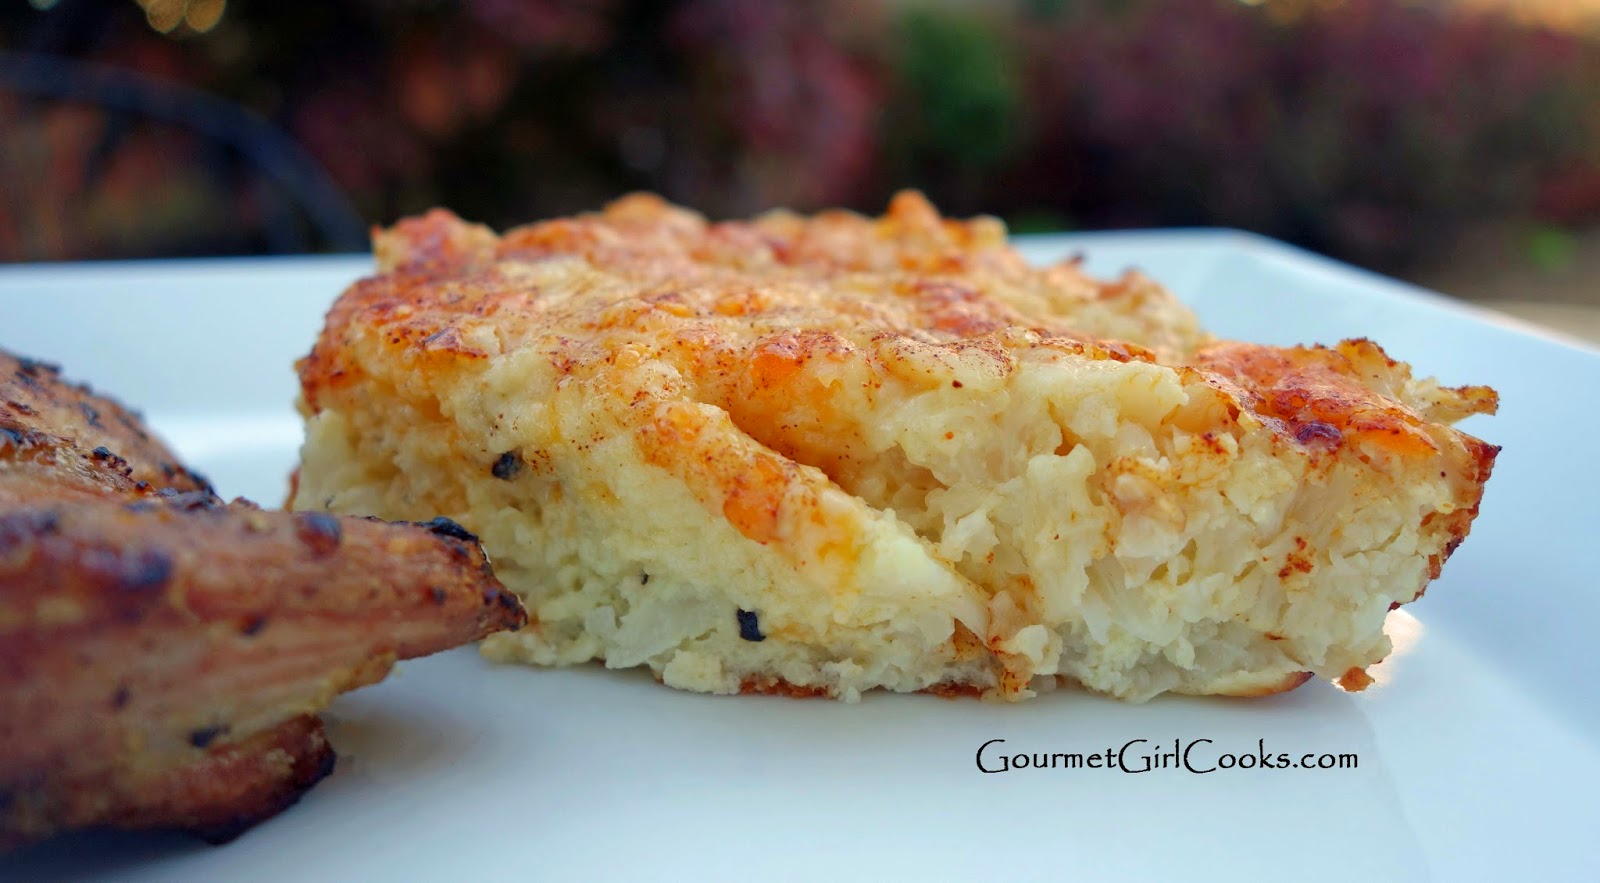
It was a gorgeous day here today -- absolutely beautiful, and we are expecting a beautiful weekend, too. We are supposed to have our new grill delivered tomorrow (for the 2nd time)...so hubby decided to cut the grass this evening for the first time to get the yard ready for grilling season! We may even get adventurous and try to pressure wash the patio, table and chairs tomorrow before it comes, too (we are such conscientious new grill parents, aren't we?). LOL This week just seemed extra long and I really didn't feel like doing too much for dinner. Last night hubby picked up a rotisserie chicken on his way home and I just steamed some fresh broccoli and we simply had chicken and broccoli for dinner. Neither of us were very hungry. So tonight, since I had plenty of leftover chicken and wasn't in the mood to spend too much time in the kitchen, I decided to make chicken salad sandwiches for dinner. I really love chicken salad. I had some leftover 
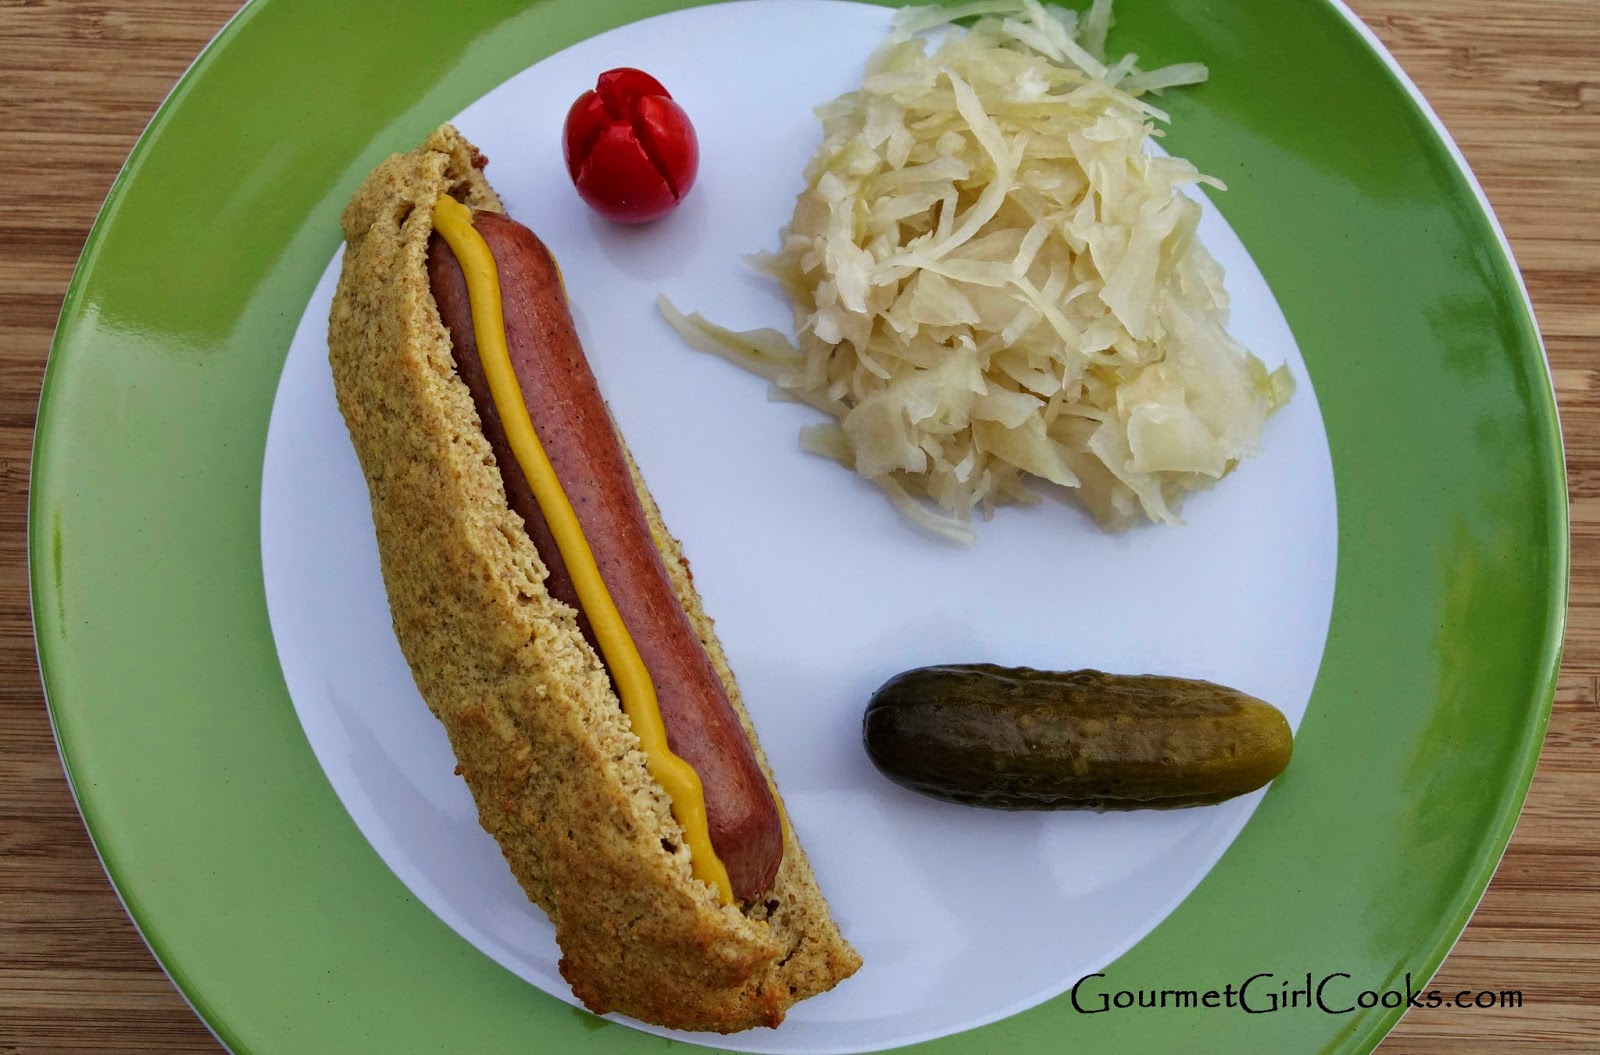
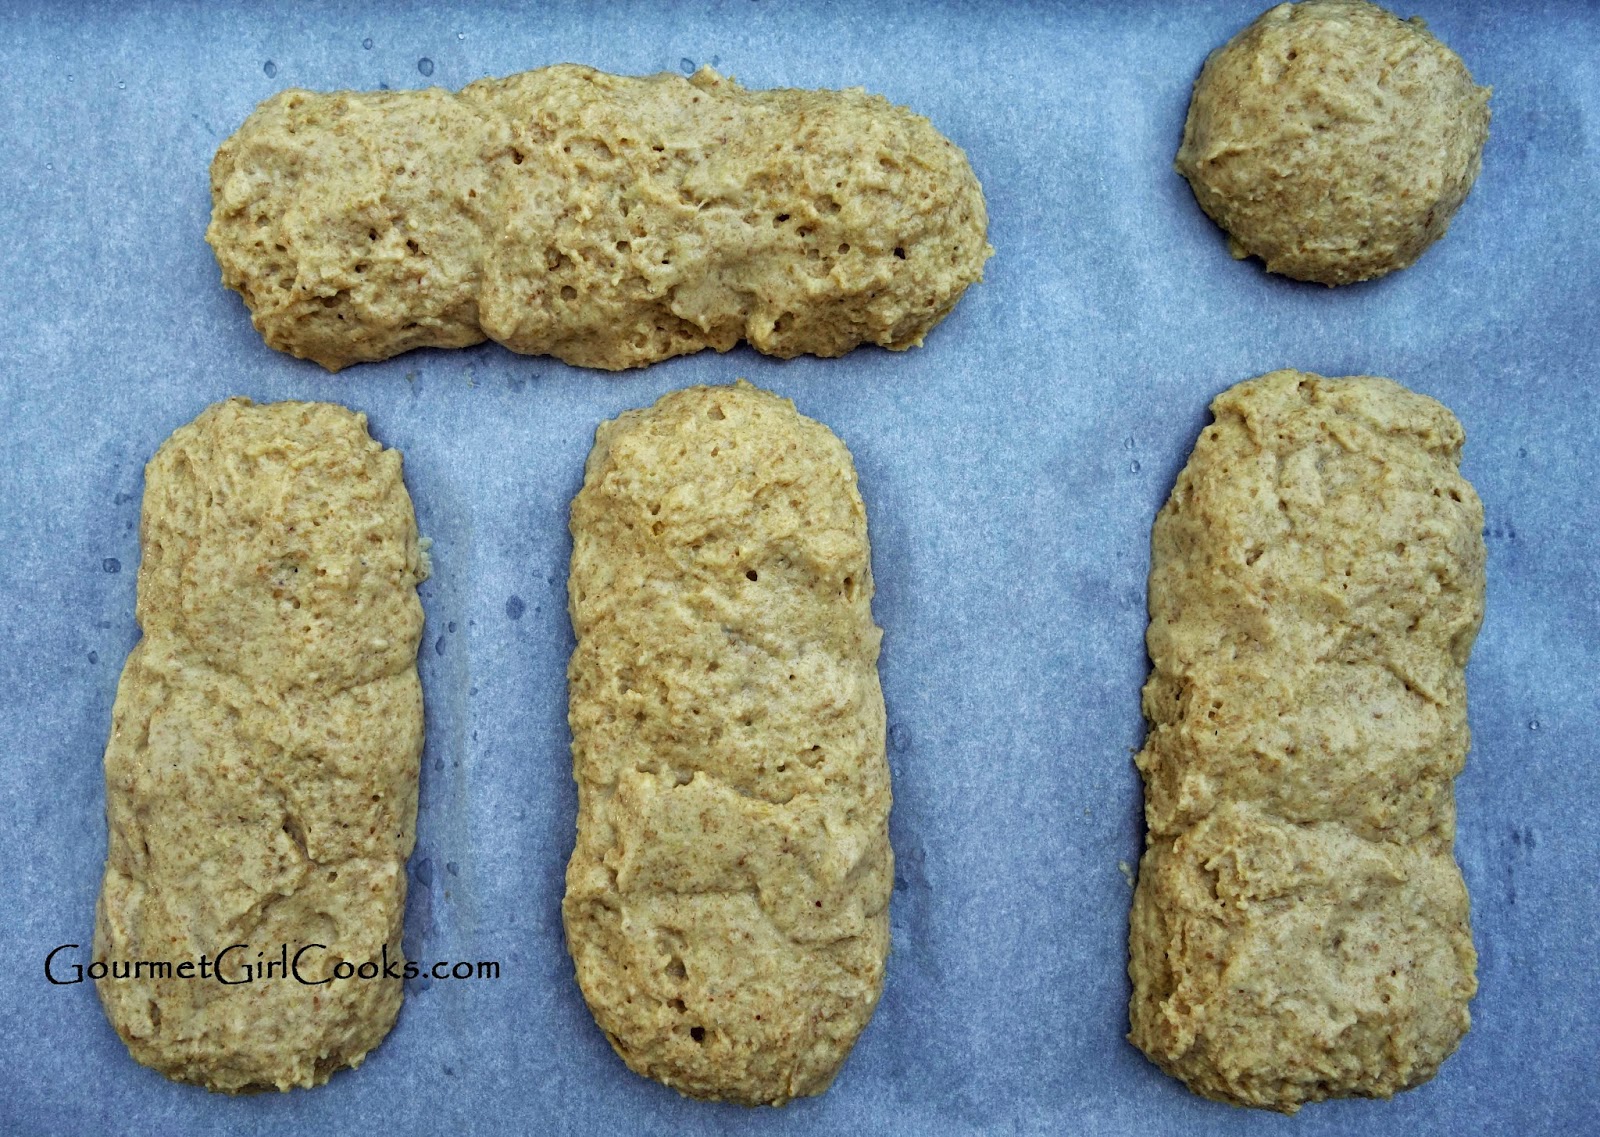
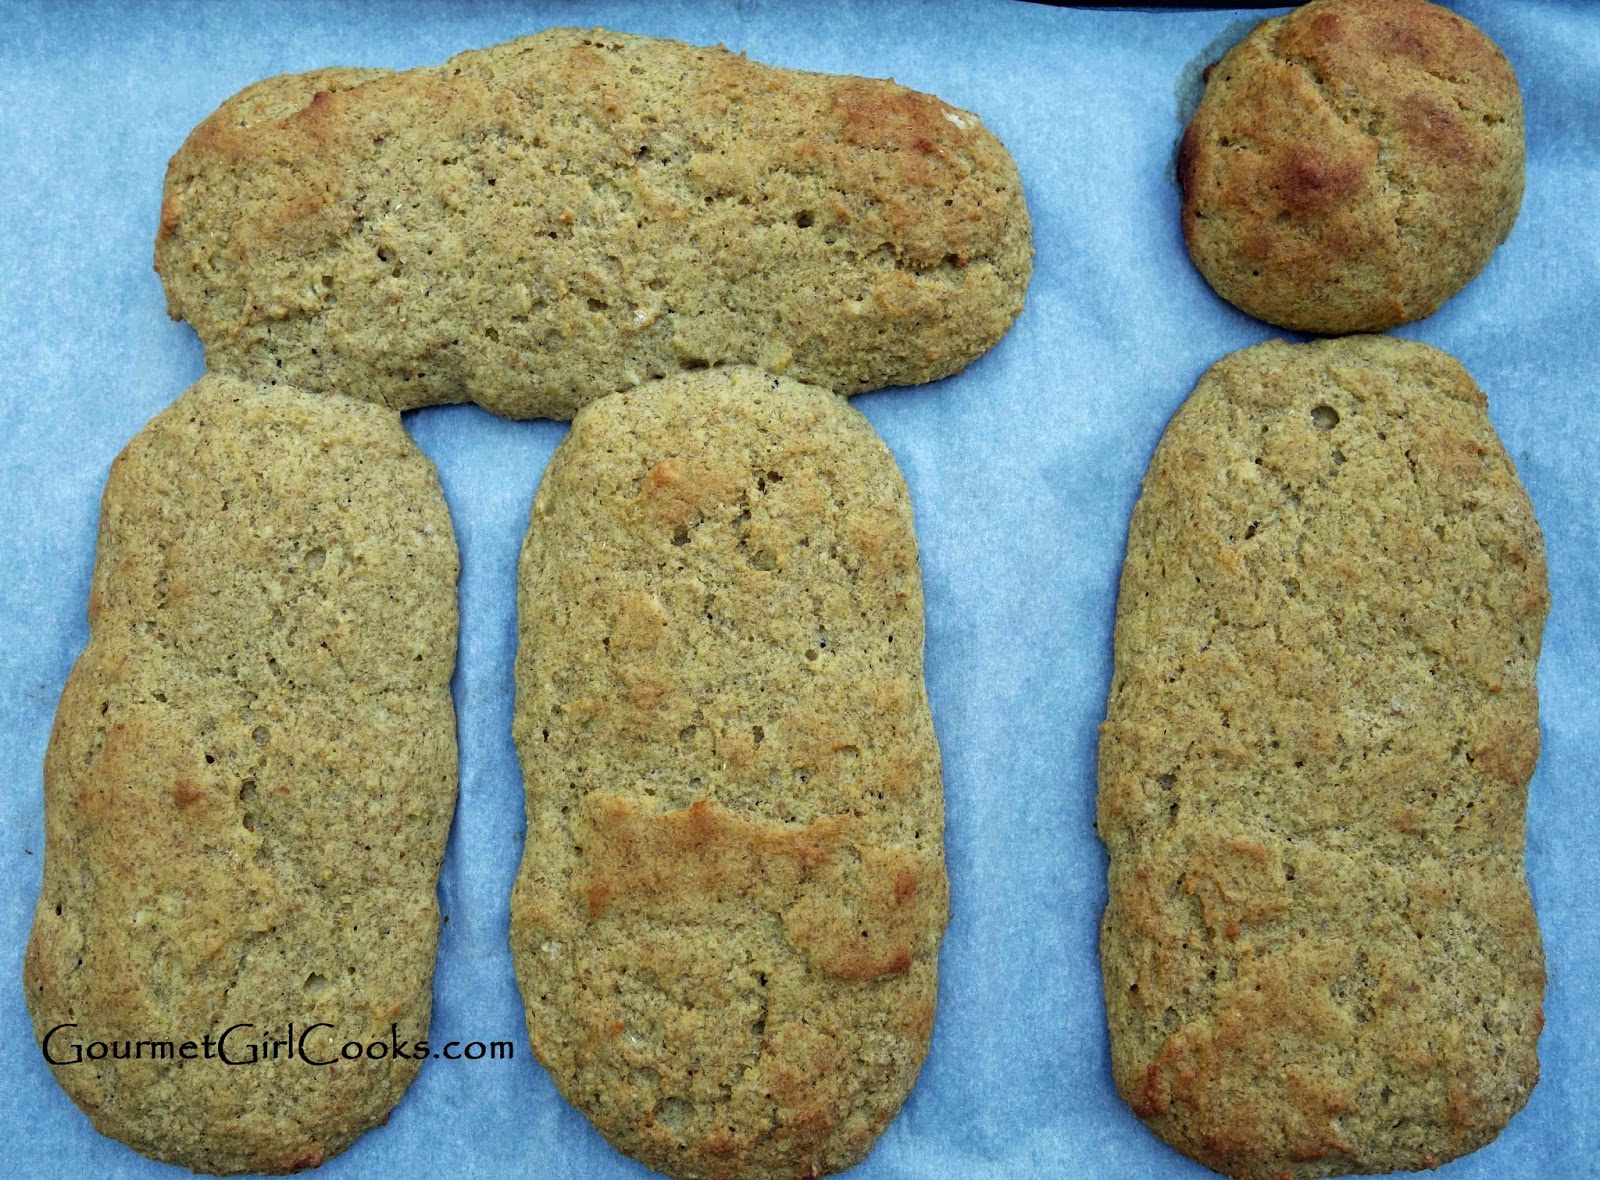
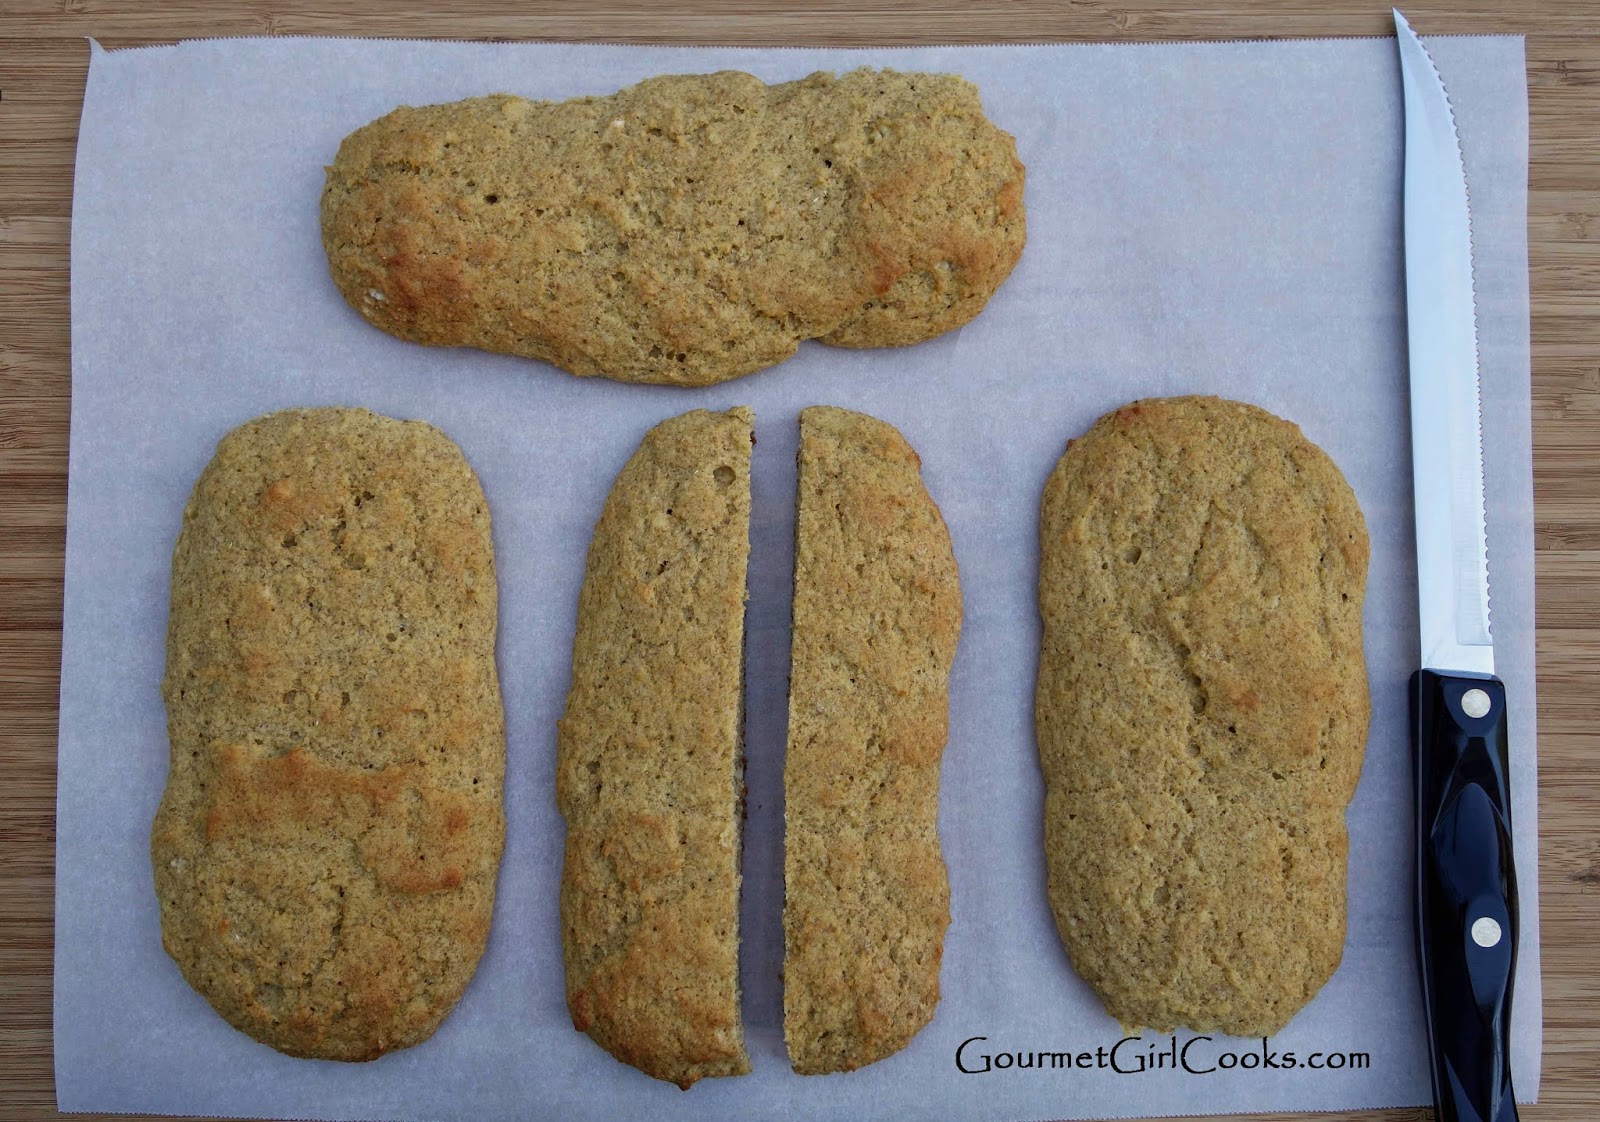
Sesame Seed Sandwich Buns and wanted to enjoy the convenience of making a quick sandwich for dinner.

When I make chicken salad, I like it super crunchy with different textures of various add-ins and 
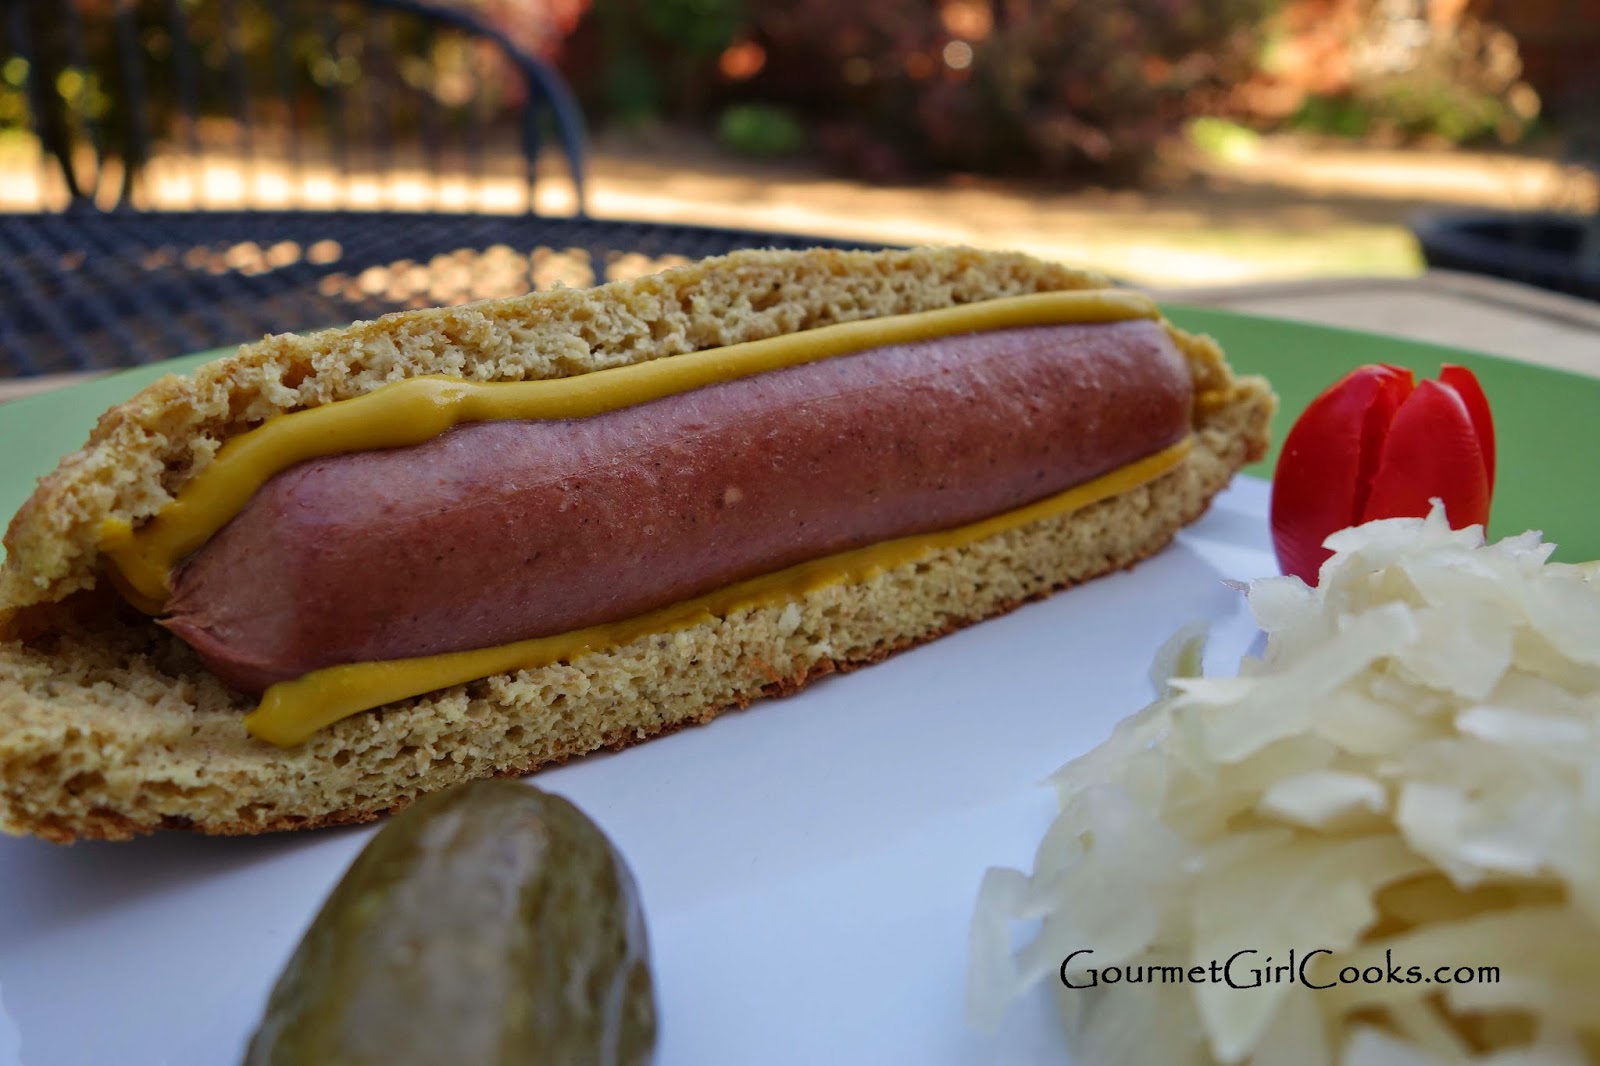
very little mayo. I've never been a big mayonnaise person. I add just barely enough to moisten the chicken but not make it "gooshy and mayonaisey." I'm weird about that kind of stuff -- I like very little dressing on a salad too and I'm not particularly fond of gravy. On the other hand, hubby tends to like more mayo, some diced pickles and nothing else in his chicken salad. He won't eat it if I put in any crunchy veggies. So, I simply mix some diced chicken with finely diced pickles and mayo and offload his to a separate bowl. Then...I jazz mine up. To my reserved bowl of chicken, pickles and mayo, I add diced red bell pepper, diced celery and sliced green onion. Then, I added toasted slivered almonds both in my chicken salad as well as on my chicken salad (it's awesome). Then, I added a little dash of sea salt and PILED it onto my Sesame Seed Bum. It was the most awesome sandwich. I had planned to eat 1/2 of an avocado with it but was actually too full so I couldn't. Once you see my ginormous sandwich you'll know why there was no room for anything else. I absolutely love these sandwich buns. They are really, REALLY good and they are the closest to "regular bread" as I have had in almost 2 years. Check out my "super-sized" sandwich below. Enjoy!

***P.S. -- The April 2014 digital issue of Wheat-Free Living Magazine is out! Check out my recipe for Chipotle Cheddar Crackers on pages 26 & 27! This issue is chocked full of great articles, tips, recipes and other helpful information for those of us either new to or already enjoying wheat-free living. Here is the link:  Wheat Free Living Magazine-April 2014


Wednesday, April 23, 2014

Quick Soup & Sandwich w/ Wheat & Grain-Free Sandwich Buns

This evening we had soup and sandwiches for dinner (again). We enjoyed a bowl of last night's Spicy Beef & Cabbage Soup (cooked in the slow cooker / crock pot) and made a turkey sandwich to go with it! Generally speaking, I don't miss bread very much, but I would be lying if I didn't admit that I really love these Sesame Seed Sandwich Buns. Honestly, it is some of the best "bread" that I've had since going wheat free. You can easily omit the sesame seeds if you don't have them or don't care for them. This last batch that I made yesterday, I made half with and half without sesame seeds. If you like poppy seed rolls, you could substitute those instead. This evening, my sandwich consisted of Boars Head turkey breast (deli without nitrites or nitrates), sliced avocado and white cheddar cheese with chipotle peppers. It was delicious. I think one of the things many people miss when going wheat and grain free isn't as much the bread itself, but the convenience it provides as well as the portability that bread allows you. Well, these buns just restored that convenience and portability for me. They are simple to make and don't take a lot of time and it's nice having them as an option and will be great to have for upcoming summer barbecues, etc. I see a lot more options opening up for me now. All you need is a bowl and a spoon -- no mixer required -- that's my kind of recipe! So many of us go looking for the perfect "loaf" of grain-free bread and it never quite seems to measure up because we keep wanting it to behave like wheat bread with gluten, yeast, etc. Why keep fighting mother nature? If you are going to slice the bread anyway...why not just start out that way? I'm tired of "baby bread" slices from squatty dense loaves that don't quite measure up (literally). I snapped a few photos of my "convenience meal" for you to see below. Enjoy!


Tuesday, April 22, 2014

Grilled Cheese with Spicy Beef & Cabbage Soup (Slow Cooker Style)

This evening we had "soup and sandwiches" for dinner; two of my favorites, grilled cheese and my Slow Cooker Spicy Beef & Cabbage Soup. When I came home at lunch time today, I put the soup ingredients into my slow cooker and got that started (I forgot to do it in the morning before I left). When I got home this evening, I turned the crock pot temperature to high and let it cook on high for the last couple of hours -- it turned out great. I also made a quick batch of my Sesame Seed Sandwich Buns to use to make grilled cheese sandwiches with. I was excited to try the new flavor of sliced cheese I picked up this weekend -- Kraft's Smoky Chipotle White Cheddar Cheese w/ Chipotle Peppers. I thought it would be great in a grilled cheese sandwich and that it would go nicely with my soup since it's also spiced with ground chipotle chile pepper. The sandwich bun recipe makes 6 buns. I topped 3 of them with sesame seeds and left the other 3 plain. I used the plain buns to make the grilled cheese sandwiches. I simply cut them in half and turned the flat sliced inner side outward to use as the side that got grilled. I placed the cheese in the middle and brushed the outside with melted Kerrygold butter and grilled it in a nonstick pan until browned. It was my first ever "round grilled cheese sandwich" -- and you know what? It tastes EXACTLY the same as a square grilled cheese sandwich! LOL It went great along with the soup. I've got plenty of soup leftover to make several lunches for me this week. I snapped a few photos below of my delicious "soup and sandwich" dinner. I made one slight change to tonight's soup. Instead of adding the 14.5-ounce can of diced fire roasted tomatoes to it, I added a 28-ounce can of crushed tomatoes instead so it would be a little more "tomatoey."  Here's the link to the recipe for the soup: Spicy Beef & Cabbage Soup. Here is the link to the recipe for my sandwich buns: Sesame Seed Sandwich Buns. Enjoy!


Monday, April 21, 2014

Sausage & Sprouts -- One of My Favorite Grain-Free Fast Foods

It was a beautiful day here today -- it started off a bit chilly but warmed up nicely to around 70-ish by afternoon. I decided to make a super quick dinner tonight since I worked late. I also wanted a little reprieve after all the Easter prep this weekend. So, you know what screamed at me when I opened up the fridge? Yup...the cute little sprouts were calling my name as if to say "pick me, pick me"...so I did. LOL I trimmed and halved them and steamed them in a teaspoon of water in a covered glass casserole in the microwave for about 4 to 5 minutes (the length of time depends on the size of your sprouts). I like my sprouts with some bite to them -- sort of tender-crisp and still retaining their beautiful bright color. While they steamed, I sliced up 3 Aidells Smoked Chicken & Apple Sausage links and sauteed them in a little butter. I added the sprouts and a little more butter to the sausage and turned the heat up a little and "stir-fried" them until they were the tenderness and texture I like. This is one of my most favorite "fast food meals" to make...both because it tastes good and also because it's super quick and easy to make...oh, and I'm in love with Brussels sprouts, too! I have enough left for my lunch tomorrow -- win/win for me! I snapped a couple photos of my fast food dinner. Enjoy!  


Check out the little bits of apple in these sausages -- I really love these!

Sunday, April 20, 2014

Chicken Divan -- Wheat, Grain & Gluten Free

Happy Easter! Today was a beautiful day here after rain all day long and night yesterday. We were busy all day long cleaning the house and getting ready for Easter dinner. We started off this morning with my Skillet Sour Cream Coffee Cake. I baked it in my cast iron skillet yesterday and it turned out good. Since this is the fourth time I've made that coffee cake (made it several times while creating it), I will say that it is much easier to remove from a nonstick ovenproof skillet than a cast iron skillet. This is actually only the 2nd time I've used my cast iron skillet so maybe as I keep using it, it will get better seasoned (or that is what I've read at least). We had my wheat and grain free Chicken Divan for Easter dinner. The rest of the family ate theirs along with rice and I ate mine "as is". It was delicious! I briefly considered making cauli-rice to go with mine, but instead decided to eat it without any. I snapped a few photos of my dinner below. I have attached the recipe and my tweaks below as well as the photos -- hope everyone had a nice day with family. Enjoy!


Easter Breakfast!


Chicken Divan (Wheat, Grain & Gluten Free)

Ingredients:


1-1/2 pounds cooked boneless chicken breasts, cut or torn into large chunks

1  10-oz pkg frozen broccoli spears, florets or fresh broccoli, cooked & drained

For the Sauce:

1-1/2 cups Wheat/Grain Free Cream of Chicken or Mushroom Soup
1/4 cup mayonnaise
3/4 - 1 teaspoon curry powder (more or less, to taste)
1 tablespoon freshly squeezed lemon juice, or to taste


For the Topping:

1-1/2 cups shredded sharp cheddar cheese, divided
1/3 cup almond flour

1 tablespoon butter

Directions:
  • Lightly grease a glass 11" x 7" or 2 quart casserole dish. Layer cooked broccoli in the bottom of baking dish (florets facing outward). Add chunks of cooked chicken breast over the top of the broccoli.
  • In a medium to large bowl, mix cream of chicken soup, mayonnaise, curry powder and lemon juice; mix until combined. Pour and spread the sauce mixture on top.
  • Scatter 1 cup of shredded cheese on top of sauce. 
  • In a small bowl, using a pastry/dough cutter, cut remaining 1/2 cup shredded cheese, almond flour and butter together until crumbly.
  • Scatter the crumbly topping mixture on top of casserole. 
  • Bake at 350 degrees F for approximately 25-30 minutes until bubbly and topping is golden brown.  
  • Optional: Serve over cauli-rice (grated steamed cauliflower) or regular white rice, if desired. Makes approximately 3 servings.
*Note: If a more saucy casserole is desired, increase the sauce mixture proportionately. I prefer a more lemony flavor so I frequently add more lemon juice. As an alternate or additional topping, add lightly toasted slivered almonds to the top before baking.


Saturday, April 19, 2014

Burger & Eggs on a Sesame Seed Bun -- Saturday's Silly Brunch

This morning I woke up hungry for some reason. I thought about making eggs for breakfast and decided to make an egg and cheese sandwich using one of my leftover Sesame Seed Buns to put it on. As I was pulling the eggs out of the fridge, I spotted one lonely little sirloin burger left from a couple nights ago so I pulled it out, too. I sliced the cold burger in half to make 2 thin patties, heated them and then sandwiched a fried egg between the burgers, topped it with some white cheddar jalapeno cheese and placed it on a lightly toasted Sesame Seed Bun. I was in Burger & Egg heaven and there were no "golden arches" in sight! I snapped a couple photos of my silly brunch below. It's great using leftovers in sometimes silly but delicious ways! I'm good to go until dinner now. Well...off to get prepared for Easter tomorrow. Enjoy!


Thursday, April 17, 2014

Sesame Seed Sandwich Buns -- Low Carb, Wheat, Grain & Gluten-Free

This evening I decided to finally break out my nonstick muffin top pan that I bought a while back to use to make sandwich buns/rolls with. The recipe I created makes 6 sandwich buns. I considered seasoning them with some onion powder, herbs and cheese but instead, decided to make them plain so they could be used for peanut butter & jelly if I decided to. I wanted them to be more neutral than savory, but think that adding some grated cheese and seasonings would be good, too. I added a bit of Swerve sweetener to them to give them that ever so slight hint of sweetness flavor like found in many "whole wheat' breads. I used buttermilk as the liquid for these to give them a little lift. I wasn't looking to make a big thick roll (I'm so over a big hunk of bread for my burgers or sandwiches) but more like the Arnold "sandwich thins" (thin rolls) that I used to eat before going grain-free. I would use those so the emphasis was on what went between the bread (the good stuff) rather than the bread. I used the same rationale when creating these. I divided the dough into 6 equal parts and used a retractable scoop to divide and transfer the dough to my pan and then moistened my fingertips and patted them into the muffin top pan. I let them sit for about 10 minutes before baking which allowed them to rise and puff up a little. Since these are thinner rolls, the easiest way to slice them in half (after they have completely cooled) is to lay them on a cutting board, place one hand on top to hold it in place and using a sharp serrated knife, carefully slice it in half with a gentle sawing motion. I used these for our dinner tonight. I grilled sirloin burgers and topped them with white cheddar with jalapeno cheese and topped with my "special sauce" and served them on my Sesame Seed Sandwich Buns alongside a wedge of last night's leftover White Cheddar Cauliflower Bake (and a Bubbie's dill pickle). It was a simple and delicious meal. I snapped a few photos as well as the recipe for the buns/rolls. Enjoy!


Before baking...
After baking...


Wednesday, April 16, 2014

White Cheddar Cauliflower Bake -- Low Carb & Grain-Free

It was a chilly day here today. It was only 32 degrees when I headed to work this morning and it only made it up into the 50s. Quite a drastic drop from our 80 degree weather over the weekend where we got tricked into pulling out our shorts and flip-flops only to have to unpack the turtleneck sweaters again this morning! It felt like a pretty cruel joke Mother Nature played on us! For dinner tonight, I was in the mood for a little comfort food with our sudden cold snap. I had a small head of cauliflower in the fridge that needed to be used as well as a big block of sharp white cheddar cheese. I thought about making mashed cauliflower with white cheddar but decided to put together a quick little "skillet bake" with them instead. I created a simple White Cheddar Cauliflower Bake and baked it in a skillet. When hubby got home, he grilled some boneless chicken thighs that I lightly sprayed with olive oil and sprinkled with Spicy Montreal Steak Seasoning. While he was grilling, I planned to make a green vegetable to go with our meal but realized I had some avocados that needed to be used...so the "green" on my plate became avocado (which is actually a fruit, not a vegetable). I snapped a few photos for you to see below and the recipe for the cauliflower bake. Enjoy!