Monday, March 31, 2014

Monday Night's Colorful Pizza -- Low Carb & Wheat/Grain/Gluten Free

It was a gorgeous day here today. The morning started out chilly in the upper 30s but ended up close to 80 by the end of the day. We have upper 70s forecast for our highs for the remainder of the week. Maybe spring has finally sprung! Since we haven't had pizza for a little while, I decided to make pizza for dinner this evening. I had an open jar of sun-dried tomato pesto in the fridge so I decided to spread a little of that on top of my crust in place of pizza sauce -- it turned out great. I topped my pizza with fresh mozzarella cheese, pepperoni, sauteed mushrooms, thinly sliced mini red, yellow and orange peppers and then topped it with a final layer of shredded mozzarella and some sliced green spring onions. To add a nice spicy little bite, I drizzled my pizza with 1 teaspoon of spicy garlic crushed red pepper extra virgin olive oil (made by Sweetwater Growers locally here in Georgia) a couple minutes before pulling it out of the oven. I made my Almond-Flax-Parmesan Pizza Crust and included the recipe below as well as a couple photos of tonight's pizza. Enjoy!


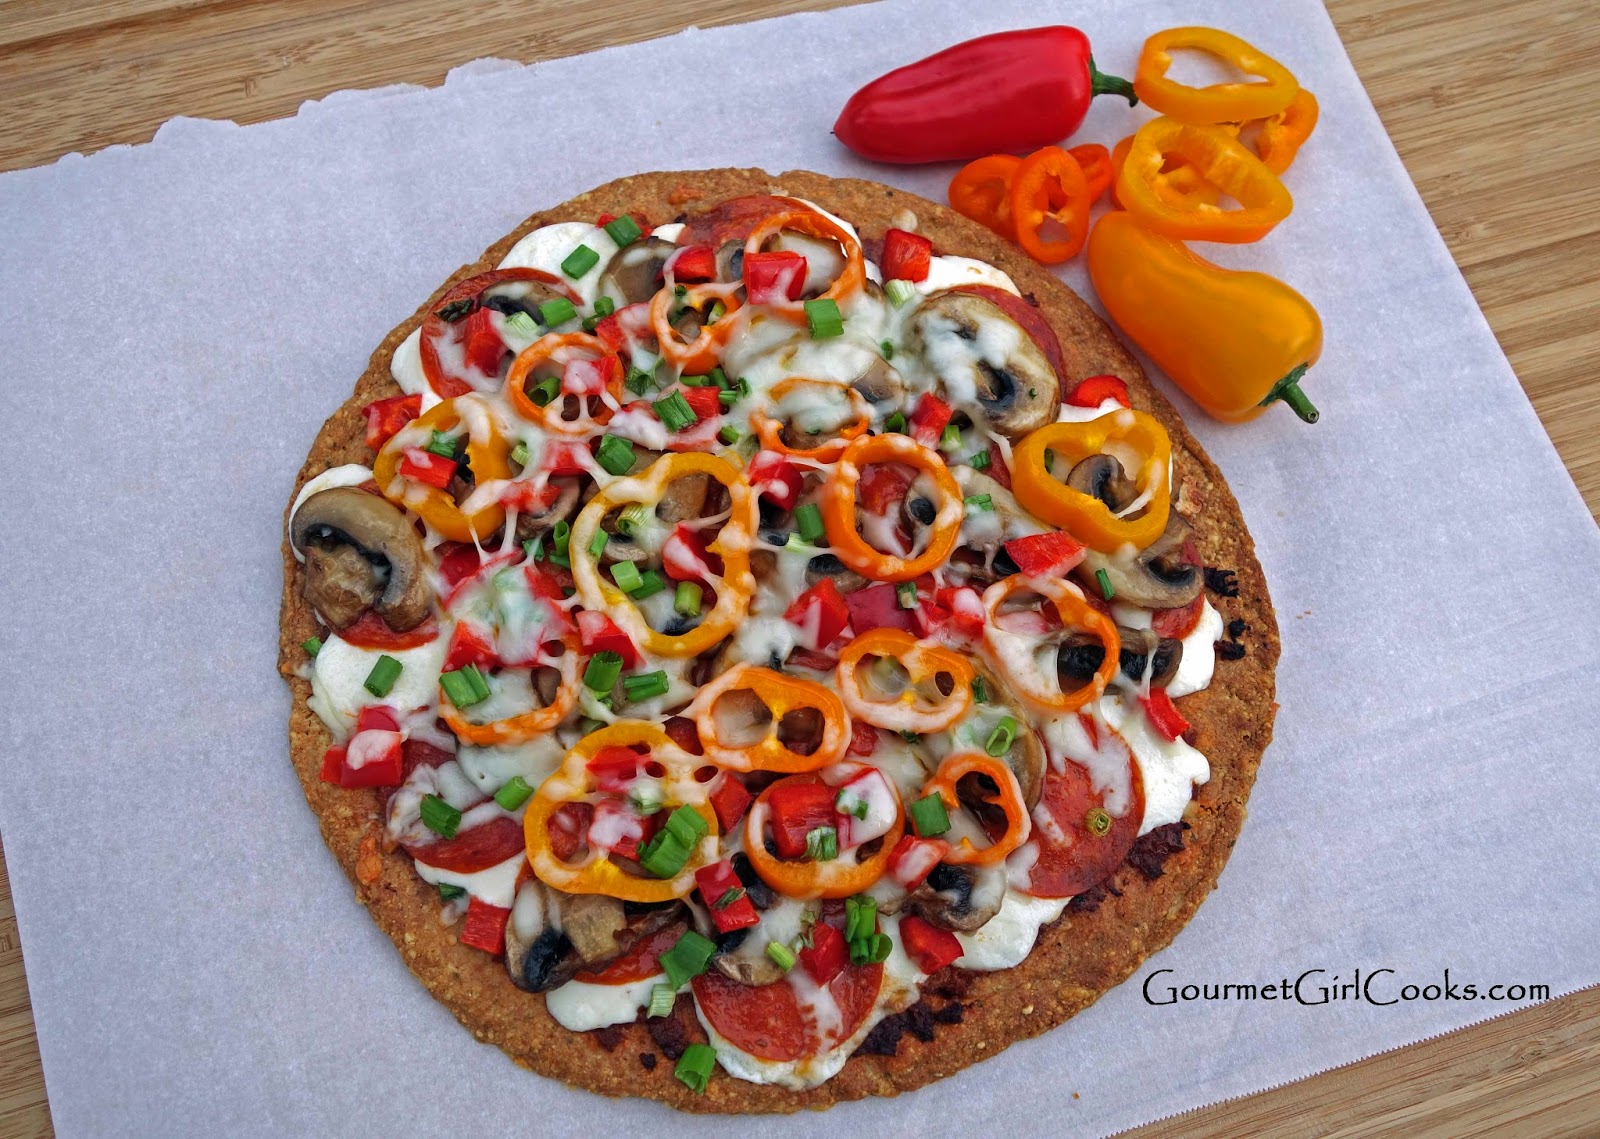
Almond-Flax-Parmesan Herb Pizza Crust
Makes 1 10-inch round pizza (approximately 2 servings)

Dry Ingredients:
1/4 cup almond flour
1/4 cup golden flax seed meal (organic golden flax is milder in taste than brown)
2/3 teaspoon baking powder (aluminum free)
1/2 - 1 teaspoon dried Italian seasoning
1/4 teaspoon garlic powder
1/4 teaspoon onion powder 
Dash cayenne pepper, optional
1/4 teaspoon sea salt, or to taste (decrease salt if using saltier cheeses and toppings)
Few grinds of freshly ground black pepper
4 - 5 tablespoons Parmesan cheese, finely grated

Wet Ingredients:
1 egg (or 1/4 cup egg substitute such as Egg Beaters)
1 tablespoon olive oil (a little more, if desired)
1 to 2 tablespoons water (start with 1 tablespoon of water and add the second, if necessary)

Toppings (Optional):  
Pizza sauce, pesto sauce, etc.
Cheese: shredded mozzarella cheese, sliced or diced fresh mozzarella, etc.
**Pre-cooked vegetables of choice: onions, green peppers, mushrooms, spinach, etc. 
**Pre-cooked meat of choice: sausage, ground beef topping, etc.
Other: artichokes, olives, pepperoni, etc.

**Tip: Fresh vegetable and meat toppings should be pre-cooked and drained to prevent crust from becoming soggy

Directions:
Preheat oven to 375 degrees.  Mix dry ingredients together; add wet ingredients and mix well. Let the dough sit for approximately 5 minutes to thicken. 

Spread dough on a lightly oiled large pizza pan or cookie sheet lined with greased parchment paper (you can also use Reynolds non-stick foil, lightly brushed with olive oil).  Using a lightly oiled rubber spatula, press the dough out to desired shape and thickness (I usually make it about 1/4" thick -- *see note below).  Bake for 15-20 minutes or until cooked through (check crust after 15 minutes and remove from oven when it looks and feels done).  Spread with a thin layer of sauce, cheese and desired toppings (fresh vegetable and meat toppings should be pre-cooked to prevent soggy crust); place back into the oven to bake an additional 5-10 minutes to melt cheese.  If desired, run under the broiler for a few minutes to lightly brown the toppings and make the cheese bubbly (be careful not to burn it).

*Note:  For a crust that is flat, smooth and even in thickness, lightly spray a 2nd sheet of parchment paper with olive oil spray and place it on top (oiled side down) of the ball of pizza dough that is centered in the middle of your prepared pizza pan or baking sheet.  Using either your hands or the flat edge of an object (I use a big container of black pepper) press the dough smooth by swiping it the direction you want the pizza crust to go.  When it is the desired thickness and shape, carefully peel off the top layer of parchment paper...and "Voila"...perfectly flat, smooth, thin pizza crust! If you don't have parchment paper, pressing the dough out with a lightly oiled rubber spatula works just fine, too.


Sunday, March 30, 2014

Grilled Lemon Herb Marinated Chicken Medallions w/ Tri-Color Veggie Alfredo

It was a beautiful bright and sunny day here most of the day after an overcast start to the morning. I worked on taxes all morning and got them done..."oh what a relief it is"!  :-)  We ran errands and got a few chores done around the house. We really need to get our spring cleaning started here next weekend. I decided to grill something for dinner since it was so pretty out. I had a couple of packs of boneless chicken breasts that needed to be used so I sliced them horizontally into medallions, seasoned them with sea salt and pepper, then covered them with plastic wrap and pounded them with my meat mallet until they were nice and thin (like scallopini). I simply placed them in a large Ziploc bag along with about 1/4 cup olive oil, the juice of 2 large lemons, the zest of 1 lemon, 2 crushed garlic cloves, about 1 teaspoon of Italian seasoning and a little fresh rosemary. I sealed the air out and placed them in the fridge to marinate for about 4 hours.

Both of my sons came for dinner and I made the guys baked potatoes to go with their meal and made Tri-Color Veggie Alfredo for our vegetable. I used my julienne vegetable peeler to make strands of veggie pasta using zucchini, yellow summer squash and a carrot. The most important step I've found in making a non-watery veggie pasta is to spread and lay the pasta strands on paper towels and then lightly salt them, cover with more paper towels and let the salt pull the excess liquid out of the veggie pasta; occasionally pressing to blot the liquid out. I actually change the paper towels a couple times over about 20-30 minutes or so and lightly salt one more time. Believe it or not, the pasta isn't salty, mainly because the salt absorbs along with the liquid into the paper towels. I simply heat a tablespoon or 2 of olive oil and saute the veggie pasta for a few minutes and then add in some heavy cream, sun-dried tomato pesto, and finely grated Parmesan and toss it around until its lightly coated. It turned out fabulous. I snapped a couple photos for you to see below as well as my easy peasy recipe for the Tri-Color Veggie Alfredo. Enjoy!


Friday, March 28, 2014

No-Flip Berry Pancakes -- *Improved Version (Now Thicker & Fluffier) -- Wheat/Grain-Free

Check out my *improved* version of No-Flip Berry Pancakes. I was in the mood for them again and wanted to see if I could make a couple little tweaks to produce a thicker and fluffier pancake. My original version produced pancakes that were approximately 1/2-inch thick. My improved version produces a thicker pancake that is almost 1-inch thick and fluffier. Both are good, so the choice is yours. These are the only modifications I made to the original recipe. I added 1 extra tablespoon of coconut flour, 1 extra egg and 1 more tablespoon of granular sweetener to the mixture. That's it! Maybe I'm a weirdo, but I liked having a nice big thick pancake wedge. 

Also, in this particular pancake, I used fresh strawberries but was out of fresh blueberries. I added some thawed organic wild frozen blueberries that I picked up at Costco not long ago. I've used them to make my mini blueberry muffins as well as this pancake recipe. They are great to have around -- you thaw at room temp for about 30 minutes before adding them to your recipe. The only difference I noticed when using them was you get a little more "blueberry juice bleed" when using the frozen berries...but I think it actually turns out prettier (they make little blueberry swirls). I snapped a few photos below. We had this pancake with our Mini Breakfast Casseroles last night. I topped it with diced fresh strawberries (tossed with a bit of sweetener), a splash of sugar free maple pancake syrup and a little pat of butter). It was delicious! The leftover pancake wedges reheat so nicely in the microwave in less than a minute. Did I mention how much I absolutely LOVE not having to flip pancakes any more? Check out the photos and recipe below. Enjoy!


I love that my 2 favorite berries (cranberries and blueberries) are so high in antioxidants -- look how much higher the wild blueberries are than regular? They make these pancakes SUPER healthy!

Thursday, March 27, 2014

Mini Breakfast Casseroles -- You Say Egg Strata; I Say Frittata

This evening I decided to make "breakfast for dinner"...and not just any old breakfast, either! I'm making practice runs for Easter breakfast! This evening I decided to make personal (individual) Mini Breakfast Casseroles...or Egg Strata as some might call it...or Frittata as others might. They are low-carb, wheat-free, grain-free and gluten-free...made WITH biscuits! Whatever you want to call them...just call them delicious! The great thing about making "individual" breakfast casseroles is that you can prepare a variety of "fixings" and individualize each casserole. I oven roasted some uncured bacon and sauteed fresh baby spinach, diced fresh mushrooms, diced red bell peppers and then sliced some fresh cherry tomatoes and green spring onions as my array of "fixings". I also shredded some extra sharp white cheddar cheese. I added all of those different fixings to my casserole, but omitted the mushroom and onion in hubby's casserole since he doesn't care for those. I had a few leftover week-old Easy Cheddar Black Pepper Biscuits that I used as the "bread" to add to my little breakfast casseroles. These casseroles are so easy to put together and you can add whatever you like to them. I buttered 4 small (9 to 10-ounce) casserole dishes. I layered broken up biscuits (about half a biscuit in each dish), then layered the "fixings" and cheese and poured eggs beaten with cream over top and popped them into the oven to bake at 350 degrees for about 30 minutes. They are so simple to make. You could use ramekins or any small baking dish. I snapped a few photos below as well as the easy peasy recipe. So, whether you like to call it a Breakfast Casserole, an Egg Strata or a Frittata makes no difference. Generally speaking, a strata has some type of bread added to it (like these do) where a frittata usually does not contain bread...and a quiche can either have crust or be crustless. To be safe, I just call this a Breakfast Casserole because that can include all of the above without being too confusing. I served our Breakfast Casserole alongside my No-Flip Berry Pancakes (topped with diced strawberries, a splash of no-sugar syrup and a pat of butter). I've improved my pancake recipe to make an even bigger, fluffier pancake and will post my improved recipe tomorrow. Can you picture these beauties on your Easter breakfast table? Enjoy!


Mini Breakfast Casseroles
Serves 4

Ingredients:

1 to 2 tablespoons butter for buttering casseroles
10 large eggs
1/2 cup cream
Salt and pepper, to taste
2 or 3 Easy Cheddar Black Pepper Biscuits, crumbled into 1-inch pieces
5 or 6 slices cooked bacon (or browned sausage)
1 cup sauteed vegetables of choice (mushrooms, onions, spinach, peppers, etc.)
1/2 cup diced tomato, optional
1/4 cup sliced green onion, optional
1 cup shredded sharp white cheddar cheese

Directions:

Preheat oven to 350 degrees F.  In a medium bowl (or 4-cup glass measuring cup), beat eggs and cream together; season with salt and pepper.

Butter casseroles and divide crumbled biscuits evenly between casseroles. Divide and layer bacon or sausage and vegetables between casseroles and top with cheese. Pour beaten egg mixture evenly among casseroles and bake for 25 to 30 minutes until done.


Wednesday, March 26, 2014

Stir-Fried Smoked Chicken-Apple Sausage & Sprouts -- Quick, Simple and Delicious!

This evening I made a super quick and easy dinner with one of my favorite veggies...brussels sprouts! I had a bag of baby brussels sprouts that I picked up at Costco. I trimmed, halved and lightly steamed about 1 pound of them for 4 to 5 minutes. While they steamed, I lightly sauteed some sliced smoked Aidells Chicken-Apple Sausage links until they browned and caramelized a bit. I added a tiny bit of coconut oil and then tossed the sprouts in and sauteed them along with the sausage. It only took about 15 minutes from start to finish -- this is my kind of "fast food". I snapped a couple photos below. Here's a link where I made this same dish recently but added some sliced red cabbage to it as well. It's good either way. Here's the link: Stir-Fried Sprouts, Red Cabbage and Chicken-Apple Smoked Sausage. Enjoy!


Tuesday, March 25, 2014

Carne Asada Lettuce Cups -- A Fabulous Way to Use Leftover Roast Beef

This evening I made the most delicious Carne Asada Lettuce Cups. I chopped the leftover Slow Cooker Spice Rubbed Tri-Tip Roast from last night's dinner which provided about 2 cups of chopped beef. I also had 1 cup of au jus left from the roast that I reduced by half in a saucepan over medium-high heat until there was about 1/2 cup remaining which concentrated the flavors of the spices and beef juices. I added a couple generous dashes each of smoked paprika, roasted cumin and ground ancho chile pepper and then added in the 2 cups of chopped beef, 1/2 cup of fresh salsa and about 1/4 cups of chopped pickled jalapeno slices and simmered it until all the liquid was just evaporated but the beef was still very moist (I didn't want soggy lettuce cups). I shredded some block style Monterey Jack cheese and placed a bit in the bottom of each lettuce cup and then topped it with a scoop of the hot Carne Asada beef, topped it with additional cheese, a dollop of sour cream, diced tomatoes and some sliced green spring onions. It was amazingly delicious, simple and flavorful. It turned last night's beef roast into tonight's entirely new Mexican fiesta. I snapped a few photos below. Enjoy!


Monday, March 24, 2014

Slow Cooker Spice Rubbed Tri-Tip Roast

We had Slow Cooker Spice Rubbed Tri-Tip Roast for dinner. I placed it in the crock pot last night and cooked it overnight. Before getting into the shower this morning, I removed the roast and transferred it to a platter to let cool. I covered it and refrigerated until getting home. It slices nicely when cold. I reheated it in the "au jus" created from the meat juices that cooked out of the roast. Since I don't add any liquid to this particular roast, the juices are very concentrated in flavor and the spices give it a wonderful flavor. I added a heaping tablespoon of Swerve sweetener to my spice rub and it balanced the spiciness, smokiness and saltiness beautifully, much the way barbecue sauce does. You can use whatever type granular sweetener you prefer. I served the roast alongside cooked sliced buttered mushrooms and a wedge of steamed savoy cabbage. I found some beautiful small heads of savoy cabbage and thought they'd be perfect to steam and serve in wedges. Savoy cabbage is the type of cabbage that has more wrinkly crinkly leaves that are thinner and more delicate than regular cabbage. It makes nice tender steamed cabbage. I simply cut the small head into quarters and placed it in a glass covered casserole and steamed it in about 1/4 cup of water in the microwave for about 5 to 7 minutes on high. I served it with a pat of Kerrygold butter and sprinkled with a little sea salt. I forgot how much I really love cooked cabbage. I snapped a few photos below as well as the easy recipe for the roast. Enjoy!


Slow Cooker Spice Rubbed Tri-Tip Roast

Ingredients:

Spice Rub Mixture
1-1/2 tablespoons granular sweetener (I use Swerve)
1/2 teaspoon sea salt
1/2 teaspoon freshly ground black pepper
1/2 teaspoon smoked paprika
1/2 teaspoon ground ancho chile pepper
1/4 teaspoon onion powder
1/4 teaspoon garlic powder

1 small onion, sliced
2 - 2-1/2 pound tri-tip roast (or other roast)

Directions:

In a small bowl, combine spices (first 7 ingredients). Pat roast dry with paper towels. Place sliced onion in bottom of 5 to 6 quart slow cooker. Sprinkle seasoning over roast and rub well on all sides. Place roast in slow cooker and cover. Cook on high for 2 hours; turn to low and cook an additional 6 to 7 hours. As an alternative, roast can be cooked on low for 8 to 10 hours.

*This roast produces approximately 1-1/2 to 2 cups juice as it cooks. If desired, add 1/4 cup liquid (wine, water, stock) to roast prior to cooking.


Sunday, March 23, 2014

White Chicken Enchilada Casserole -- Wheat/Grain-Free, Low Carb & Delicious!

This evening both boys came for dinner. I made my White Chicken Enchilada Casserole for dinner (low carb and wheat free).  It's simple to make and everyone in the family loves it (including those that aren't wheat/grain free like me). I use my grain-free tortillas for the enchiladas and this dish is so good and so authentic tasting that you have no idea you are eating a grain free meal. I served it with steamed fresh broccoli florets. In the enchiladas I made this evening, I bumped the amount of chicken up to 4 cups (instead of the 2 to 3 cups) and increased the cheese a bit (I almost always do that). This made nice big fat enchiladas. To add a bit of extra flavor, I diced and sauteed some Poblano pepper and red bell pepper and then added about 1 tablespoon of diced cooked peppers to each enchilada as I rolled them up. It turned out amazing. I had enough leftover to send home with both sons so they can enjoy them again tomorrow night. I snapped a few photos for you to see below. The link to the enchilada recipe is in the first sentence above (in the different colored text). Enjoy!


Saturday, March 22, 2014

Grilled NY Strip Steaks w/ Baked Cauli-roni & Cheese - Another Grain-free Saturday Night

Today was a gorgeous warm spring day here and perfectly fitting for the first Saturday of Spring. Hubby and I ran lots of errands this afternoon and hope to get to our mounting list of house and yard projects tomorrow. Since it was so nice out today, we picked up some steaks to grill for dinner. I decided to make my Baked Cauli-roni & Cheese to go along with our steaks. I halved the recipe and baked it in individual casseroles instead of one large casserole. There is something special about having your own little casserole. I made it with a new kind of cheese that I picked up from Costco -- a big block of Cabot's 3-year sharp Vermont white cheddar. A gentleman saw me checking out the Kerrygold Dubliner cheese a couple weeks ago and he highly recommended this particular cheese...so I picked up a big block and used it to make my Baked Cauli-roni & Cheese this evening. It turned out fabulous! It had lots of flavor and was nice and sharp, just the way I like it. We kept our steaks quite simple and just seasoned them with coarse Kosher salt and coarsely cracked black pepper. I cooked some sliced fresh mushrooms in butter to top my steak with. It was a simple, fresh and delicious meal. Even after almost 2 years, I still find it truly amazing how well you can eat without wheat, grains or added sugar. We had No-Flip Berry Pancakes for breakfast, leftover Sausage-Broccoli & Biscuit Frittata for lunch and Grilled Steak amd Baked Cauli-roni & Cheese for dinner. If you ever feared that you would be deprived of good food after eliminating wheat and grains from your diet, have no fear..."Gourmet Girl Cooks" is here...and I am NEVER deprived of good food. I simply refuse to be.  ;-)  Check out a couple photos of our dinner below (recipes for breakfast, lunch and dinner are linked above in the different colored text). Enjoy!


No-Flip Berry Pancakes -- A Grain-free Breakfast Treat

We awoke to a gorgeous Saturday morning. I had planned to post this recipe last night but actually fell asleep much earlier than planned and didn't get to it. So, I made a fresh batch of my No-Flip Berry Pancakes for breakfast this morning so hubby could enjoy them, too. They are sort of a breakfast version of "strawberry shortcake"...or "strawberry short-pancake". I did a test batch Thursday night while he was in a meeting after work. I actually had that as my dinner that night. In this morning's version, I added both strawberries and blueberries. I was so excited for hubby to try it (as many of you know, he is not grain-free like I am). He absolutely loved it. I love this recipe for a variety of reasons...one of them being that the thing I absolutely detest the most about making pancakes is making them one at a time and flipping them. 

When I made my pancake batter Thursday night, I initially started making them the traditional way (flipping them one at a time). After the first batch, I found myself thinking "this is for the birds". Just the night before I had made Sausage Broccoli frittata...and suddenly that little light bulb went off again. I turned my oven on, grabbed the bowl of pancake batter and poured it all into the hot skillet and cooked it on the stovetop for a couple of minutes and added sliced strawberries to the top, then sprinkled some granular sweetener over the berries and popped it into the oven and baked it. It turned out fabulous...like "happy dance fabulous". To give some added maple flavor to my pancakes, I used some natural maple extract and added a bit of sweetener to my batter and then scattered a bit on top so they wouldn't need much syrup. I slid the baked pancake onto a cutting board and cut it into wedges (just like I did with the frittata). I served these amazing pancakes, with a pat of Kerrygold butter and just a drizzle of maple sugar free pancake syrup. I will never flip pancakes again! I snapped some photos below as well as the easy peasy recipe. Enjoy!


Before going into the oven...
Fresh out of the oven...
Can't you almost smell it?
Topped with a drizzle of sugar free maple syrup and a melted pat of Kerrygold butter
This is the syrup I use