

These are the ramblings of a self-described wheat, grain and gluten-free “gourmet girl” that loves to cook and eat good food. I love creating and sharing recipes and photographing “beautiful food”. In July 2012, I eliminated wheat, grains and added sugar from my diet and rediscovered real, whole fresh foods again and effortlessly lost 65+ pounds. Join me in my wheat, grain and gluten-free journey. See how easy it is to enjoy grain free gourmet, one meal at a time! Welcome to my blog. Enjoy!
Saturday, November 30, 2013
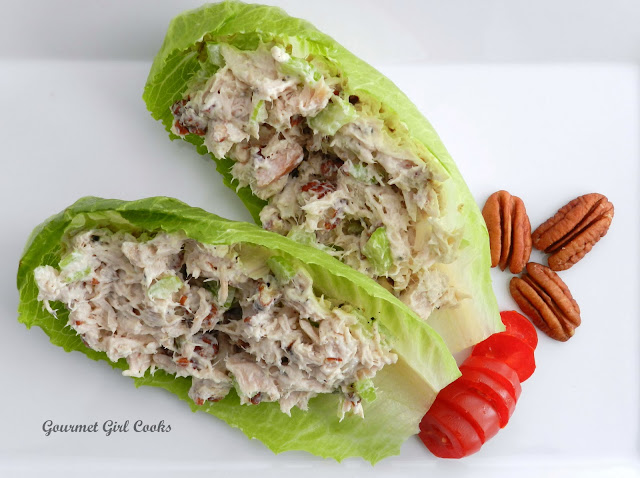
Turkey-Pecan Salad Cups
This afternoon I decided to use some of the leftover turkey to make turkey salad for lunch. Last night we had an exact repeat of Thanksgiving dinner by reheating all the leftovers, and I still have 2 refrigerators full of leftovers. I didn't feel like reheating all that again for lunch...so I whipped up a quick and easy turkey salad instead. I diced some leftover turkey breast, sliced up some celery and onions, seasoned it with salt and pepper and mixed in some mayonnaise. I used leftover toasted pecans and folded them into my turkey salad for some additional crunch and nutty flavor. I scooped it into little artisan romaine lettuce cups and enjoyed my Thanksgiving turkey reincarnated into something else. It was a nice change. I snapped a quick photo below as well as the easy peasy recipe. Enjoy!
Friday, November 29, 2013
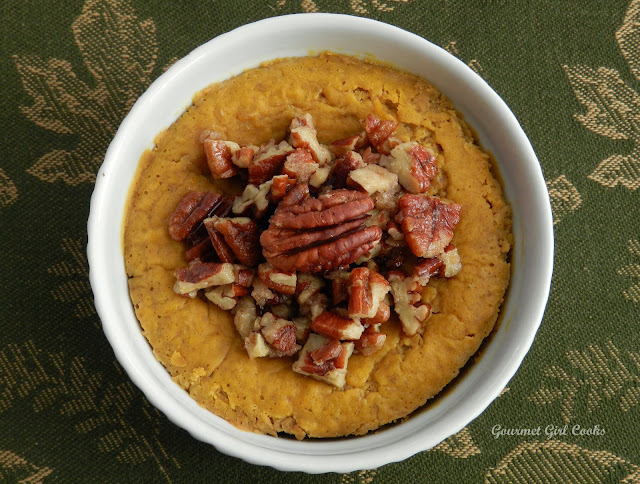
Rich & Creamy Pumpkin Custard Cups
I wanted to share the recipe I made for my Thanksgiving dessert last night -- Rich & Creamy Pumpkin Custard Cups -- totally and absolutely decadent. I started out with the intention of making my individual regular crustless pumpkin pies (in ramekins)...but wondered what it would be like if I modified it and made it sort of "cheesecakish". It turned out fabulous...and even better than I had hoped. If you haven't already had your fill of pumpkin this fall...this is definitely worth trying! Think of it as "more than a pie"...but "not quite a cheesecake".
For the topping, I had planned to use toasted pecans to sprinkle on top for a little crunch and toasty-nutty flavor (right before serving)...but instead, I decided to put it over the top a bit. I lightly toasted pecans in my oven (at 350 degrees) for about 5-7 minutes, just to bring out their nuttiness and crisp a bit and then coarsely chopped them. I made a Buttered Pecan Topping to sprinkle on top that was SO simple, yet SO good! Since it is just me eating these (thank God...they are ALL mine)...I put the topping together right before serving so it's nice and hot and buttery. I take about 3 tablespoons or so of toasted pecans and melt 1 tablespoon of butter in a tiny skillet, add the pecans, a couple dashes of cinnamon and about 2 to 3 teaspoons of granular Swerve and stir it in until it melts together. I top my little Rich & Creamy Pumpkin Custard Cups with the hot, lightly sweetened, buttered spiced pecan topping right before eating...pure heaven! Below is the recipe as well as a few photos -- I assure you, you will never miss the pie crust in these little delights. Enjoy!

For the topping, I had planned to use toasted pecans to sprinkle on top for a little crunch and toasty-nutty flavor (right before serving)...but instead, I decided to put it over the top a bit. I lightly toasted pecans in my oven (at 350 degrees) for about 5-7 minutes, just to bring out their nuttiness and crisp a bit and then coarsely chopped them. I made a Buttered Pecan Topping to sprinkle on top that was SO simple, yet SO good! Since it is just me eating these (thank God...they are ALL mine)...I put the topping together right before serving so it's nice and hot and buttery. I take about 3 tablespoons or so of toasted pecans and melt 1 tablespoon of butter in a tiny skillet, add the pecans, a couple dashes of cinnamon and about 2 to 3 teaspoons of granular Swerve and stir it in until it melts together. I top my little Rich & Creamy Pumpkin Custard Cups with the hot, lightly sweetened, buttered spiced pecan topping right before eating...pure heaven! Below is the recipe as well as a few photos -- I assure you, you will never miss the pie crust in these little delights. Enjoy!


Thursday, November 28, 2013
My 2nd Wheat/Grain/Sugar Free Thanksgiving Dinner
Well...my 2nd wheat, grain and sugar free Thanksgiving has almost come to a close. We had a wonderful dinner and I enjoyed it even more than I did last year's. Preparing a wheat-free Thanksgiving dinner last year seemed more daunting...but this year it was a breeze. I ate as good, if not better, than any Thanksgiving dinner I've ever eaten in the past...roast turkey, mashed cauliflower, cheesy squash casserole, green bean casserole, stuffing, fresh cranberry orange walnut sauce...and biscuits that I was too full to eat. I had a crustless rich pumpkin custard cup for dessert (a cross between cheesecake and pumpkin pie). I snapped a few photos of my dinner below so you can see how deprived I wasn't! I hope everyone had a great day with family and friends. Enjoy!

 |
| Roast turkey, mashed cauliflower, green bean casserole, stuffing, cheesy squash casserole and fresh cranberry orange walnut sauce...100% wheat/grain/sugar free! |


Happy Thanksgiving!
Happy Thanksgiving to everyone...from my home to yours. May you all be blessed with family, friends and good health...and as always, good food!


Wednesday, November 27, 2013
Green Bean Casserole -- Wheat-free Suggestion
I have been a busy bee in the kitchen today working on Thanksgiving dinner. The only thing I have left to do this evening is make cranberry sauce and put a turkey breast in the crock pot to cook overnight. I will roast a whole turkey in the oven tomorrow, but since my family prefers the breast meat, I always make an extra turkey breast. As many of you know, I am the lone wheat-free ranger in my family. While my hubby eats and likes what I make...he still eats wheat stuff, too. My kids eat their own way, too since they are grown...so what that boils down to is, for holidays I still make some of the traditional regular dishes they are accustomed to. Although I am transitioning some of the items over to wheat free for them, too. I am still making 2 different stuffing recipes -- both will have everything the same in them except mine will have grain free stuffing bread cubes. They will have mashed red skinned potatoes; I made myself my Rich & Thick Parmesan Cauliflower Mash. For the green bean casserole, I made my own Cream of Mushroom Soup (wheat free) and tripled it to make a big green bean casserole for everyone (you know, the kind with green beans, cream of mushroom soup and the French-fried onions). To make sure mine remained wheat free, I offloaded a smaller portion (about 2 cups) of the green bean and cream of mushroom soup mixed together and then added the crispy onions to theirs and for me, I sauteed thinly sliced onions in macadamia nut oil until golden and caramelized and put that on the top of my mini-casserole. I made my Yellow Cheddar Squash Casserole (wheat/grain free) for everyone. I made a batch of my Fresh Cranberry Orange Sauce w/ Walnuts (sugar free) for me and the regular kind for them. I baked them a regular pecan pie and a regular pumpkin pie and made myself individual Crustless Pumpkin Pie (sugar free). I added some cream cheese to my pumpkin pie recipe and maple extract to make them even more rich and decadent. I also made corn casserole and sweet potato casserole for them to eat. I baked myself some of my Easy Cheddar Black Pepper Biscuits...so I am ready to enjoy my 2nd wheat free Thanksgiving. I am so excited! I have butternut squash in the fridge to roast if I decide at the last minute I want to have that, too...but I'm thinking I probably won't. Tomorrow we are supposed to experience the coldest Thanksgiving in 100 years here in Atlanta -- only 22 degrees tomorrow morning and a high only in the mid 40s. Well, I snapped a couple photos of my modified "personal green bean casserole" to give you a suggestion of how you might enjoy it too by making the cream of mushroom soup (instead of canned) and substituting real onions in place of the fried canned type. Now back into the kitchen for me to make some cranberry sauce. Enjoy!


 |
| Green Bean Casserole -- Wheat-free |
Find 100's of FREE eBooks here: FREE Grain-Free eBooks
Tuesday, November 26, 2013
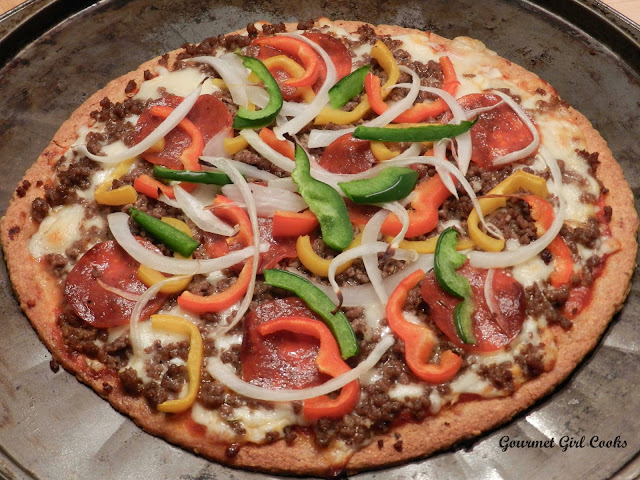
It's Pizza Night!
Today I continued working on my Thanksgiving dinner meal prep. One of my sons came for dinner so I wanted to make something fairly simple, but really good. I accomplished that by making pizza! Everyone had their own pizza. Hubby had pepperoni, artichoke hearts and Kalamata olives on his...my son and I both had the exact same toppings of browned seasoned ground beef, pepperoni, thinly sliced onions and red, green and yellow bell peppers. It turned out delicious...one of the best yet! I made my wheat and grain free pizza crust to pile the toppings onto. I used the leftover Rao's Arabbiatta sauce from Sunday's lasagna...and a combination of both shredded mozzarella and dabs of fresh mozzarella cheese before adding the toppings. If you are looking for a quick and delicious meal to make on the night before Thanksgiving...pizza is always a great choice. I usually don't "cook" on the night before Thanksgiving, and in the past, it was always a good night to have take-out pizza. While this isn't take out...its almost the next best thing. I snapped a couple of photos as well as the recipe below for my pizza crust. Enjoy!

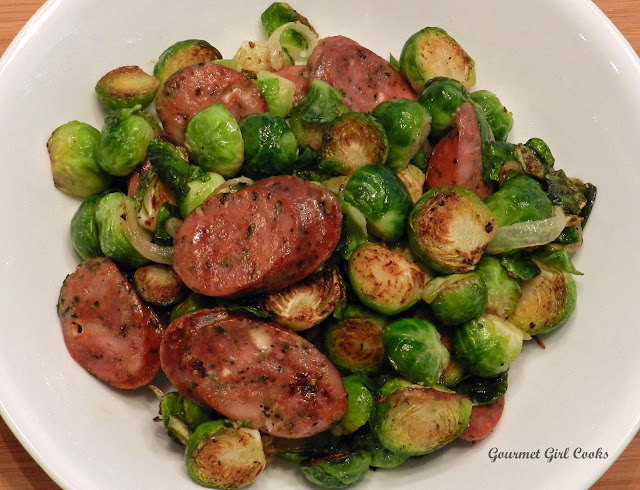
Sausage & Sprouts For Breakfast...One of the Many Hazards of Eating Low Carb & Wheat/Grain Free?
This morning we awoke to a cold, dark and gloomy morning. It is only up to 38 degrees here at lunch time. We have had lots of rain all night long...if it were a little colder we would have had a blizzard instead of a flood. They are calling for a possible wintry mix sometime tomorrow. I finally have all my Thanksgiving shopping done and worked a good part of yesterday on starting the prep work. While I am transitioning more of my traditional recipes over this year to being wheat/grain free for everyone (since I am the only one that eats this way), not everything I make for the family is wheat free, which means I still make 2 different versions of some items. I have done all my chopping (onions, celery, squash, etc.) and roasted the sweet potatoes for the casserole for the family. I baked some crustless individual Rich Pumpkin Custard Cups late last night (for me). Today I am working on making green bean casseroles which means I'll be making my grain free Cream of Mushroom Soup first. This morning I realized one of the many hazards of eating low carb and wheat/grain free. When we woke up, hubby immediately reached for a big old bagel (he does not eat wheat-free, although he eats and likes what I make--he still eats the other stuff). You know what oddity I was in the mood for when I got up??? Well, that would be brussels sprouts and sausage with onions!!! While I initially hesitated making it for "breakfast" since it's kind of an odd breakfast for most...that's what I wanted so I went ahead and made it for myself. Take this as a warning...eating low carb, wheat, grain and sugar free may cause you to eat really unusual things for breakfast!!! Check out my Sausage & Sprouts below. Enjoy!

 |
| I found these at Costco a while back...they are not overly spicy, despite the habanero |
Monday, November 25, 2013
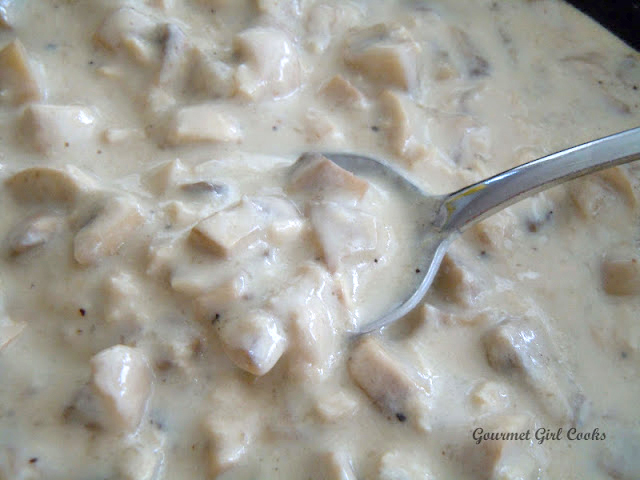
Cream of Mushroom or Chicken Soup -- Low Carb & Wheat/Grain-Free
Below is my recipe for Cream of Mushroom OR Cream of Chicken Soup (depending on your preference). I created it last September for one of my casseroles. It is a delicious soup to eat as is or to use in place of canned cream of mushroom soup (or chicken) in recipes like the classic Green Bean Casserole many of us are use to making. It is wheat free and grain free and very simple to make. If you are going to use it to make Green Bean Casserole, you don't need to add the additional milk to the green bean casserole recipe...you can use it as is. The recipe and a couple photos are attached below. Enjoy!

Cream of Mushroom or Chicken Soup (Wheat/Grain-free)
(Makes approximately 1-1/2 cups of cream of chicken/mushroom soup)
Ingredients:
2 tablespoons unsalted butter
8 oz mushrooms, diced (or 1/2 to 2/3 cup finely minced cooked chicken for cream of chicken)
1/4 teaspoon Celtic sea salt
1/4 teaspoon freshly ground black pepper
1/2 teaspoon xanthum gum (slightly more if you want thicker soup)
3/4 cup chicken stock
3/4 cup half-n-half or heavy cream
Dash tamari sauce, optional
Directions:
Melt butter in a medium saucepan over medium heat. Stir in mushrooms, salt and pepper. Cook until mushrooms have released their moisture, about 8-10 minutes. Stir in chicken stock and half-n-half or cream and when the mixture is hot, sprinkle xanthum gum across the surface, whisking until well blended into the soup. Simmer uncovered until soup is thick and reduced, about 10-15 minutes, stirring frequently. When the soup is the thickness you desire, remove from heat. Stir in optional dash of tamari. The soup can be eaten as is or used as a substitution for canned creamed soups. If you want it thicker, more like the condensed canned soups, add a tiny more xanthum gum while simmering.
*Note: Can be used as is without diluting in recipes calling for cream of mushroom or chicken soup. To make thicker for using in casseroles, add 1 to 2 ounces brick style cream cheese to pan after the moisture is cooked out of mushrooms, and whisk until cream cheese is softened and melted before adding chicken stock and cream; whisk vigorously to blend. Then, when soup is hot, add xanthum gum per instructions above.
**Additional Note: In the photo above, I added about 1/4 cup finely diced chicken breast to my cream of mushroom soup as it was simmering (so I actually made cream of mushroom/chicken soup). You could easily substitute any other item such as small cooked broccoli florets to make cream of broccoli, etc. or make any type of "cream of whatever" soup. The possibilities are endless. Hope this helps you recreate some of your old favorites!
Find 100's of FREE eBooks here: FREE Grain-Free eBooks
Sunday, November 24, 2013
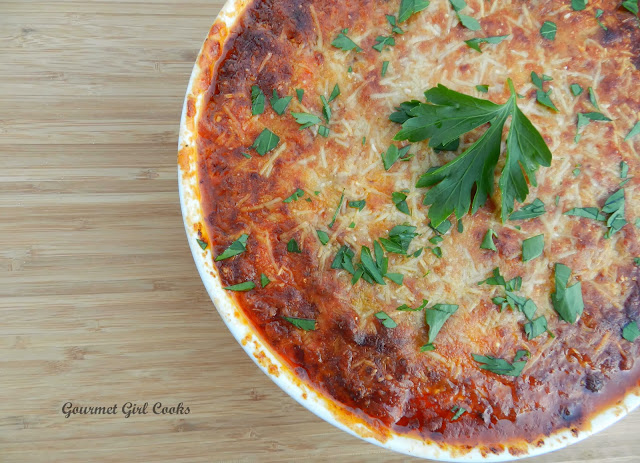
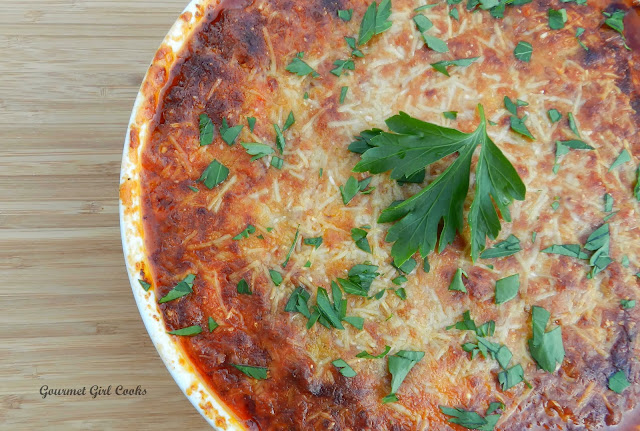
Lasagna w/ Grain-free "Noodles" -- Low Carb & Wheat Free
This evening I decided to make Lasagna w/ Grain-free Noodles. For the noodles, I used my grain-free tortilla/wraps to use as my noodles and then layered them with fresh mozzarella, shredded Parmigiano Reggiano, ricotta and shredded regular mozzarella. One of my sons and my daughter came for dinner this evening so I thought that might be something they would both enjoy. I browned a pound of ground sirloin with diced onion and seasoned it with salt, pepper, red pepper flakes, a bit of Italian seasoning and a little fennel seeds to give it a sausage-like flavor. I poured in 3/4 of a jar of Rao's Arrabbiata sauce and then layered it with my "noodles" (it's better to serve your lasagna with additional sauce than to make it too saucy). As I got ready to cut the tortillas to fit into a rectangular lasagna pan, I found myself suddenly questioning why...if pizza can be rectangular, why can't lasagna be round? So, obviously you know what the answer to that question was...I made a round lasagna! LOL (I'm such a rebel). ;-) I so hate driving between the lines...it's more fun to drive ON them! I just happen to own a deep dish 10-inch round pie dish...so I just plopped my perfectly fitting "noodles" in and layered my lasagna. I used a bit of cayenne, onion powder and a pinch of Italian seasoning in my grain-free noodles. The lasagna turned out beautiful. I snapped a few photos for you to see below along with the recipe for my grain-free "noodles". Enjoy!


 |
| Tired of watery grain-free lasagna -- there is no water on this plate! |
Sunday's Wacky Breakfast
Happy Sunday! This morning I woke up with lots of energy and enthusiasm and wanted to start the day by making a big Sunday breakfast of eggs, bacon, biscuits and muffins. What my breakfast evolved into though was quite different, and a bit comical (now, anyway)...it was not comical whatsoever at the time. I'm hoping this isn't an indication of how my Thanksgiving cooking will go this week! I started my breakfast prep by making my Lemon Macaroon Mini-Muffins. Well, that is where my breakfast aspirations began and promptly ended! While making my muffins, I had a bowl of all the dry ingredients and another bowl with all the wet ingredients on the counter. While I was beating the wet ingredients together (3 eggs, 3/4 cup buttermilk, 1/4 cup oil, vanilla, etc.), I somehow knocked my bowl of wet ingredients off the counter when I bumped my whisk. So, there I was standing in my favorite pink fuzzy slippers in a pool of the most slimy icky sloppy mess you could imagine. It was all over the counter, running down my dishwasher, my cabinets, all over my chef's mat and all over my hardwood floors -- and how, by the way, did I get some in my hair, too??? Your guess is as good as mine. After close to an hour of clean up (mostly by hubby) -- yeah, it was that messy -- and putting my slippers into the washing machine...I actually resumed making my muffins and started over again with the wet ingredients. By then, my enthusiasm was all but gone. I baked the muffins and scrapped the biscuits, eggs, and bacon...and instead grabbed a few slices of Boar's Head cracked pepper turkey breast out of the fridge...slapped some muenster cheese on top and rolled them up. I had that along with a few muffins and a cup of coffee. Hmmm....wonder what making dinner will turn into for me tonight? LOL As I sat down to eat, I decided to grab my camera, toss a couple of beautiful fall flowers by my plate and snap a quick photo to show you that "when life hands you lemons and dumps your muffin batter on the floor...regroup and roll up turkey and cheese"! Enjoy!


Friday, November 22, 2013
Pumpkin Pie w/ Cinnamon Almond or Hazelnut Crust -- Low Carb & Sugar Free
When I made pumpkin pie last year, I used a Cinnamon Hazelnut Crust, but if you prefer a more traditional type pie crust, you simply use all almond flour and make a Cinnamon Almond Crust instead. For the pie filling, I use the recipe on the can of Libby's pure pumpkin puree as my general guide and then make a few simple modifications. One of them is substituting 3/4 cup of Swerve (instead of 3/4 cup of sugar in the original recipe). I also reduce the amount of milk/liquid to 8 ounces (instead of the 12 ounces evaporated milk in the original recipe). You can use 8 ounces of whatever type milk product you prefer (cream, half-and-half, canned coconut milk or almond milk) or a combination like I did last year. By reducing the volume of milk, it helps keep the pie thick and rich and not too liquidy and also reduces the carbs a bit. When using nut flour based crusts (either hazelnut or almond flour), it is best to keep the temperature a bit lower since pies take a bit longer to bake than many other baked products. Nut flours are more susceptible to burning, which you want to avoid. A hazelnut crust will produce a darker and stronger tasting crust; an almond flour crust will produce a more traditional flour-type crust that most people are use to. If you prefer, you can also omit the crust altogether and make individual crustless pumpkin pies and just mix and bake according to the instructions. I have made them both with and without crust. I actually prefer pumpkin pie without crust, especially after a big holiday meal...but it's delicious either way. The crustless version is also nice and quick to put together. Below are a couple of pictures of my pumpkin pies from last year (one with a cinnamon hazelnut crust and a crustless version). I've made a few minor updates to the recipe posted below and am reducing the baking temperature a bit to better ensure the pies won't burn. Enjoy!
 |
| With Cinnamon Hazelnut Crust |
Thursday, November 21, 2013
Magical Chocolate Cranberry Walnut Bars -- Sugar Free & Low Carb
This evening, my seasonal "cranberry craze" continues! I have been looking at finding ways to incorporate cranberries into a bar cookie. What better way to do that than layering them along with dark chocolate, coconut, walnuts and ooey gooey Sweetened Condensed Coconut Milk? These Magical Chocolate Cranberry Walnut Bars are sweet, tart, chocolatey, coconutty, ooey, chewy and gooey...it doesn't get much better than that -- especially if you happen to be a cranberry lover like I am. They are also festive looking for the holidays. Who needs red M&Ms for holiday baking when you can have antioxidant rich cranberries, along with some dark chocolate tossed in, to boost those antioxidants. Check out some interesting facts about why cranberries are considered to be such a "superfood" --> "Cranberry Health Benefits: The Power of Antioxidants". In this link it states that fresh cranberries can last up to 2 months in the refrigerator if tightly sealed and that cooked cranberries can last up to a month in the fridge (so I'm going to make my cranberry sauce ahead of time this Thanksgiving). Another interesting factoid that I didn't realize was that if one cranberry in the bag gets soft, you should remove it immediately or others begin to get soft and go bad, too. The only other fruit higher in antioxidants is blueberries...who knew they were THAT good for you -- almost medicinal...LOL. Check out my bar cookie recipe below as well as a few photos. Excuse me now while I go "take my antioxidants". Enjoy!


Magical Chocolate Cranberry Walnut Bars
Ingredients:
For the crust:
For the crust:
1-1/2 cups blanched almond flour
1/4 cup ground golden flax seed
1/4 cup Swerve Sweetener (or equivalent sweetener to 1/4 cup sugar)
1/2 teaspoon cinnamon
4 tablespoons butter, diced
1 egg
For the toppings:
1 cup chopped walnuts
1 cup unsweetened flaked coconut (the longer shreds)
1 (3.5 ounce) bar of 70% or 85% cacao chocolate, chopped or 70% chocolate chips
1 cup fresh cranberries, coarsely chopped
3 tablespoons Swerve Sweetener (or sweetener equivalent to 3 tablespoons sugar)
1 cup fresh cranberries, coarsely chopped
3 tablespoons Swerve Sweetener (or sweetener equivalent to 3 tablespoons sugar)
Preheat oven to 325 degrees F. In a medium bowl, add almond flour, flax, Swerve, cinnamon, diced butter and 1 egg. Using a pastry/dough cutter, cut butter and egg into flour mixture until a thick, dense dough forms. Using your hands or a rubber spatula, press dough evenly into a 9x9" nonstick baking pan. Bake crust at 325 degrees for approximately 12 minutes, or until very lightly browned. Remove crust and let cool about 15 minutes.
Increase oven temperature to 350 degrees. In a small bowl, mix cranberries with 3 tablespoons Swerve and set aside. Layer walnuts, coconut, and chocolate on top of crust; top with cranberries. Evenly drizzle 1-1/4 cups sweetened condensed coconut milk on top. Bake at 350 degrees for 20 to 25 minutes, or until lightly golden on top and bubbly around edges. Let cool completely and refrigerate until chilled before cutting into bars.
Increase oven temperature to 350 degrees. In a small bowl, mix cranberries with 3 tablespoons Swerve and set aside. Layer walnuts, coconut, and chocolate on top of crust; top with cranberries. Evenly drizzle 1-1/4 cups sweetened condensed coconut milk on top. Bake at 350 degrees for 20 to 25 minutes, or until lightly golden on top and bubbly around edges. Let cool completely and refrigerate until chilled before cutting into bars.
Wednesday, November 20, 2013
Rich and Thick Parmesan Cauliflower Mash - Low Carb Alternative for Mashed Potatoes
This evening we had my Spice Rubbed Slow Cooker Tri-Tip Roast for dinner (seasoned with a simple rub of 1/2 teaspoon of each: sea salt, freshly ground black pepper, smoked paprika, ground ancho chile pepper, and then about 1/4 teaspoon each onion powder and garlic powder). I put it in my crock-pot and cooked it all day long on low. When I got home, I placed about 2 pounds of cauliflower florets in a pot along with 1 cup of chicken stock and cooked it for about 20 minutes until the cauliflower was totally tender and all the broth had cooked off (I uncover the pan after the cauliflower is soft and cook off the remaining broth to concentrate the flavor the broth adds to the cauliflower). It also gives the cauliflower a slightly golden buttery color.
I add cream cheese, cream, Parmesan salt and pepper and whiz it all together with my immersion blender while it's still in the pot...and "Voila"...rich, thick mashed potato-like cauliflower mash. Not only does it taste good, but it is almost impossible to tell them from the "real McCoy"!! While many of you that have followed me for a while have probably already tried these or made your own version of cauliflower mash (there are many variations), I wanted to make a special post for any newcomers, too. This recipe makes a GREAT low carb substitution for the traditional mashed potatoes frequently enjoyed on Thanksgiving. It is quick, simple and uses very few ingredients that are easy to find anywhere...but more importantly, it tastes really good. If you like garlic mashed potatoes simply coarsely chop a clove or two of garlic and toss it into the pan along with your cauliflower while it cooks so it gets tender. It will get pureed right along with the cauliflower, too. If you prefer your mash super thick and rich, simply add a bit more cream cheese or Parmesan. If you prefer them a bit thinner, add a touch more cream -- of course, butter is always welcome, too! ;-) Below is the recipe for my Rich & Thick Parmesan Cauliflower Mash along with a photo -- check out those "faux-tatoes". Enjoy!
.jpg)
Tuesday, November 19, 2013
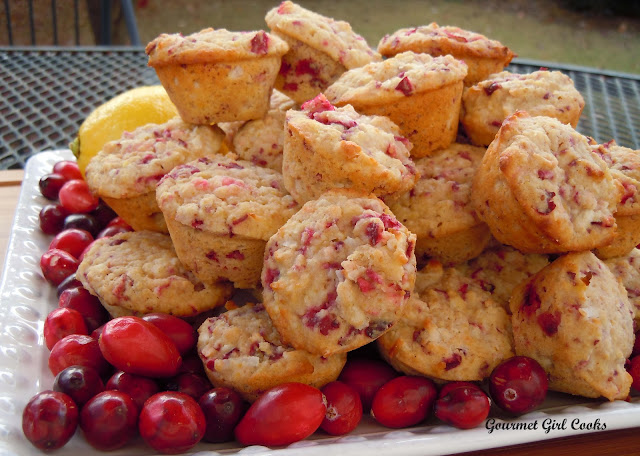
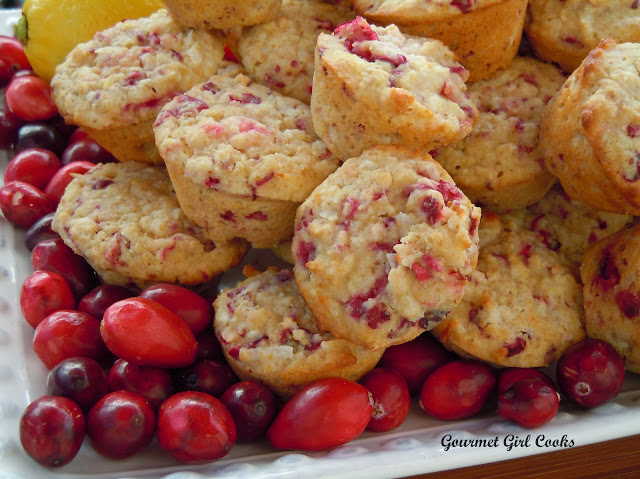
Cranberry Lemon Macaroon Mini-Muffins -- Low Carb & Wheat Free
This past week I made a variation of my cranberry muffins. I made Cranberry Lemon Macaroon Mini-Muffins. I bumped up the cranberries, added lemon zest and unsweetened coconut. It was probably my favorite variation so far. I really liked the additional cranberries, but then again I really love cranberries. I added 2 cups of chopped cranberries to mine (add 1-1/2 cups if you aren't as crazy about cranberries as I am) and I increased the sweetener a bit to compensate for the additional tartness. I also added unsweetened shredded coconut instead of nuts. The muffins turned out great -- I loved the added crunch from the coconut. It was sort of a cross between a muffin and a macaroon. I snapped a few photos for you to see below as well as the recipe. Enjoy!
.jpg)
.jpg)


Monday, November 18, 2013
Chicken Cheese Quesadillas -- Made w/ Grain-Free Tortilla/Wraps
This evening I used my Grain-Free Tortilla/Wraps to make one of my old Mexican style favorites that I didn't think I'd be able to enjoy again after giving up wheat and grains...that is, until I created a simple multi-purpose tortilla/wrap recipe not long ago. I have used these tortillas as noodles in soup, in place of lasagna noodles, as a sandwich wrap, to make fajitas, as a breakfast burrito...and now tonight, quesadillas! They are so simple to make. I made 2 grain free tortillas (recipe below) using my crepe pan (I usually use my non-stick skillet to make them in, but I found my missing crepe pan this evening completely by accident). I placed 1 cooked tortilla in a heated non-stick skillet and scattered some shredded cheddar and Monterey Pepper-Jack cheese on top, then added some leftover shredded chicken along with sauteed Poblano peppers and onions, a bit more cheese and heated it until lightly toasted and golden on the bottom. I placed the 2nd tortilla on top and gently pressed it down to even everything out. I very carefully flipped it over (it's easier to flip once the cheese on top melts a bit and sticks to the top tortilla like glue to help hold it in place). After flipping it over, I cooked it a few minutes on the other side until the bottom was golden and toasty and then slid it out onto a cutting board and let it sit about 5 minutes for the cheeses to set so they wouldn't run out when cut. I cut the quesadilla into wedges and enjoyed it with some salsa and sour cream. As I ate my quesadilla, I did a little Mexican hat dance in my head -- LOL! I really didn't think I would ever be eating this dish again. The recipe for the simple tortillas is below -- it makes one tortilla/wrap -- just multiply it times the number you need and fill it with your favorite quesadilla filling. I also made an extra tortilla to set aside to make a wrap sandwich with for lunch tomorrow. Enjoy!


Sunday, November 17, 2013
Herbed Grain Free Stuffing - Wheat Free & Grain Free
This weekend was a busy weekend. The weather here was ugly today -- not cold (upper 60s) -- but rainy, dark, foggy...just yucky. Both of my sons came for dinner this evening. I just made simple and quick lightly dusted chicken cutlets (w/ almond flour, Parmesan, salt, and pepper) that I quickly browned in a skillet on the stove. We had green beans w/ toasted almond and the guys had noodles with their meal (they are not wheat free). This weekend I have been experimenting with a number of different recipes -- one of which I tested out on my family tonight -- it was an epic fail...LOL. So, don't worry...I definitely won't be posting THAT recipe. It was a "cranberry chipotle chutney" and I thought it might go nice with our simple chicken cutlets (I had planned to make turkey breast cutlets, but couldn't find any). Anyway...I wanted it to be sweet-tart-spicy. Well...the truth is, it was just yucky-yucky-yucky! It tasted good when I was making it (I thought)...but all the berries didn't burst when I cooked them, which is a bad thing. When the berries don't burst (like they do when you are making cranberry sauce)...you get a nicely sweetened/flavored "sauce" from the berries that have ruptured...but when you bite into those softened but intact berries when you are eating....well, it is not a good thing...it is sour enough to send shivers down your spine! Hahaha! So, the topic of conversation at our dinner table was "Mom...this is not good -- what were you thinking"....LOL. Oh well...we all survived! :-)
Yesterday I posted the recipe for my stuffing bread cubes. Below is the recipe for the herbed sausage apple stuffing that I like to make. I always add celery, onion, apple and herbs -- the sausage and cranberries are added on and off from year to year, and I always want to add mushrooms but don't normally because hubby doesn't like them...which is why making my own grain free stuffing is really nice -- I can add anything I want! ;-) Check out my stuffing recipe below -- the great thing about stuffing is you can put whatever you like in it to make it your own. Enjoy!
Herbed Grain Free Stuffing
Ingredients:
6 cups of grain free stuffing bread cubes (*click link for recipe)
2 cups turkey or chicken broth (more or less to moisten, depending on preference)
1/2 pound Italian sausage, (or preferred type or flavor of bulk sausage), optional
2 tablespoons fresh sage, finely chopped (or 1 tablespoon dried)
2 teaspoons fresh rosemary, finely chopped (or 1 teaspoon dried)
2 teaspoons fresh thyme leaves (or 1 teaspoon dried)
1/4 cup fresh flat leaf parsley, chopped
1/2 cup onion, finely diced
1 cup celery, chopped or thinly sliced
1/2 teaspoon Kosher salt, or to taste
1/2 teaspoon pepper, or to taste
1 Granny Smith apple, cored and diced, optional
1/2 cup fresh cranberries, coarsely chopped, optional
1 cup sliced fresh mushrooms, cooked, optional
8 tablespoons (1 stick) butter, melted
Directions:
Preheat oven to 350 degrees F. Please grain free bread cubes in a large bowl and set aside. In a medium to large skillet, brown optional bulk sausage well, breaking and crumbling into pieces as it cooks; remove cooked sausage and add to the bowl of bread cubes. Place butter in a large saucepan or stockpot; add onion and celery and cook for about 4-5 minutes until celery and onion is crisp-tender. Add chopped apple and cranberries (if using) to the celery and onion mixture and cook a few more minutes just to soften slightly. Add herbs (sage, rosemary, thyme, parsley), the bowl of bread cubes with optional cooked sausage and mushrooms to the pot; stir until mixed. Pour broth over the stuffing mixture and toss lightly (add enough to moisten, but do not over saturate). Spoon mixture into a well greased 9 x 13 baking dish or casserole dish; cover and bake at 350 degrees F for about 35-40 minutes. If desired, uncover and bake an additional 10-15 minutes to give it a drier "crusty topping" or until stuffing is the desired moistness and consistency (you can add additional broth, if needed while it is cooking).
*Note - The fresh cranberries are tart and not sweet like adding dried sweetened "Craisin" type cranberries. If you want to add a bit of sweetness, you can add a sweeter type of apple other than Granny Smith.
Yesterday I posted the recipe for my stuffing bread cubes. Below is the recipe for the herbed sausage apple stuffing that I like to make. I always add celery, onion, apple and herbs -- the sausage and cranberries are added on and off from year to year, and I always want to add mushrooms but don't normally because hubby doesn't like them...which is why making my own grain free stuffing is really nice -- I can add anything I want! ;-) Check out my stuffing recipe below -- the great thing about stuffing is you can put whatever you like in it to make it your own. Enjoy!

Herbed Grain Free Stuffing
Ingredients:
6 cups of grain free stuffing bread cubes (*click link for recipe)
2 cups turkey or chicken broth (more or less to moisten, depending on preference)
1/2 pound Italian sausage, (or preferred type or flavor of bulk sausage), optional
2 tablespoons fresh sage, finely chopped (or 1 tablespoon dried)
2 teaspoons fresh rosemary, finely chopped (or 1 teaspoon dried)
2 teaspoons fresh thyme leaves (or 1 teaspoon dried)
1/4 cup fresh flat leaf parsley, chopped
1/2 cup onion, finely diced
1 cup celery, chopped or thinly sliced
1/2 teaspoon Kosher salt, or to taste
1/2 teaspoon pepper, or to taste
1 Granny Smith apple, cored and diced, optional
1/2 cup fresh cranberries, coarsely chopped, optional
1 cup sliced fresh mushrooms, cooked, optional
8 tablespoons (1 stick) butter, melted
Directions:
Preheat oven to 350 degrees F. Please grain free bread cubes in a large bowl and set aside. In a medium to large skillet, brown optional bulk sausage well, breaking and crumbling into pieces as it cooks; remove cooked sausage and add to the bowl of bread cubes. Place butter in a large saucepan or stockpot; add onion and celery and cook for about 4-5 minutes until celery and onion is crisp-tender. Add chopped apple and cranberries (if using) to the celery and onion mixture and cook a few more minutes just to soften slightly. Add herbs (sage, rosemary, thyme, parsley), the bowl of bread cubes with optional cooked sausage and mushrooms to the pot; stir until mixed. Pour broth over the stuffing mixture and toss lightly (add enough to moisten, but do not over saturate). Spoon mixture into a well greased 9 x 13 baking dish or casserole dish; cover and bake at 350 degrees F for about 35-40 minutes. If desired, uncover and bake an additional 10-15 minutes to give it a drier "crusty topping" or until stuffing is the desired moistness and consistency (you can add additional broth, if needed while it is cooking).
*Note - The fresh cranberries are tart and not sweet like adding dried sweetened "Craisin" type cranberries. If you want to add a bit of sweetness, you can add a sweeter type of apple other than Granny Smith.
Saturday, November 16, 2013
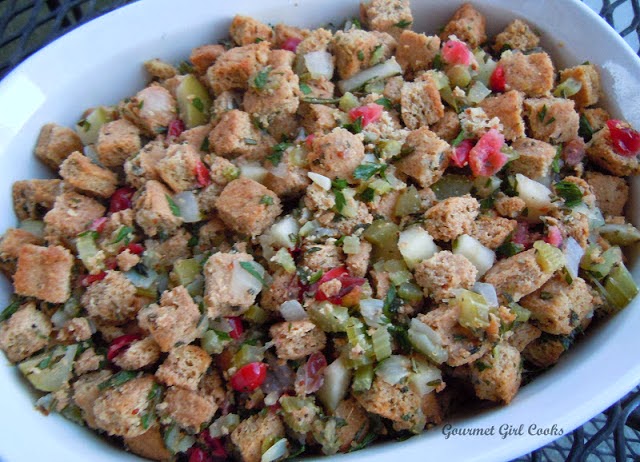
Grain Free Stuffing Bread Cubes -- To Use In Your Favorite Stuffing Recipe
 |
| This is the stuffing I made with these for last year's Thanksgiving |
This afternoon I made a batch of my Grain Free Stuffing Bread Cubes. I used these last year to make my Thanksgiving stuffing and it turned out great (it was my first wheat free Thanksgiving). I tweaked it just a tad this year. It is simple to make and can be made days ahead of time and then sealed tightly in a Ziploc-type bag to keep crisp until you are ready to use them to make your Thanksgiving stuffing. This recipe makes a grain free equivalent of "seasoned stuffing cubes" that you normally buy at the store (I used Pepperidge Farm or Arnold in the past). You simply substitute these grain free stuffing cubes in your favorite stuffing recipe. It makes about 7 cups of oven dried bread cubes, which is the equivalent to about 1 bag of commercial stuffing mix which normally holds about 6 cups. It is measured after oven drying to get 7 cups (before drying it measures about 10 cups of fresh bread cubes). Tomorrow I will post a stuffing recipe using them that I usually make (sometimes with and sometimes without sausage). Stuffing (or dressing) is one of those dishes where there are a zillion different versions -- and is really a matter of personal preference and to some extent where you are from that determines the style and what you put in it. People tend to be very opinionated about what to put in it and what NOT to put into their stuffing. Some prefer to cook it in the bird and others in a casserole dish. I have made it both ways and frequently make it both ways (in and out of the bird) because it is usually one of those dishes that you can never have too much of. I have not yet tried cooking the grain free stuffing inside the bird -- last year I made both regular stuffing (for the family) and grain free for me. Everything was the same except for the bread cubes used. I hope you enjoy using this recipe as an alternative to the traditional stuffing cubes and enjoy making your favorite stuffing recipe with these. I snapped a few photos of the grain free stuffing bread cubes below as well as the recipe. Enjoy!
 |
| Before oven drying... |
 |
| Here is the dough |
 |
| Dough has been patted out with a rubber spatula - ready for the oven |
 |
| Stuffing bread is fresh out of the oven |
 |
| Cooling before cutting into cubes |
 |
| Oven dried and ready to be used in your favorite stuffing recipe! |
Grain Free "Stuffing" Bread Cubes
Makes 6 to 7 cups toasted bread cubes
Ingredients:
1/4 cup organic coconut flour
1 cup blanched almond flour
2 cups organic ground golden flax seed
4 teaspoons baking powder (aluminum free)
2 teaspoons Italian seasoning
1 teaspoon Kosher salt
1 teaspoon onion powder
1 teaspoon garlic powder
1/2 teaspoon black pepper
6 eggs (I used organic cage free)
1 cup water
1 tablespoon apple cider vinegar
4 tablespoons extra virgin olive oil
Directions:
Preheat oven to 375 degrees F. In a medium sized bowl, mix all dry ingredients together; add eggs, water, vinegar and oil and mix well. Dough will be thick and a bit sticky and slightly springy feeling. Let the dough sit for about 5 minutes while you prepare the baking pan. Line a baking pan or cookie sheet with non-stick foil lightly brushed with oil (or parchment paper sprayed or brushed with oil). Place ball of dough in the center of the pan and begin pressing the dough outward using a lightly oiled rubber spatula to a thickness of 1/4 to 1/2 inches thick. Bake at 375 degrees for 25-30 minutes or until the bread is lightly golden and feels done when pressed near the center. This makes a 1/2 to 3/4-inch thick "stuffing bread".
Remove bread from oven and transfer to a rack; let cool for approximately 10-15 minutes. Lower oven temperature to 300 degrees F. Place cooled bread on a cutting board and cut into approximate 1/2-inch cubes; place cubes back on baking sheet and return to 300 degree oven and bake for approximately 30-40 minutes, or until cubes are dried and crisp (when done, cubes should be hard when pinched or gently squeezed). When bread cubes are thoroughly dry, hard and toasty, remove from oven and let cool completely. Store in a tightly covered container or Ziploc-type bag to keep moisture out until ready to use. Makes approximately 6 to 7 cups of toasted dried bread cubes. Use in your favorite stuffing recipe.
Saturday's Breakfast Skillet -- Fried Organic Egg w/ Brussels Sprout-Bacon Hash & Roasted Cranberries
Happy Saturday! We awoke to a dark and cloudy, damp Saturday morning. Before beginning our errands for the day, I decided to make a "weekend breakfast"...which basically means having anything other than the Greek Yogurt I eat for breakfast every day during the week! I like to treat myself on the weekends with more of a "Bed & Breakfast" type breakfast. As I rummaged through my refrigerator, I realized I had so many odds and ends of different items as well as small bowls of leftovers from meals made throughout the week. You know...the things you don't want to throw away, but aren't really enough to make anything with? Well...here enters the queen of odds n' ends (that would be me)! This is what I found in my fridge this morning (by no means a complete inventory...but nonetheless they were taking up precious space): a small bowl with about a cup of leftover chipotle dusted roasted brussels sprouts; 2 strips of leftover oven roasted bacon on a small plate; small bowl containing about 1 cup of fresh cranberries leftover from feverish cranberry muffin making the past couple of weeks (by the way I have another recipe for those, too); a small wedge of raw onion wrapped in plastic wrap...and of course my usual organic eggs that are always in there. I also just happened to have one precious leftover lonely looking Easy Cheddar Black Pepper Biscuit wrapped and sitting on my counter. So, I waved my magic wand (also known as my spatula)...and preheated my oven to 375 F and tossed a handful of the raw cranberries on a baking sheet and spritzed them with olive oil, then grabbed a pinch of granular Swerve and sprinkled the cranberries and roasted them for 10 minutes until they popped (yes...roasted tart Craisins...who knew???). While they roasted, I sliced the onion wedge into strips and sauteed it in a bit of olive oil until it began to caramelize and get brown and golden...I tossed in the leftover chipotle roasted brussels sprouts along with a pat of butter and tossed them with the onions while I chopped up the bacon strips and tossed them in and heated the sprouts, onions, bacon until all buttery and hash-like. Once my brussels-bacon hash was perfect, I used my magic wand (spatula) to push them aside and leave a well in the middle of my skillet where I added another small pat of butter, then cracked an egg into the well...covered it and cooked until the egg was done to my liking. I scattered the tart roasted cranberries on top...and "Voila"...with 100% leftovers (except for the egg), I was having my own Bed & Breakfast style breakfast. Don't throw away your week's leftovers -- make something "out of the box" or off the grid with them at the end of the week -- you just might surprise yourself -- and the worst case scenario if you don't like what you put together??? Well...the leftovers were probably headed for the trash anyway. Enjoy!
P.S. -- After re-reading what I wrote before posting -- I realized I had a little too much coffee this morning...Happy Saturday!


Did someone mention "Christmas Wreath"??? LOL -- This is what it looked like when I plated it before eating...without the skillet and with the white background...well, I felt a little Ho-Ho-Ho-ish when I ate it! ;-)

P.S. -- After re-reading what I wrote before posting -- I realized I had a little too much coffee this morning...Happy Saturday!
 |
| Leftovers are a beautiful thing... |


Did someone mention "Christmas Wreath"??? LOL -- This is what it looked like when I plated it before eating...without the skillet and with the white background...well, I felt a little Ho-Ho-Ho-ish when I ate it! ;-)

Thursday, November 14, 2013
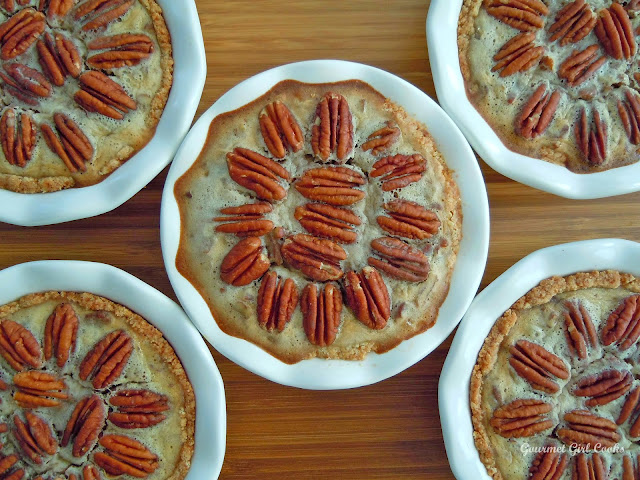
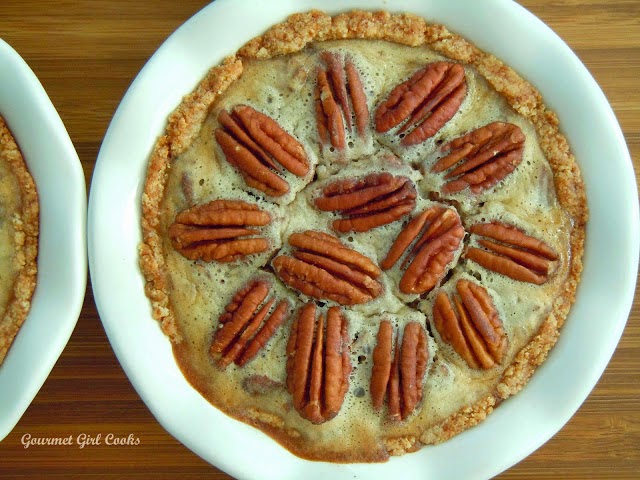
Pecan Pie w/ Cinnamon Almond Crust -- Wheat & Sugar Free
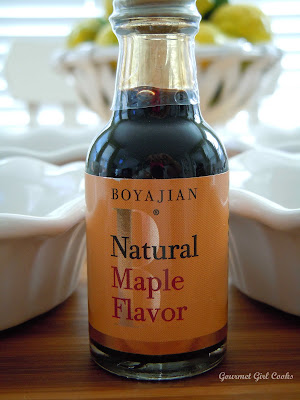
This weekend I experimented with some holiday recipes. Last year I made a sugar and grain free pumpkin pie for Thanksgiving, so this year I wanted to experiment with making a sugar and grain free pecan pie. Pecan Pie is a bit trickier to create because of the "goo" part of the pie that typically consists of a boatload of sugar and Karo syrup, which are no-no's for me (and should be no-no's for everyone). I considered using my sugar free maple syrup that's sweetened with xylitiol, but decided against using it since xylitol causes tummy troubles for some folks and is toxic and deadly to pets. Since I have a little dog and my family is famous for feeding him from the table, I decided not to risk tummy troubles for my family or even worse, harm my beloved pup, Spike...so I nixed the xylitol based syrup idea. I've never really been much of a pecan pie fan because I always found it too sickening sweet, so to counter that, I would add an extra cup of pecans to the "goo" part to help cut the sweetness. For my sugar free pecan pie, rather than trying to duplicate a "goo replacement", I decided instead to focus on the pecans themselves and encase them in a less sweet natural maple flavored "Sweetened Condensed Coconut Milk custard-like base". Wow, that was a mouthful wasn't it! LOL
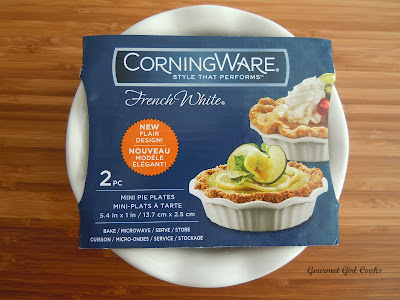
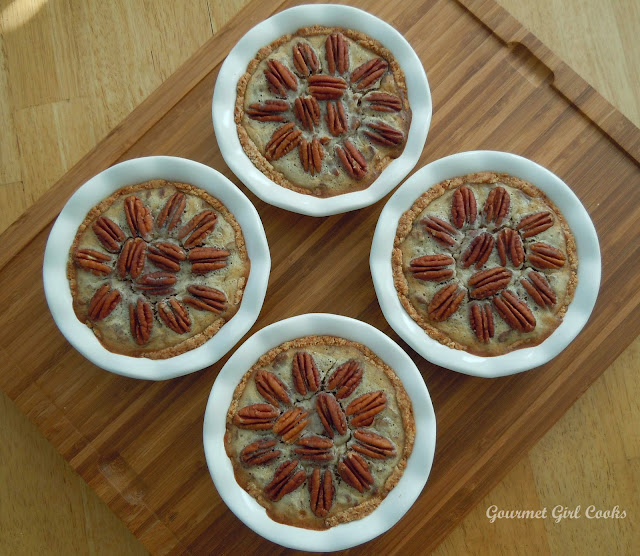
I combined my Sweetened Condensed Coconut Milk with eggs, Swerve, pure maple extract, vanilla and butter to make a thick, dense, custard-like pie filling to hold the pecans. It turned out great. I actually liked it much better than the sickening sweet traditional goo type filling. While my version of pecan pie has some similarities to typical pecan pie...it is also very different because it is "goo-free" and nowhere near as sweet (although you could make it sweeter if you prefer). I used to make a chocolate pecan pie at Christmastime, which could easily be done with this version, too, by simply melting about 3 ounces of chopped dark chocolate into the sweetened condensed milk and then allowing it to cool before mixing in the eggs and other filling ingredients. I decided to make individual smaller pies rather than a larger pie (they cook more quickly). I used cute little 5-inch diameter, 1-inch deep, pie dishes (by Corningware French White) and got 5 individual pies from this recipe. Otherwise the recipe makes one 9.5-inch or 10-inch pie. Notice that this pie is lighter in color without the dark Karo syrup or maple syrup. I tried a different kind of pure maple extract in this recipe, made by Boyajian (which I found by researching "best real maple flavor"). Bon Appetit Magazine rated it as one of the better natural maple extracts, so I decided to give it a try. I also have pure maple extract by OliveNation (which I like), but I wanted to compare them. I found the Boyajian Natural Maple Extract much darker, with a richer and more intense maple flavor. While both extracts are good, I liked this one best for these pies (I didn't want the maple flavor to bake off). This maple extract provided the real maple flavor I was looking for without the sugar I was trying to avoid. I snapped some photos of my little mini-pies below as well as the recipe. Enjoy!
.jpg)


Pecan Pie w/ Cinnamon Almond Crust -- Wheat & Sugar Free
Makes one 10-inch pie or five 5-inch x 1-inch individual pies
Ingredients:
For the crust:
2 cups blanched almond flour
3 tablespoons butter
1 large egg
1/2 teaspoon ground cinnamon
3 tablespoons Swerve Sweetener (granular or confectioners)
Coconut oil spray or butter for greasing pie dish
For the filling:
1-1/4 cups Sweetened Condensed Coconut Milk
1 teaspoon vanilla extract
1 teaspoon pure maple extract
2 tablespoons melted butter
3 large eggs
3/4 cup Swerve Sweetener Confectioners (or powdered erythritol)
1 cup coarsely chopped pecans (large pieces)
1 cup pecan halves
Directions:
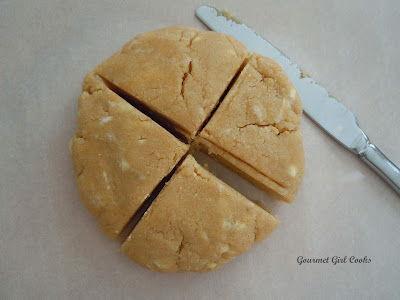
Preheat oven to 350 degrees F. Place all crust ingredients in a medium bowl (except for oil or butter for greasing pie dish). Cut butter, egg, cinnamon and 3 tablespoons sweetener into flour with a pastry cutter until mixture resembles small pebbles and the flour is thoroughly moistened (just like preparing a regular pie crust). Press crust mixture into a 10-inch pie dish (or divide evenly among 5 smaller individual pie dishes). Bake for 10 minutes until very lightly browned; remove from oven and set aside.
Reduce heat to 325 degrees F. Combine all filling ingredients in a medium bowl (except for 1 cup pecan halves reserved for the top) until mixed thoroughly. Pour filling mixture into pie dish (or divide between smaller pie dishes). Top with 1 cup reserved pecan halves and bake for 30 minutes; remove and cover loosely with foil and bake an additional 15 minutes for smaller individual pies or bake an additional 25-30 minutes (or until done) for the larger 10-inch pie. Cool and serve at room temperature or chilled. Top with whipped cream, if desired.
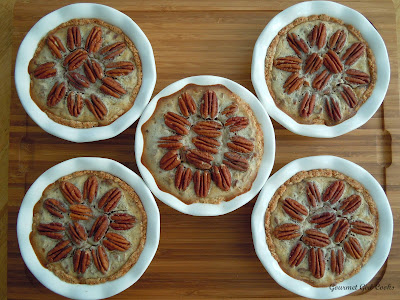
I combined my Sweetened Condensed Coconut Milk with eggs, Swerve, pure maple extract, vanilla and butter to make a thick, dense, custard-like pie filling to hold the pecans. It turned out great. I actually liked it much better than the sickening sweet traditional goo type filling. While my version of pecan pie has some similarities to typical pecan pie...it is also very different because it is "goo-free" and nowhere near as sweet (although you could make it sweeter if you prefer). I used to make a chocolate pecan pie at Christmastime, which could easily be done with this version, too, by simply melting about 3 ounces of chopped dark chocolate into the sweetened condensed milk and then allowing it to cool before mixing in the eggs and other filling ingredients. I decided to make individual smaller pies rather than a larger pie (they cook more quickly). I used cute little 5-inch diameter, 1-inch deep, pie dishes (by Corningware French White) and got 5 individual pies from this recipe. Otherwise the recipe makes one 9.5-inch or 10-inch pie. Notice that this pie is lighter in color without the dark Karo syrup or maple syrup. I tried a different kind of pure maple extract in this recipe, made by Boyajian (which I found by researching "best real maple flavor"). Bon Appetit Magazine rated it as one of the better natural maple extracts, so I decided to give it a try. I also have pure maple extract by OliveNation (which I like), but I wanted to compare them. I found the Boyajian Natural Maple Extract much darker, with a richer and more intense maple flavor. While both extracts are good, I liked this one best for these pies (I didn't want the maple flavor to bake off). This maple extract provided the real maple flavor I was looking for without the sugar I was trying to avoid. I snapped some photos of my little mini-pies below as well as the recipe. Enjoy!

.jpg)


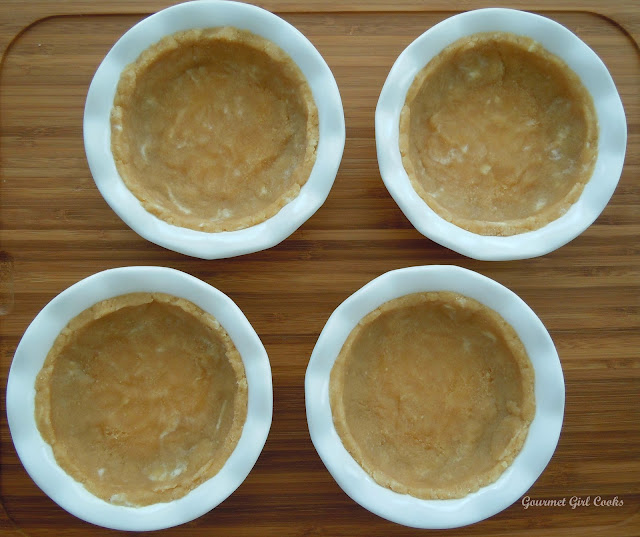
 |
| Popped into the oven to bake... |


Pecan Pie w/ Cinnamon Almond Crust -- Wheat & Sugar Free
Makes one 10-inch pie or five 5-inch x 1-inch individual pies
Ingredients:
For the crust:
2 cups blanched almond flour
3 tablespoons butter
1 large egg
1/2 teaspoon ground cinnamon
3 tablespoons Swerve Sweetener (granular or confectioners)
Coconut oil spray or butter for greasing pie dish
For the filling:
1-1/4 cups Sweetened Condensed Coconut Milk
1 teaspoon vanilla extract
1 teaspoon pure maple extract
2 tablespoons melted butter
3 large eggs
3/4 cup Swerve Sweetener Confectioners (or powdered erythritol)
1 cup coarsely chopped pecans (large pieces)
1 cup pecan halves
Directions:
Preheat oven to 350 degrees F. Place all crust ingredients in a medium bowl (except for oil or butter for greasing pie dish). Cut butter, egg, cinnamon and 3 tablespoons sweetener into flour with a pastry cutter until mixture resembles small pebbles and the flour is thoroughly moistened (just like preparing a regular pie crust). Press crust mixture into a 10-inch pie dish (or divide evenly among 5 smaller individual pie dishes). Bake for 10 minutes until very lightly browned; remove from oven and set aside.
Reduce heat to 325 degrees F. Combine all filling ingredients in a medium bowl (except for 1 cup pecan halves reserved for the top) until mixed thoroughly. Pour filling mixture into pie dish (or divide between smaller pie dishes). Top with 1 cup reserved pecan halves and bake for 30 minutes; remove and cover loosely with foil and bake an additional 15 minutes for smaller individual pies or bake an additional 25-30 minutes (or until done) for the larger 10-inch pie. Cool and serve at room temperature or chilled. Top with whipped cream, if desired.

Subscribe to:
Posts (Atom)