Sunday, September 18, 2016

Cheddar-Black Pepper Mini Biscuit Muffins - Low Carb

Happy Sunday! This morning we awoke to overcast skies and it's actually raining right now (we need it). I woke up early this morning to work on a recipe project and before I knew it, it was already 11:00. I decided to prepare us a nice Sunday brunch since it was so late. I was in the mood for biscuits with my scrambled eggs and bacon, so I quickly whipped up a batch of my Cheddar-Black Pepper Biscuits. I decided that rather than make them in the usual style of larger biscuits, that I'd scoop the dough into a mini muffin tin and make 24 small "biscuit-muffins" instead. Sometimes I don't feel like eating an entire biscuit (shocking, I know) and this way it's easier to have more or less, depending on your mood. They turned out great. I used Cabot's Classic Vermont White Cheddar Cheese in this morning's biscuits that I grated from a big brick I buy at Costco. It has lots of cheddar flavor, which I love. I also added some 3-Alarm Spicy Colby Jack Cheese to my eggs (another of my faves). The little Cheddar-Black Pepper Mini Biscuit Muffins turned out GREAT! Check out this morning's breakfast/brunch of "two's"...2 eggs, 2 strips of bacon, 2 mini biscuit-muffins and 2 small strawberries! I included a few photos as well as the easy peasy recipe below. Enjoy!


Cheddar-Black Pepper Mini Biscuit Muffins

INGREDIENTS:


2 cups blanched almond flour
3 tablespoons "cold" butter, diced
1 large egg
1 cup sharp shredded cheddar cheese, divided (I used Cabot's Classic Vermont White Cheddar)
1/4 to 1/2 teaspoon salt, or to taste
1/2 teaspoon freshly ground black pepper, or to taste
2 teaspoons baking powder
1/2 cup heavy cream (or buttermilk)

DIRECTIONS:

Preheat oven to 350 degrees F.  Lightly grease a 24-cup mini muffin pan.  

In a medium bowl, add almond flour, butter, egg, 1/2 cup of cheddar cheese, salt, black pepper, and baking powder. Cut in with a pastry cutter/dough blender until crumbly and all flour is slightly moistened and cheese is pulverized into the mixture. 


Stir in cream and remaining 1/2 cup of shredded cheddar cheese; mix in lightly until dough forms. Use a 1-tablespoon retractable scoop to make 24 even sized biscuit muffins by scooping heaping tablespoons of dough divided equally among the mini muffin pan wells. 

Bake at 350 degrees F for approximately 18-20 minutes or until light golden brown. Remove from oven; brush tops with melted butter, if desired. Cool for about 5 minutes; carefully remove from pan.


Thursday, September 15, 2016

Southwestern Style Chicken Chili - Easy Low Carb

This evening I was in the mood for chili, even though our temperature here is still ridiculously hot. I simply turned down the air conditioning and made it feel like Fall inside while we ate! LOL I stopped by Sprouts Farmers Market on  my way home and decided to make Southwestern Style Chicken Chili using ground chicken breast and fresh Southwestern Style Chicken Sausage (made fresh at Sprouts). The sausage was bulk style (not in casings) and had diced jalapeno, onion and garlic in it. The chili turned out absolutely amazing. The ground chicken breast becomes so tender when it simmers in the acidic tomato base. I only simmered it for about 30 minutes after everything was cooked. I like to use fire roasted tomatoes for extra flavor but you can use regular diced or crushed tomatoes if you prefer. The chili was moderately spicy but you can tone it down or add more heat if you prefer. I served the chili topped with Sargento's 4 State Shredded Cheddar, a blend of 4 different cheddars. It's one of my favorites. We also added a little dollop of sour cream to our bowls. I served the chili with mini Cheddar-Black Pepper Biscuits made with Cabot's Artisan Reserve 3-Year Aged Sharp White Vermont Cheddar that I shredded by hand. They were tender little biscuits that carry big cheddar flavor. I snapped a couple photos of the chili below and included the easy peasy recipe. Enjoy!


Chicken and veggies are cooked and ready for spices and tomatoes


Southwestern Style Chicken Chili

Ingredients:

2 pounds ground chicken (I used ground chicken breast)
3/4 pound spicy chicken sausage (I used Sprout's fresh Southwestern Spicy Sausage)
3 tablespoons oil, to saute vegetables
1 cup onion, diced
1 large sweet bell pepper (red, yellow or orange), diced
2 jalapeno peppers, finely diced (optional)
4 cloves garlic, minced
Spices:
   1 tablespoon chili powder
   1 teaspoon "Mexican style chili powder" (or 1 teaspoon chipotle chili powder)
   1 teaspoon hot Hungarian paprika (optional)
   1 teaspoon ground coriander
   1 teaspoon ground cumin (I use roasted cumin)
   1/4 teaspoon cayenne pepper, or to taste
   1 teaspoon dried oregano
   1 teaspoon salt, or to taste
   1 teaspoon freshly ground black pepper, or to taste
1 28-oz can diced or crushed fire roasted tomatoes, including juice (I used Muir Glen Organic Crushed Fire Roasted tomatoes)
1 6-oz. can tomato paste
1 cup chicken stock
1 cup water (more or less, depending on preferred thickness)
1 16-oz can kidney beans, drained (optional)

Directions:

In a large stockpot over medium heat, add oil and saute onion, sweet bell peppers, and jalapeno peppers until almost tender; add minced garlic and cook approximately 2 to 3 more minutes, stirring frequently (cover the pan to help speed up cooking time). 

In the same pan, add ground chicken and chicken sausage; cook, breaking up with a large spoon, until chicken is no longer pink. Add all of the spices, tomatoes, tomato paste, chicken stock and water. Add optional beans, if using. Bring to a medium boil; taste to adjust seasoning, if necessary.  Cover pot and reduce heat to low, Simmer on low for approximately 30 minutes (if desired, chili can be placed in a crock-pot and cooked on low for approximately 8 hours instead of cooking on stove top).

Ladle chili into bowls and top with shredded cheddar cheese and dollop of sour cream, if desired.


Wednesday, September 14, 2016

Wild Alaskan Coho Salad - Quick, Easy & Delicious

This evening I made a simple, quick and cool salad for dinner using a leftover piece of Wild Alaskan Coho Salmon (I poached a large fillet wrapped in foil on the grill last night for dinner for 12 minutes and then removed it from the heat, tightly closed it, and let it sit for about 10 minutes). I cut up a head of baby romaine lettuce and halved some small grape tomatoes and placed the Coho on top of the bed of salad greens. I drizzled it with a little olive oil and a squeeze of fresh lemon. It was fresh and delicious.

I bought a beautiful large piece of wild Alaskan Coho Salmon this weekend at Costco. Unfortunately, last weekend I thought I had picked up a piece of wild Coho salmon (the case was labeled "wild Alaskan Coho") and when I got home I realized that I instead came home with a $20 piece of FARMED steelhead trout; I don't know if someone made a mistake or mixed them up. To say it was upsetting is putting it mildly. I was so disgusted that I actually threw it away. But...this weekend I actually came home with the REAL Coho. I ate it for dinner last night, lunch today, and dinner again this evening. I have one more piece left for my lunch tomorrow! When I prepared it, I kept it simple and poached it with nothing but Kerrygold butter, fresh lemon juice and a pinch of pink Himalayan sea salt. I wanted to taste nothing but fresh wild salmon. I snapped a quick photo of this evening's "Coho Salad" below and included a couple peeks into my new house. The walls are still bare but it's finally beginning to look like someone actually lives here! Enjoy!


Sunday, September 11, 2016

Stove-Top Skillet Cheesy Squash Casserole - Low Carb

Yesterday was a busy day here. We're still getting situated in the new house and working on the final unpacking. We're beginning to hang pictures and decorate as well. I finally can see the light at the end of the tunnel now. I'm still waiting for one more appliance to arrive...my fridge. It's supposed to come this week...but I'll believe it when I see it! I ordered it 1 month before we moved in so it's been over 2 months now.

I can't tell you how much I am looking forward to the coming fall weeks when I can sit back and enjoy the house and start my fall baking. I'm dreaming of pumpkin, cranberries and the smell of cinnamon in the crisp cool fall air. Meanwhile, yesterday was yet another unbearably hot day here in the Atlanta area. It was 95 degrees before noon; I'm sick of the summer weather and it's been an unseasonably hot summer to boot. Hubby and I began our Saturday morning yesterday with going to get our address changed on our driver's licenses. We got there at 8:00 (they opened at 7:30) and we were already number 270 and 271 in line!!! We stood and waited for over 1-1/2 hours to do what took less than 2 minutes to do when we finally got our turn. Ugh...the joys of moving!

I decided to keep dinner simple and cool. I made a very simple chicken salad (chicken, a tiny bit of onion, celery, diced pickles and mayo). I've been craving my Yellow Cheddar Squash Casserole recently but did not want to add any additional heat to my kitchen at the end of a hot and exhausting day. I decided to experiment a bit with making a "stove top skillet version" of my cheesy squash casserole. It turned out great. Now, I'll be honest...it wasn't as pretty as the golden brown oven version, but it was every bit as delicious. If you wanted to brown the top a bit after cooking, place skillet (ovenproof skillet only) under the broiler for a few minutes until browned. I tweaked the casserole recipe a little by bumping up the amount of squash and slightly reducing the liquid part since it was going to cook covered in a skillet on the stove instead of uncovered in a dry hot oven. I snapped a few photos of my Stove-Top Skillet Cheesy Squash Casserole and included the easy peasy recipe for it below as well. It only took about 20-25 minutes to cook and it kept my kitchen much cooler than turning the oven on would have. Enjoy!


Ready to cover and cook on the stove
Cooking for 20-25 minutes
Ready to serve

Stove-Top Skillet Cheesy Squash Casserole

Ingredients:

8 cups yellow squash, sliced
1/2 cup onion, diced
4 tablespoons butter, divided
3 eggs, beaten
1/4 cup milk or cream
1/4 cup finely grated Parmesan cheese (powdery style)
1/2 to 1 teaspoon salt
1/2 teaspoon freshly cracked black pepper, or to taste
Dash cayenne pepper, optional
1 cup blanched almond flour, divided
3 cups shredded cheddar cheese, divided
Paprika, optional

Directions:

Heat 2 to 3 tablespoons butter in a large 12-inch nonstick skillet over medium-high heat. Saute squash and onions (do not add any water).  Cook until tender (covering pan while cooking hastens cooking time). Uncover skillet and increase heat to high to cook off any remaining liquid in bottom of pan (or drain off any remaining liquid). Remove skillet from heat.

In a medium bowl or glass measuring cup, beat eggs, milk, and Parmesan. Stir in salt, pepper, and optional cayenne. Set aside.

Add 2 cups shredded cheddar cheese and 1/2 cup almond flour to skillet of cooked squash, mixing until evenly distributed. Pour egg and milk mixture over squash, combining well. 

In a separate small bowl, place remaining 1/2 cup of almond flour and remaining tablespoon of butter. Cut butter into the almond flour with a pastry/dough blender or fork until crumbly (like you do when making a topping for a fruit crisp). Add remaining 1 cup of cheddar and cut into flour and butter mixture with dough blender until coarse and crumbly. Top squash with crumbly mixture; sprinkle with paprika, if desired. Cover skillet and cook on stove top over medium heat for 20 to 25 minutes, or until casserole is set and cooked through (no jiggling when skillet is gently shaken). 


Friday, September 9, 2016

Friday Night Pizza - Cheese Head Style

This evening I was in the mood for pizza. I had a big jar of oil packed grilled veggies (by Del Destino) from Costco that needed to be used. I decided a gourmet pizza would be the perfect way to use them. I made my Cheese Head Pizza Crust (one of the easiest and delicious gluten free pizza crusts you could ever make) and topped it with DeLallo's Pizza Sauce, mozzarella cheese, pepperoni and a medley of oil packed grilled veggies (baby eggplant, zucchini, piquillo peppers, and artichokes). It turned out absolutely AMAZING! It was one of the best pizzas I've made; hubby thought so too. If you haven't tried this pizza crust before, add it to your "make soon" list. You won't be sorry, I promise. I snapped a few photos of tonight's masterpiece below. Here's a link to the recipe: Cheese Head Pizza Crust. Enjoy!


Before baking with toppings
Fresh out of the oven
BOOM!


Monday, August 29, 2016

Stoplight Pizza w/ Cheese Head Pizza Crust

This evening I made our first pizza in the new house! I have several different pizza crust recipes to choose from but decided to make my Cheese Head Pizza Crust because it is super quick and easy to make and it tastes exactly like regular pizza crust...maybe even better!

I just happened to have a package of "stoplight bell peppers"...you know the package that comes with 1 red, 1 yellow and 1 green pepper. I decided it would make the perfect ingredient for "Stoplight Pizza", with a few thinly sliced Vidalia onions and pepperoni thrown in. I decided to bake my pizza crust the minimum amount of time (10 minutes) until light golden brown because it continues to cook after you add the toppings. This kept it from getting too brown on the edges when fully cooked with the toppings. It turned out AMAZING! I'm still learning how to use my new stove; so far everything I've made in it or on it has turned out great. I snapped a few photos of the pizza below (as well as a pic of my new stove). If you haven't tried this pizza crust yet...it's a must try! To get to the recipe, please click here: Cheese Head Pizza Crust. Enjoy!

Before going back into the oven with the toppings
Fresh out of the oven!
GGC's new stove!
One of my many obsessions...teapots! (It might be time for an intervention!)
            

Thursday, August 25, 2016

Peach Pecan Muffins - Easy & Dellicious

Today I've got a brand new recipe to share with you. It's special to me for a number of reasons. First, it's made with my favorite almond flour...Honeyville's Blanched Almond Flour that has had a place in my pantry for over 4 years now! Second, it's made with two of my favorite Georgia grown ingredients...Georgia pecans and Georgia peaches (and I just happen to live in Georgia)! Last, but not least...this recipe was the very first item to be baked in my new oven in my new house. These delicious muffins embarked on the "maiden voyage" of my new oven. A little silly, I know, but it's true!

These muffins are easy to make and can be made with either fresh, ripe juicy peaches or no sugar added canned peaches. They are lightly sweetened but can easily be made sweeter if that's how you like your muffins (simply increase the sweetener or add a few drops of stevia to boost the sweetness). They are super moist and tender. I store mine in the fridge since they are moist and because it's pretty humid here this time of year. I hope you enjoy them as much as I do. Check out a few photos below. To get to the recipe, please click here: Peach Pecan Muffins. Enjoy!


Wednesday, August 24, 2016

Spicy Homestyle Chili

This evening I decided to make dinner instead of unpack boxes...and it felt SO good to be back in the kitchen again believe it or not! Since it was a little cooler today (as in upper 80s/90 degrees...LOL) I was in the mood to make a big ole pot of chili. I usually like to make chili and cook it all day long on low in the crock pot, but I settled for simmering it on the stove this evening instead. I made a modified version of my "Sweet & Spicy Chili" recipe but used all ground beef instead of a mixture of beef chunks and ground beef and made a few other tweaks as well. It turned out great! I snapped a quick photo below and included my modified recipe as well. You can make this chili as spicy or as mild as you like by adjusting the chipotle pepper, hot paprika and cayenne pepper. Enjoy!


Spicy Homestyle Chili

Ingredients:

2 1/2 pounds ground beef
2 tablespoons oil, to saute vegetables
1 cup onion, diced
2 sweet bell peppers (red, yellow or orange), diced
1 Poblano pepper, diced
1 jalapeno pepper, diced (optional)
5 cloves garlic, minced
Spices:
   1 tablespoon chili powder
   1 teaspoon "chipotle chili powder" (or regular chili powder to reduce heat)
   1 teaspoon hot Hungarian paprika (or substitute sweet paprika to reduce heat)
   1 teaspoon ground coriander
   1 teaspoon cumin (I used roasted cumin)
   1/4 teaspoon cayenne pepper, or to taste
   1 teaspoon oregano
   1 teaspoon salt, or to taste
   1 teaspoon freshly ground black pepper, or to taste
1 28-oz can diced fire roasted tomatoes (including juice)
1 6-oz. can tomato paste
1 cup chicken stock
1 cup water (more or less, depending on preferred thickness)
1 16-oz can kidney beans, drained (optional)

Directions:

In a large stockpot over medium heat, add oil and saute onion, sweet bell peppers, Poblano pepper, and jalapeno peppers until almost tender; add minced garlic and cook a couple more minutes, stirring frequently (covering the pan helps speed up cooking the veggies). Remove the veggies with a slotted spoon and set aside on a platter.  

In the same pan, brown ground beef until cooked and no longer pink. Return pepper and onion mixture back to the pot. Stir in all of the spices, diced tomatoes, tomato paste, chicken stock and water. Bring to a medium boil; taste to adjust seasoning, if necessary.  Cover pot and reduce heat to low, Simmer on low for approximately 1 hour (if desired, chili can be placed in a crock-pot and cooked on low for 8 - 10 hours instead of simmering on top of the stove).  

Ladle chili into bowls and top with shredded sharp cheddar cheese and dollop of sour cream, if desired.


Saturday, August 20, 2016

First Breakfast in the New Kitchen -- I'M BACK!!!

Good morning! It seems like a lifetime since I've posted here. As some of you already know...I moved recently to a new home. It has been a long and arduous, not to mention HOT, process to say the least (so far we've had 70+ days above 90 degrees here when the average is only 30 days). Not exactly the perfect temperature to be moving in...and the humidity...DON'T EVEN ASK!

We are slowly getting settled into our new home. Still have lots of boxes to unpack but I'm beginning to see the light at the end of the tunnel. We've installed new carpet, repainted much of the house, re-done the kitchen (yes, ANOTHER kitchen remodel...the 2nd in 2 years -- am I crazy or WHAT?). We've got the last (hopefully) contractors coming later this morning and then life will hopefully return to some sense of "normal" (after I finish unpacking the last 40-50 boxes, that is). I've spent the last few months keeping my other house "showroom ready" and spotless (brutal), packing what seems like hundreds of boxes and now unpacking all of those boxes that seem to have doubled. I've not gotten more than 3 hours of sleep in a night except for ONCE in the last few months. I'm hoping to slowly re-emerge from "zombie mode" back into the human race. I've been blessed by a very understanding boss who has allowed me to juggle one million things at once which has enabled me to retain my sanity (or most of it).

Anyway...be expecting to see more and more of me again SOON! I wanted to share a photo with you of my very first breakfast in my new kitchen. After 2 nights in a row of "yogurt" for dinner...I decided I needed some REAL FOOD this morning to get me through the day. It isn't anything fancy, and the photo was taken with my phone (sorry), but it's the maiden voyage on my new stove, so I wanted to share it with you! LOL Scrambled eggs w/ cheese and bacon...not to mention I also enjoyed the FIRST cup of coffee in my new house this morning, too. I've missed blogging more than I could have imagined but just couldn't squeeze one more thing into the short 24 hours in a day. It feels GOOD to be back. Enjoy!


Sunday, July 3, 2016

Scrambled Omelets - Sunday Breakfast

This morning we awoke to a bright and sunny, as well as hot and muggy, morning. Before we started running errands, I decided that a big Sunday breakfast was in order. I debated whether to make omelets or scrambled eggs. Because I had a couple of beautiful red bell peppers and Vidalia onions to use, I decided to do the only logical thing...and make "scrambled omelets". LOL. Rather than make 3 separate omelets, I made one skillet of "scrambled omelets" for all to share.

I sauteed diced red bell peppers and diced Vidalia onions in a generous tablespoon of olive oil until softened and caramelized. I added a pat of butter to the skillet and then poured in 8 beaten eggs and mixed everything together with a rubber spatula. While the eggs were cooking, I diced up some of my favorite 3-Alarm Spicy Pepper Colby Jack Cheese and added it to the eggs, mixing it together as they cooked. It was the perfect combination of sweet peppers and Vidalia onions with spicy cheese. In another skillet I cooked up some bacon and reheated leftover oven roasted red potatoes in another skillet for the guys to eat. I made a batch of my quick and easy Mini Cheddar Bay Muffins to serve along with our breakfast. It was a great way to begin the day and is sure to hold us over until dinnertime. I snapped a few photos below. Enjoy!


Wednesday, June 29, 2016

Easy Mexican Style Meatloaf - Low Carb

This evening I made my Mexican Style Meatloaf for dinner. I actually did a little bit of prep last night by sauteing half of a diced red bell pepper, a diced Poblano pepper, and a diced small Vidalia onion in a bit of olive oil until softened and the onion translucent. I put them in a small bowl and popped them in the fridge overnight so I could just mix them into my beef along with the spices when I got home from work this evening. I used my meatloaf recipe found here: Mexican Style Meatloaf and just added the diced cooked peppers and onions to give it an additional boost of flavor. You can choose to add or omit to suit your own taste. I simply mixed everything together which took about 5 minutes and then popped it into my preheated oven for a little over an hour. Note that in place of the typical egg and breadcrumbs added to traditional style meatloaf as a binder, instead I used shredded cheese as my binder. It works amazingly well and adds flavor as well. You will never miss those fillers, I promise. I snapped a few photos of tonight's meatloaf below. If you'd like to try another delicious flavor of meatloaf, be sure to check out my recipe for Greek Style Meatloaf w/ Eggplant, Spinach & Feta here: Greek Style Meatloaf. Enjoy!


Tuesday, June 28, 2016

Oven Roasted Citrus-Butter Wild Copper River Salmon - Easy, Sustainable, Low Carb

This evening I made my favorite Wild Copper River Salmon for dinner. I picked it up at Costco, who had it for $14.99/lb this past weekend (it was $16.99/lb the weekend prior). I kept it simple and seasoned it with sea salt and pepper and put softened butter on top and then alternated fresh orange and lemon slices. I popped it into a preheated 450 degree oven and then immediately reduced the oven temp to 425 degrees and roasted it for 10-12 minutes (depending on thickness), then removed it from the oven and covered it with heavy duty foil and let it sit about 5 minutes. It turned out delicious. I served it with steamed cauli-rice (raw cauliflower grated with a box grater then briefly steamed in the microwave) tossed with butter and diced multi-colored baby tomatoes. It was a healthy, quick and delicious meal. I snapped a few photos below. If you'd like to try another delicious version of this beautiful salmon...be sure to check out my Roasted Copper River Salmon w/ Dijon Cream Sauce. Enjoy!


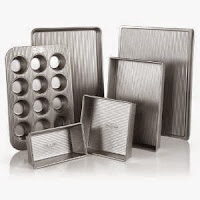
 USA Pans

Thursday, June 23, 2016

Mini Cheddar Bay Muffins - Low Carb & Grain Free

Today I've got a new recipe to share. It's a quick and ridiculously simple recipe for an absolutely delicious little bite of "cheddar heaven" made with just a few simple ingredients; predominantly cheddar cheese and Honeyville blanched almond flour! They have big cheddar flavor crammed into a tiny little package. If you like the oh so popular "cheddar bay biscuits"...you are going to love these little "Mini Cheddar Bay Muffins". They are sort of biscuity and muffiny all at the same time...and most definitely delicious. I hope you enjoy them as much as I do. Check out the photos below. To get to the recipe, please click here: Mini Cheddar Bay Muffins. Enjoy!